
Newborn and family photographers, or people with children over one year old, probably already know about cake smashes. If you’ve never heard of it, however, the name tells most of the story. As part of an ever growing trend, one-year-old children everywhere are smashing specially-made cakes to punctuate their first birthday. Of course, such a momentous occasion should be captured in photos, and that’s where you come in. But what does it take to successfully photograph a cake smash experience? And is it worth it for your business? If you already photograph newborns and/or families, or you’re looking for a fun way to add revenue to your photography business, you should definitely consider offering cake smash photography as part of your services. Below, we’re going to share 12 tips for capturing adorable cake smash photos to help you give your clients a “smashing” experience.
12 Tips for Cake Smash Photos
Make Time for Cake Smash Photos
Given the nature of the goal, trying to capture cake smash photos with unpredictable children, be sure to set realistic expectations for how long it may take. Children have earned a reputation for setting the pace of any session they’re involved in, and some take longer than others to “come around.” Others, still, occasionally decide not to play along at all. The bottom line, pad the session with extra time to make sure you get what you need. As a safe starting point, expect the cake smash experience to run for at least two hours. You won’t shoot the entire time, but you (or the baby) will need it. Trust me. And let’s not forget, cleaning up after the session will be required.
Bonus: Regarding the clean up, keep wipes, paper towels, towels in general, extra clothes, and trash bags on hand to make quick work of cleaning up.
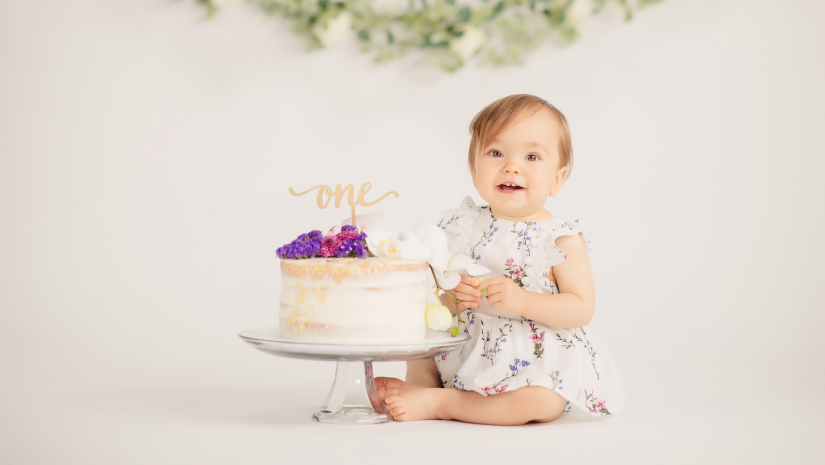
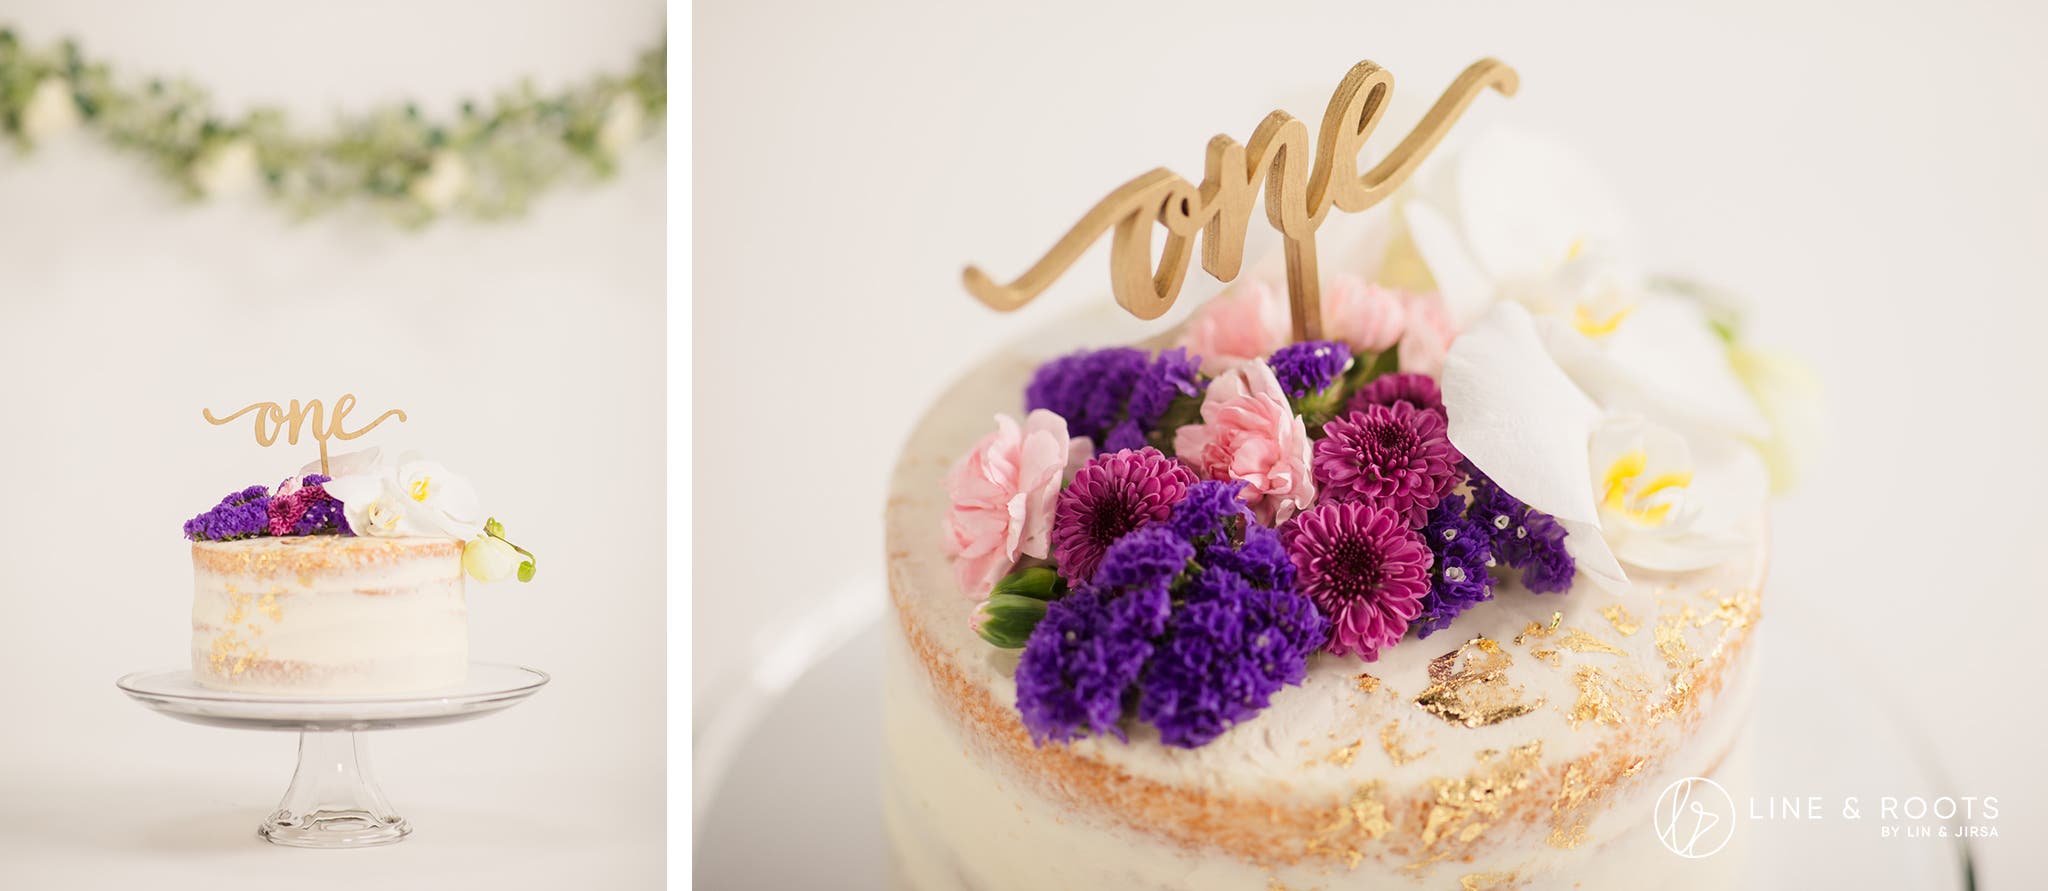
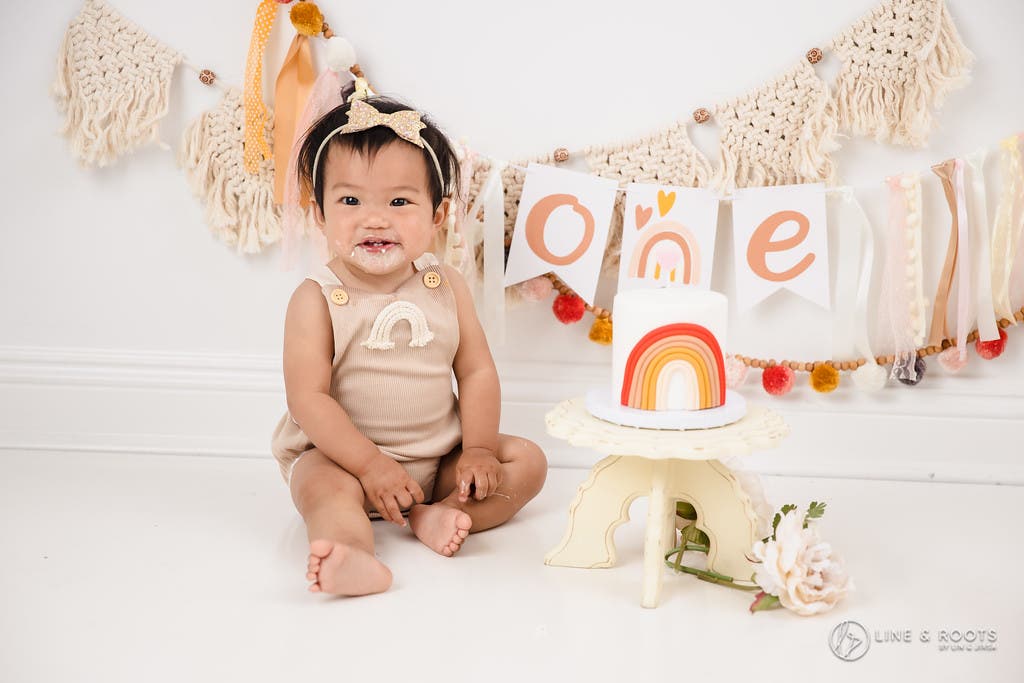
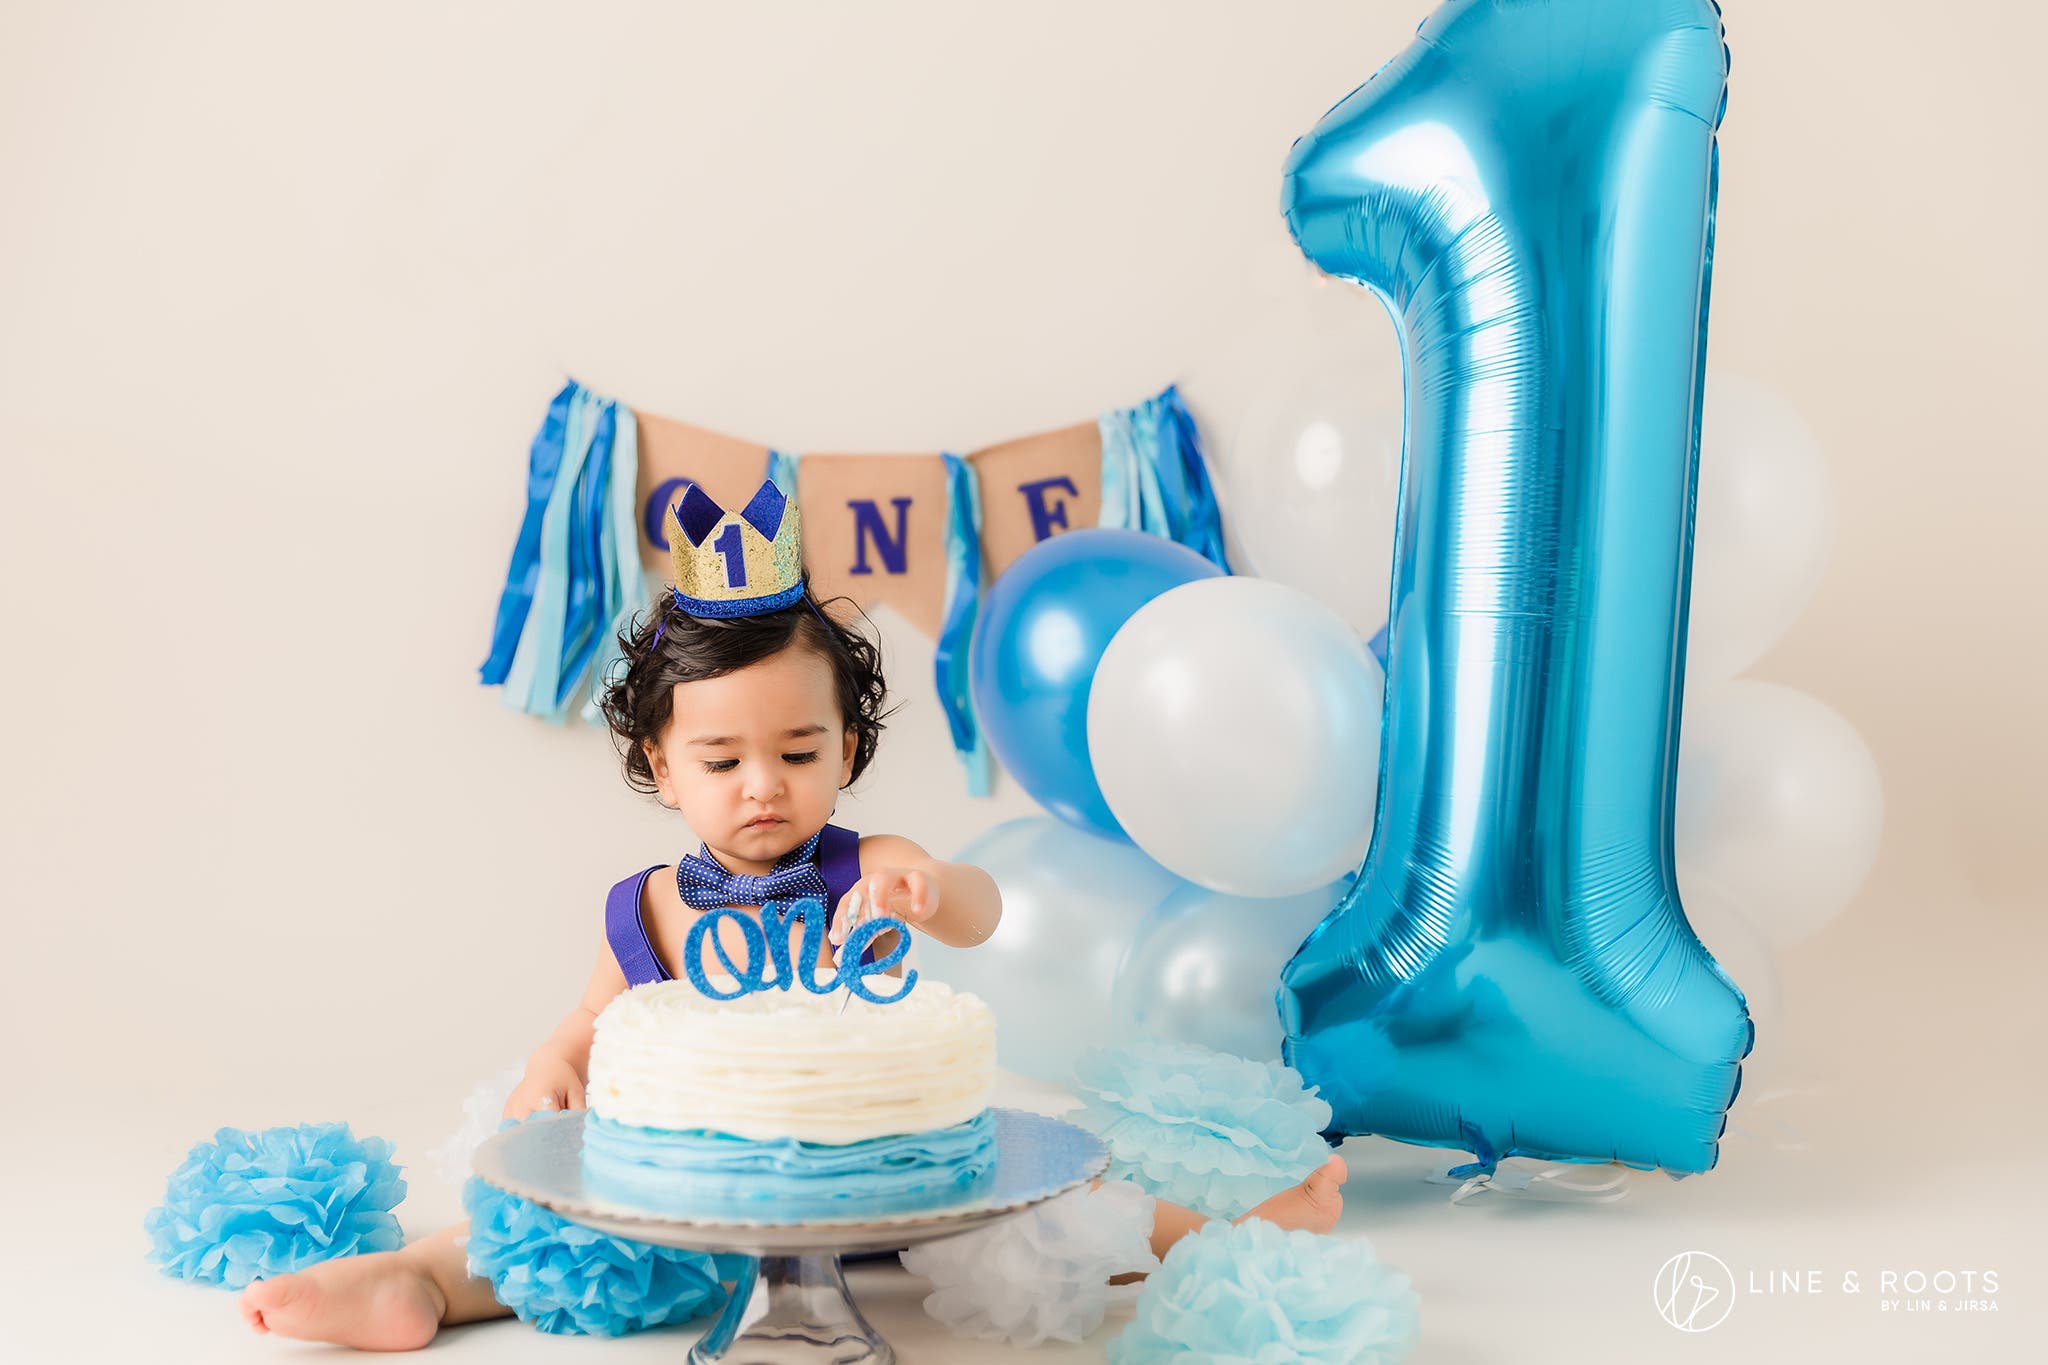
Choose the Cake with Care
You may wonder whether you or the parents should choose or purchase the cake. Some photographers include the cake as part of the cake smash service, but for safety reasons, I recommend that parents order the actual cake. The baby may have allergies (wheat, egg, etc.), and it’s best to let the parents sort that out. You can, however, give the parents suggestions regarding the design of the cake.
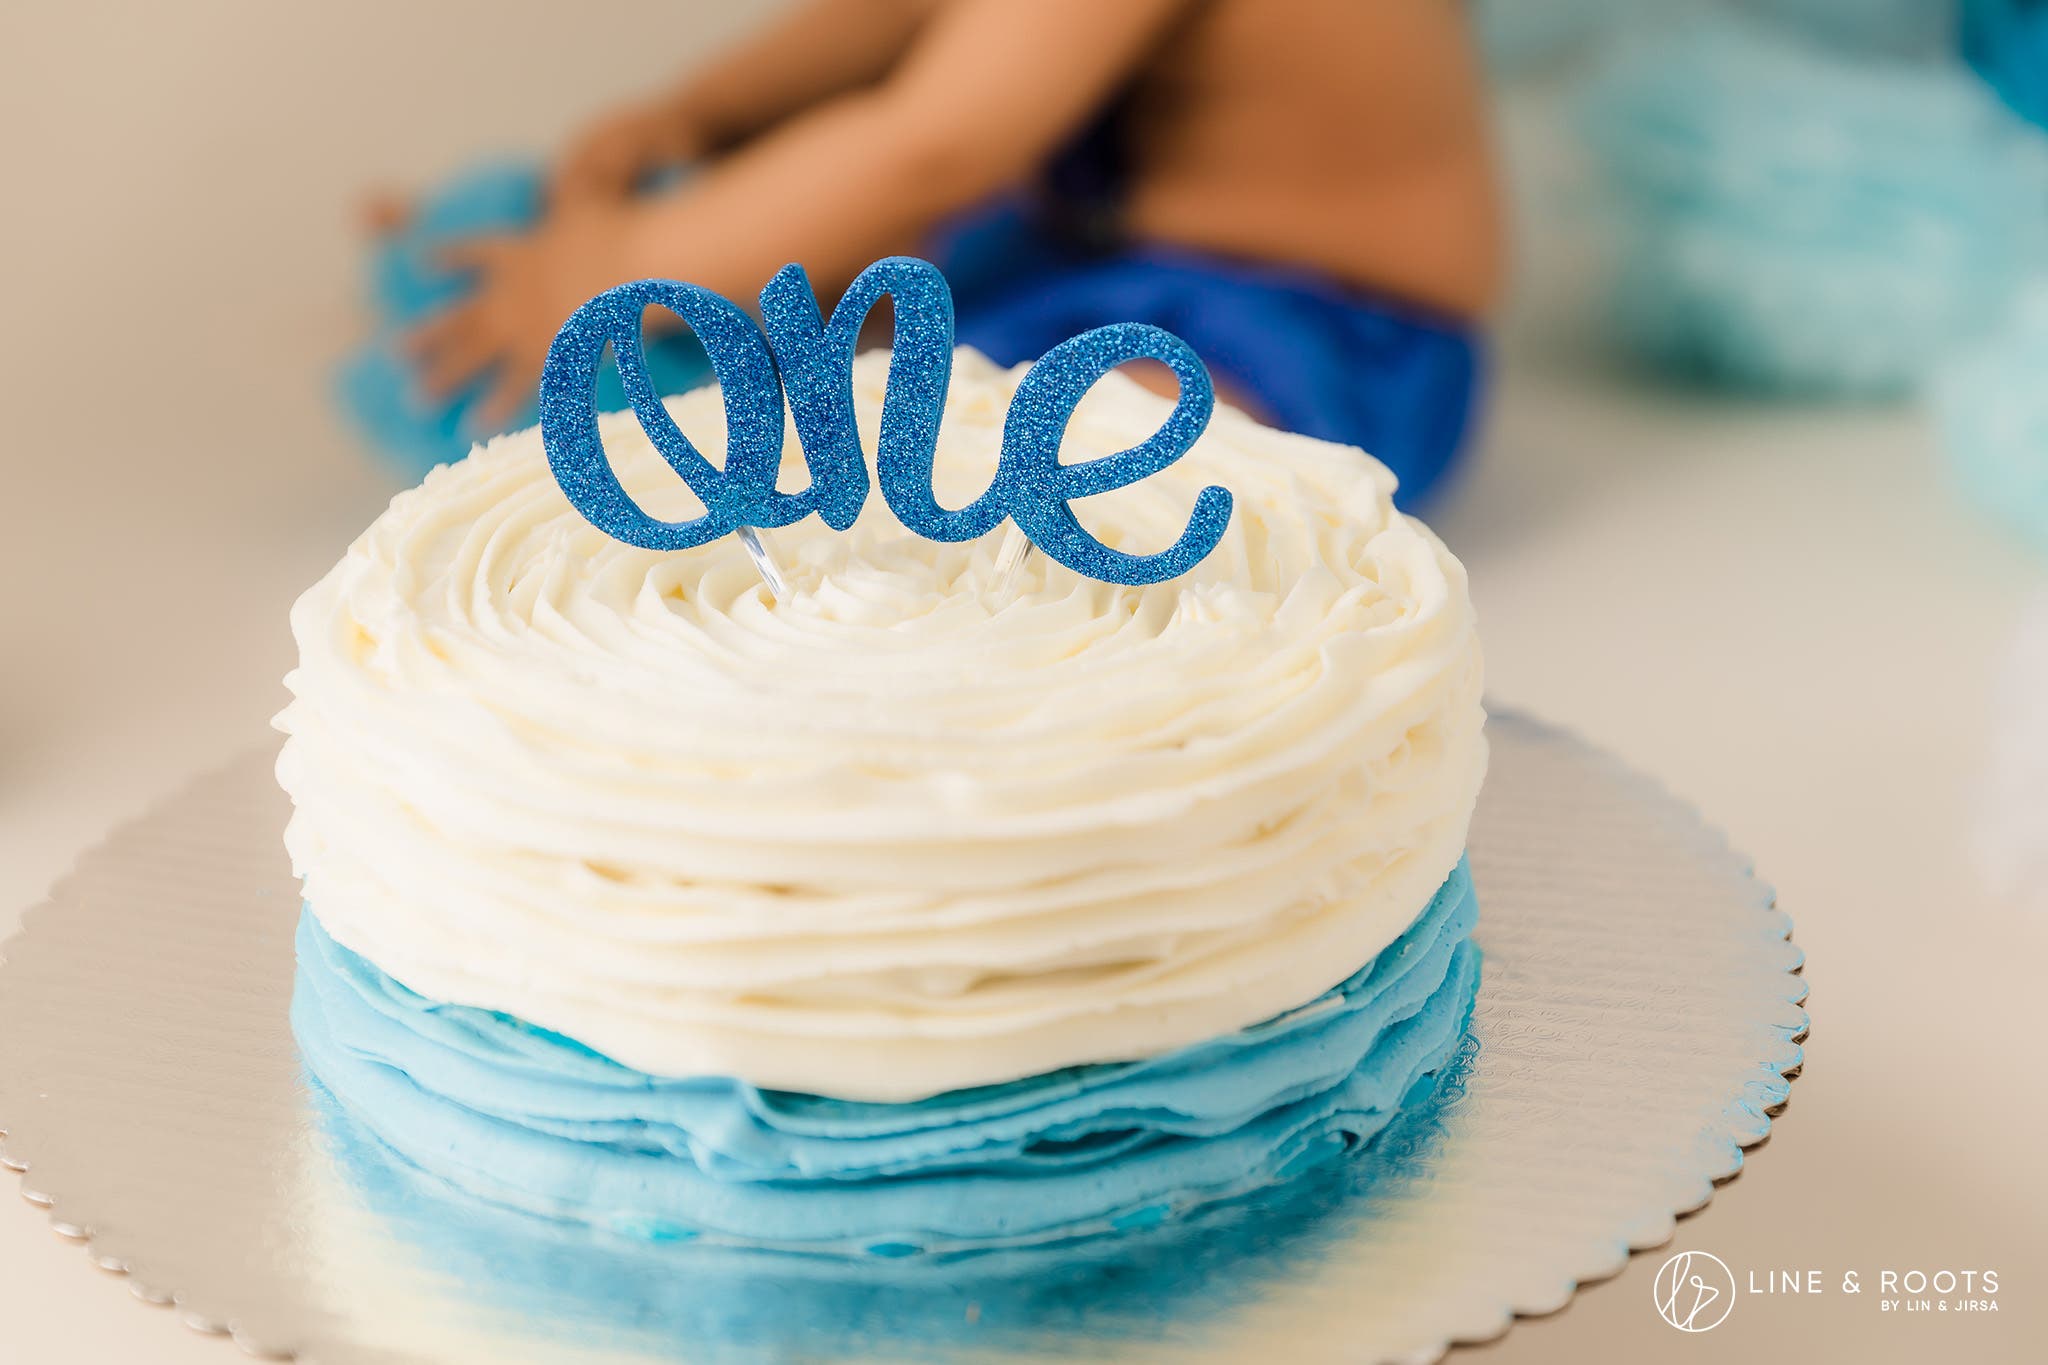
For instance, consider the cake smasher, a one-year-old baby. The cake should be soft and easy for them to tear apart and eat. As for the exterior of the cake, keep the design somewhat simple so that it does not distract too much from the baby and the action taking place. Feel free to add a topper to mark the occasion, such as a “One” to denote the baby’s first birthday. When deciding on a color, consider the baby’s outfit and overall theme of the cake smash experience, which we’ll discuss in more detail below. You can refer to this article on complementary colors for more information on how colors impact photos. Finally, let the parents know that professionally-made cakes often photograph better than homemade cakes. I’m just saying.
Dial In Your Camera Settings
As I mentioned above, children (especially one-year-olds) can prove highly unpredictable. The last thing you want to do while photographing a cake smash is fumble around with your camera settings only to miss frame-worthy moments. To help, here’s a basic starting point for dialing in your exposure so that you can focus on shooting:
- Shutter Speed: To keep up with a potentially fast-moving youngster, use a fast shutter speed. Keep your shutter speed at or above 1/200 to minimize motion blur and keep your photos tack-sharp.
- Aperture: Chances are a lot of thought went into the background and surrounding props, so you’re going to want to keep most of the frame in focus. Depending on the available light, try to keep your aperture range between f/2.8 to f/5.6.
- ISO: Of all the settings, I tend to prioritize keeping a low ISO in order to minimize noise in the photos. Your exact ISO setting will vary, but if it goes to a level that compromises image quality, try to adjust the other settings above or consider adding light to the scene. We’ll talk more about this below.
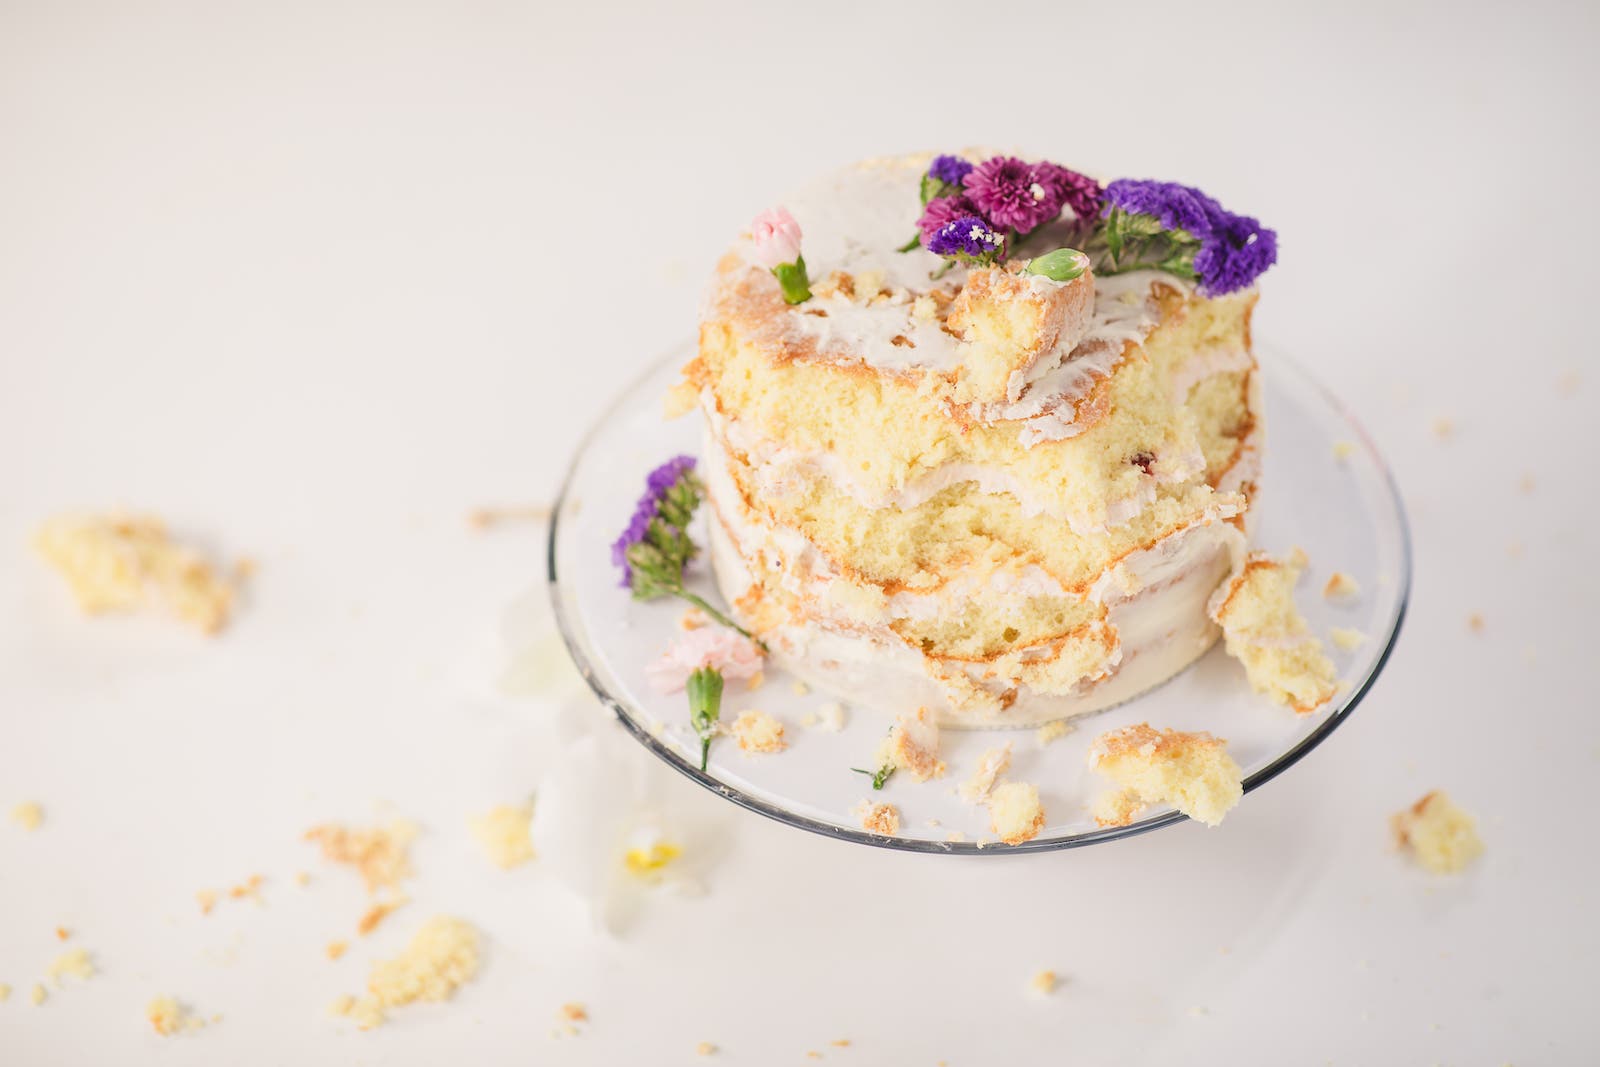
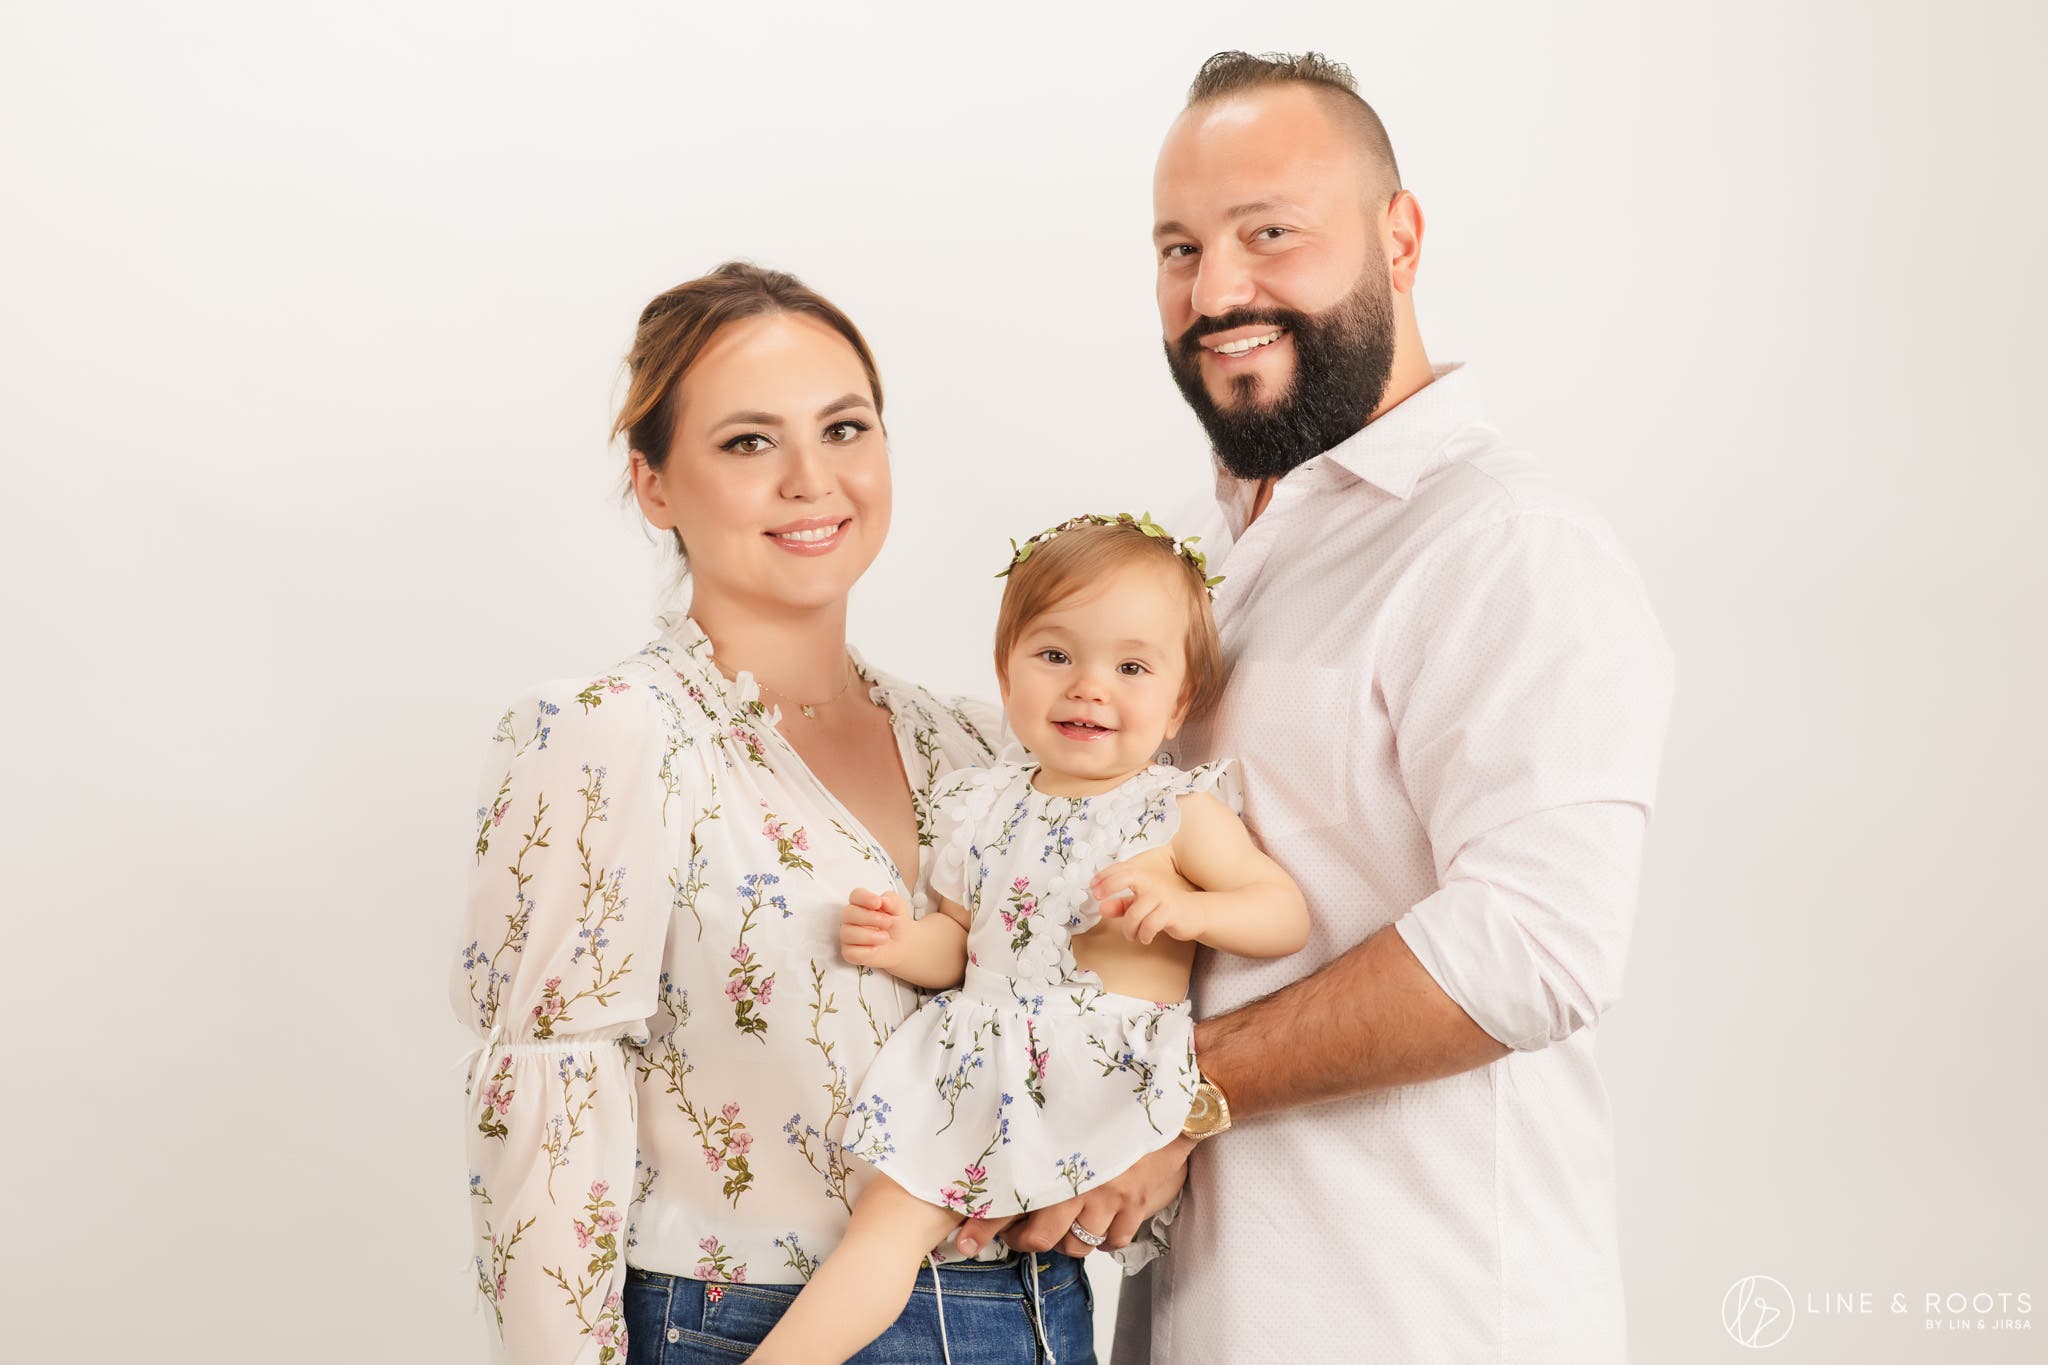
Capture Pre-Cake Basics
Before the cake smashing action begins, be sure to capture a few clean portraits of the baby and family members, as well as detailed shots of the cake and decor. This is really the only time to get these shots before chaos ensues. Keep this part of the session short and sweet so that you can get the party started.
When photographing the cake, I recommend taking close-up shots of the cake details and other items or props on the set. This is in addition to capturing wider shots of the scene as well. Use a macro lens if you have one. You can use the macro again later for getting close-ups of the baby in action, so keep this lens handy.
Keep the Cake (and Baby) Safe & Sturdy
Safety is always the highest priority when photographing children, and the same holds true for cake smash photography sessions. It begins with ensuring the baby is not allergic to ingredients in the cake, and it continues when we decide where to place the baby in the scene as well as how we present the cake. If you plan to use a cake holder, try to use one that won’t fall over too easily or injure the baby in case it does fall. You might consider taping it to whatever surface it’s placed on (table, floor, etc.). For babies placed on the ground (as opposed to a high chair), make sure they’re clear of any dangerous obstacles in case they decide to make a break for it, which does happen.
Catch All the Angles for Your Cake Smash Photos
As photographers, we are visual storytellers, and great storytelling requires thoughtful composition and shooting from a variety of angles. Whether we’re capturing the action from eye level or top-down from above, we should include wide, medium, and close up shots in every scene. Doing so allows us to tell a fuller story while also adding a variety of shots for family and friends to enjoy.
Hopefully, if you’re not using a photography backdrop, you’ve set up the session to shoot against a pleasant background. If not, remove any background clutter before the session begins. This will allow you the freedom to move around and get the best possible angle for the moment.
Go Easy on the Lighting
If possible, opt for natural lighting when photographing a cake smash. Using natural light will minimize harsh and often unexpected shadows, and allow you to keep the session bright and airy. Also, some children can become bothered or distracted by flash, which we want to avoid. Your ability to shoot a natural light cake smash will depend on the available light, of course, but the simpler the better for these sessions. If you need to add light to the scene, keep it simple with a single external camera flash through an umbrella or softbox placed off to the side.
Stylize the Cake Smash Photos with Accessories
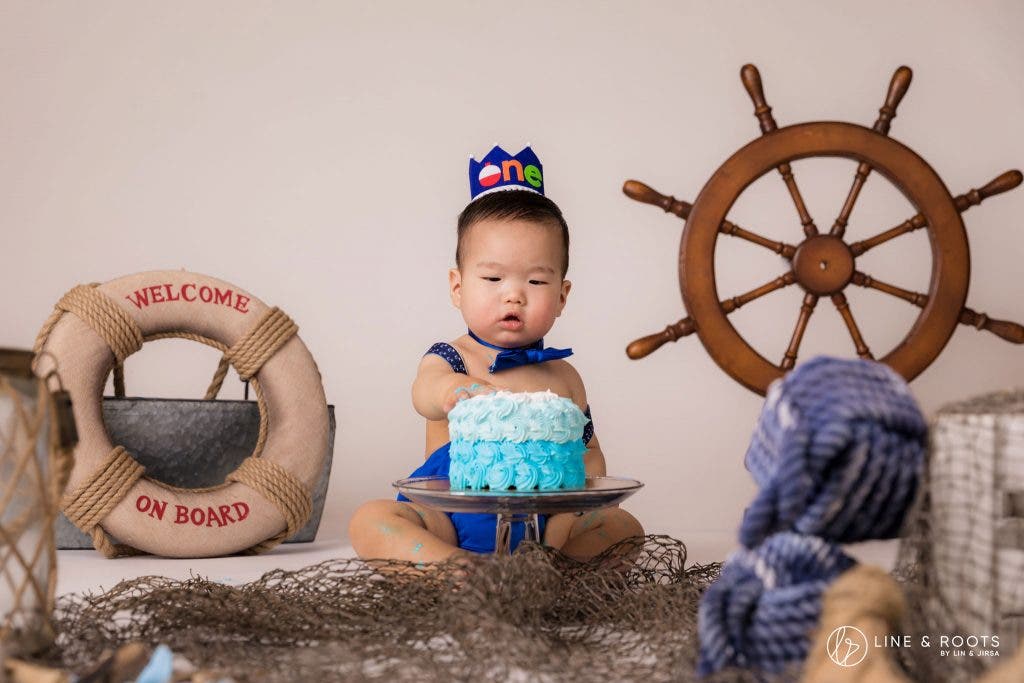
To add a bit of character to the session, why not stylize it? Adding thematic props and accessories can also add personality to an otherwise generic (albeit adventurous) photoshoot. The parents will generally take the lead here and opt for themes that reflect their favorite hobbies, movies, or sports teams, as well as shows or characters that the child enjoys. Some things to keep in mind when planning a stylized shoot include how the colors of the accessories will impact the shoot and how the props can be placed in the scene.
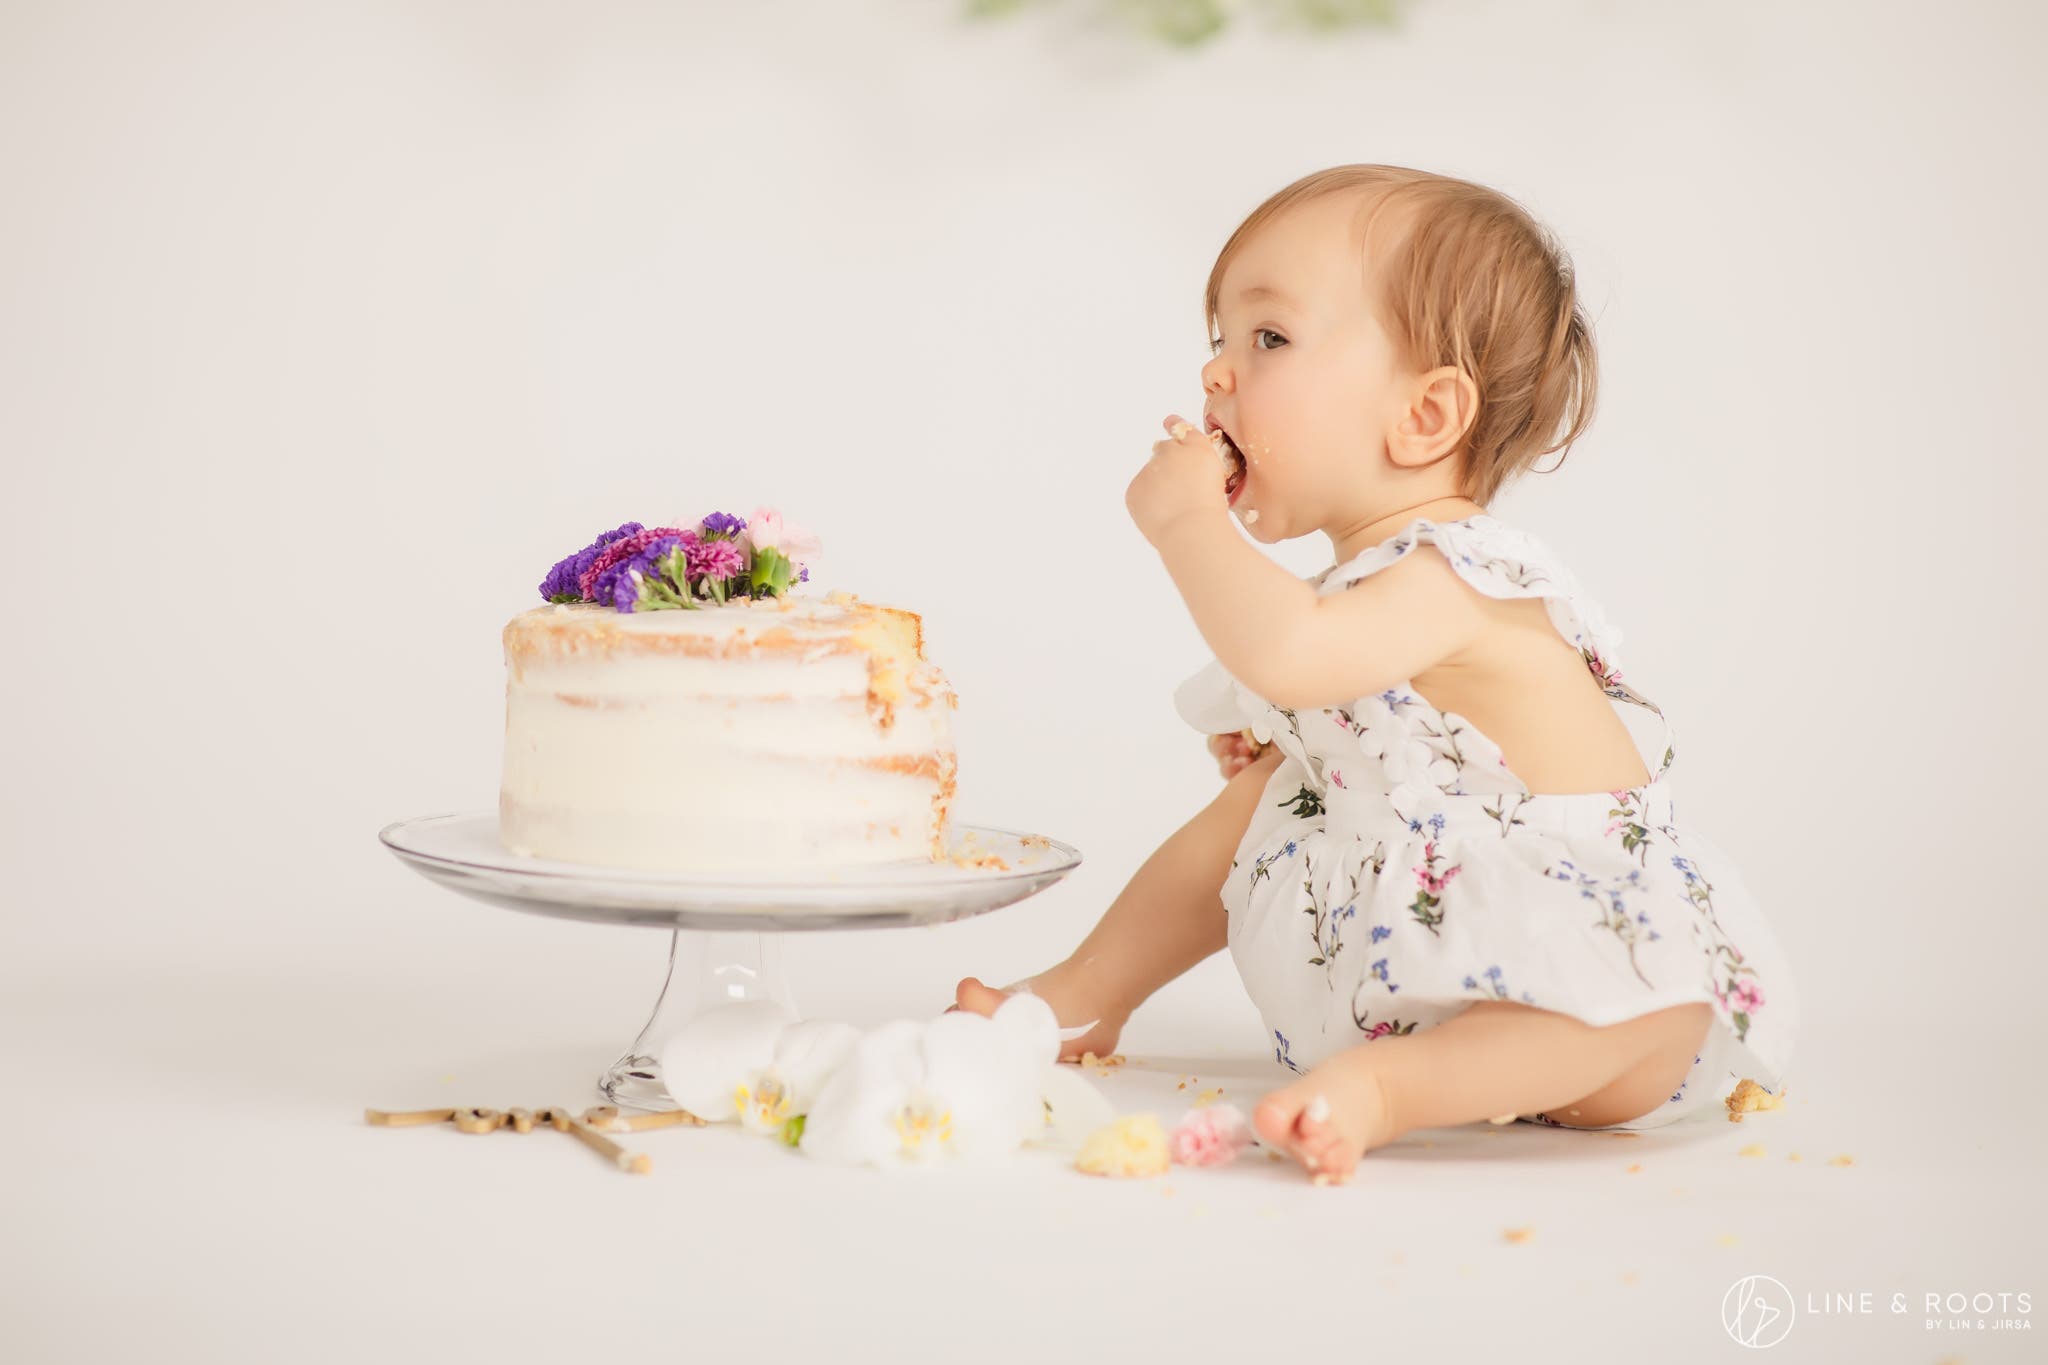
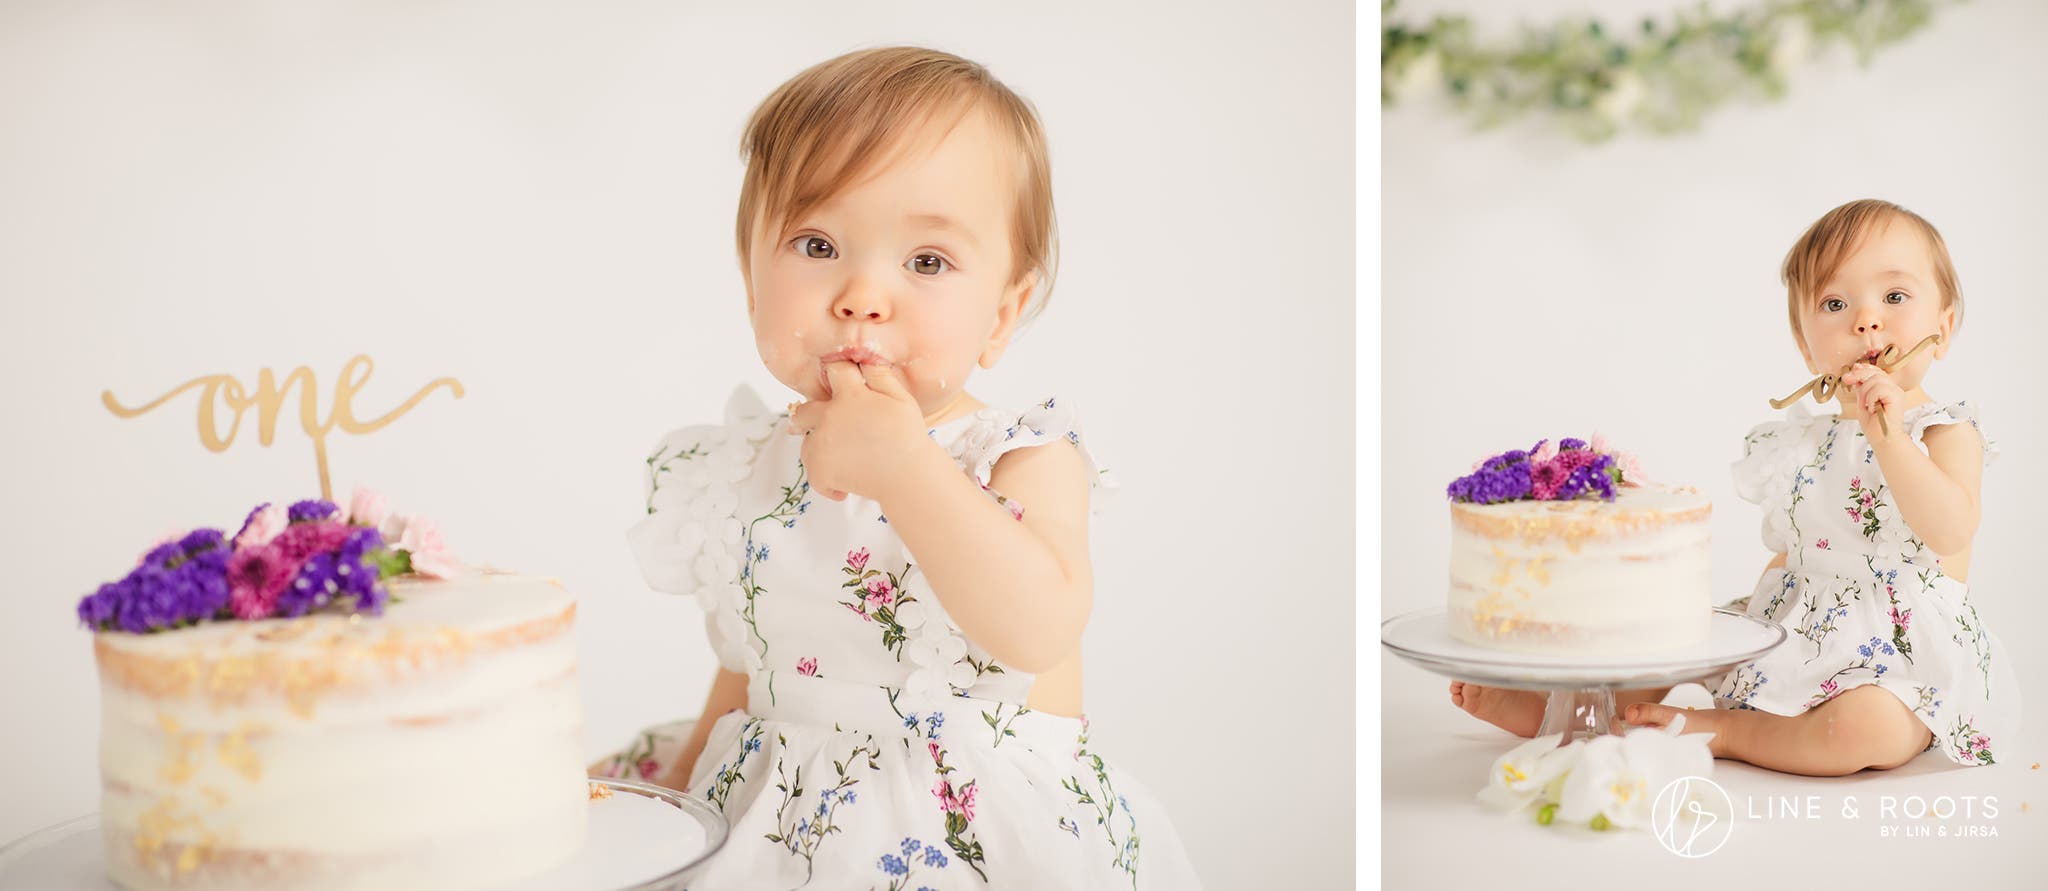
Move in Close
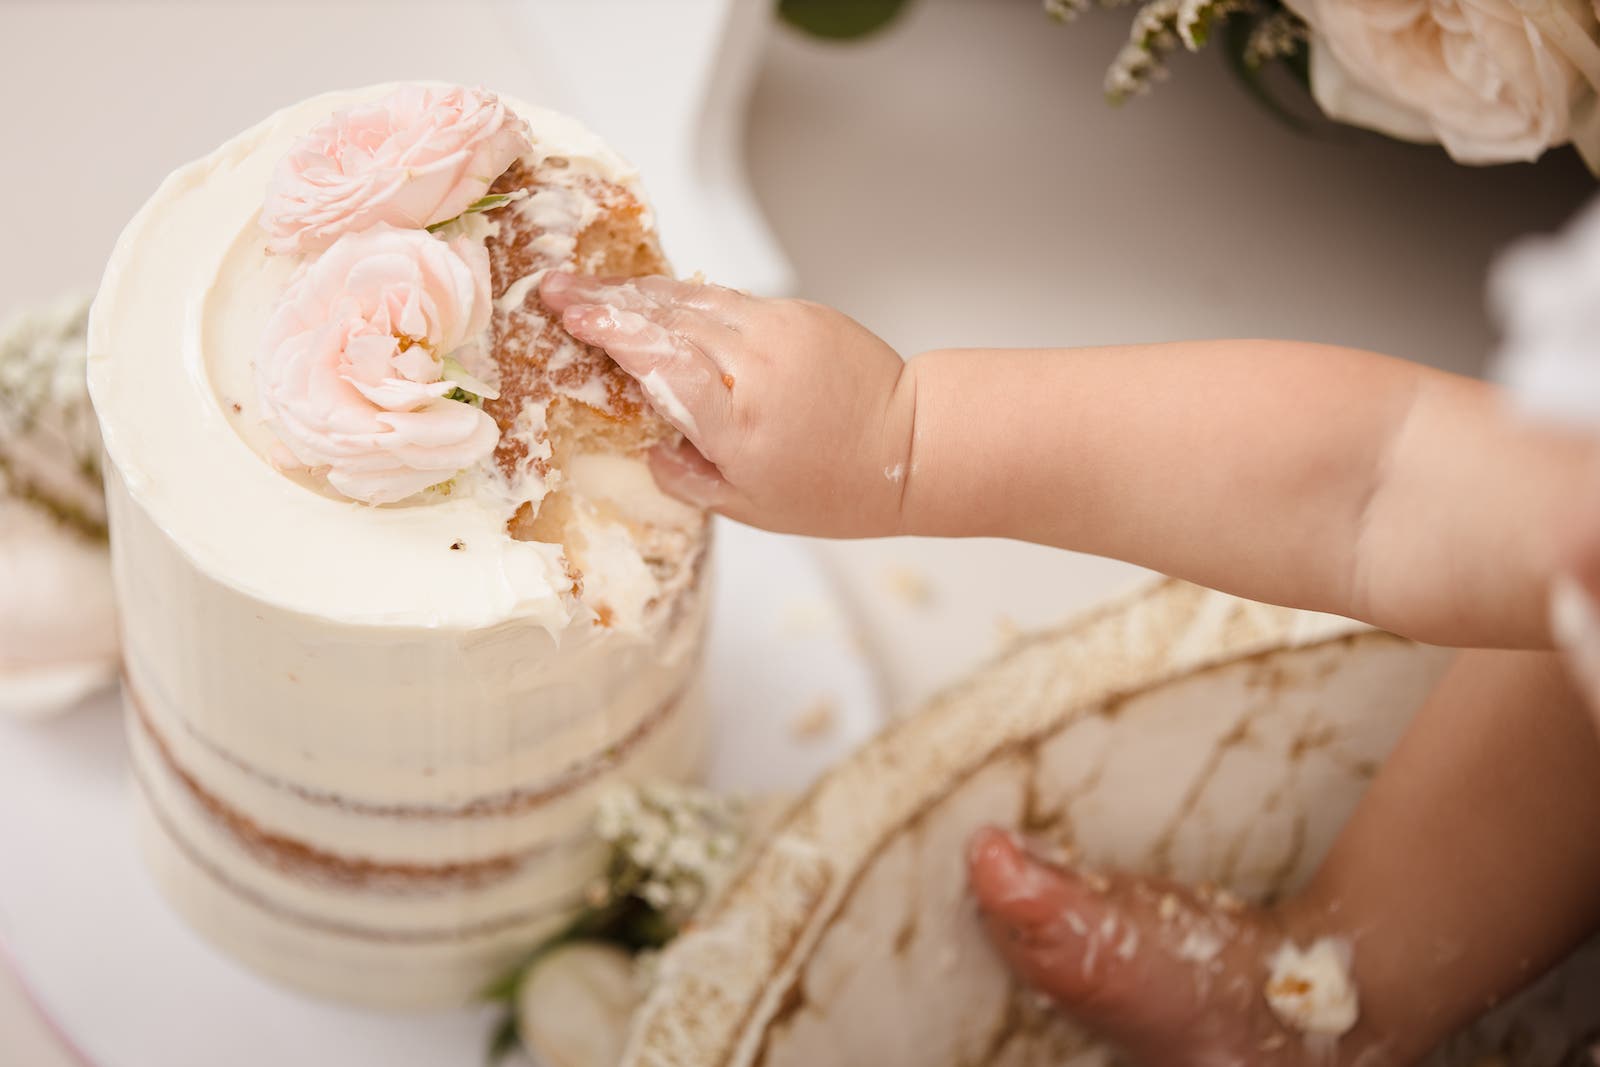
The best cake smash photos reveal the details of the heart of the action. Move in close and showcase the baby’s hands (and possibly feet) in the cake. Bring all the messy details to the forefront. It’s part of what this session is all about. These shots will add to the overall story and make for great prints or album spreads.
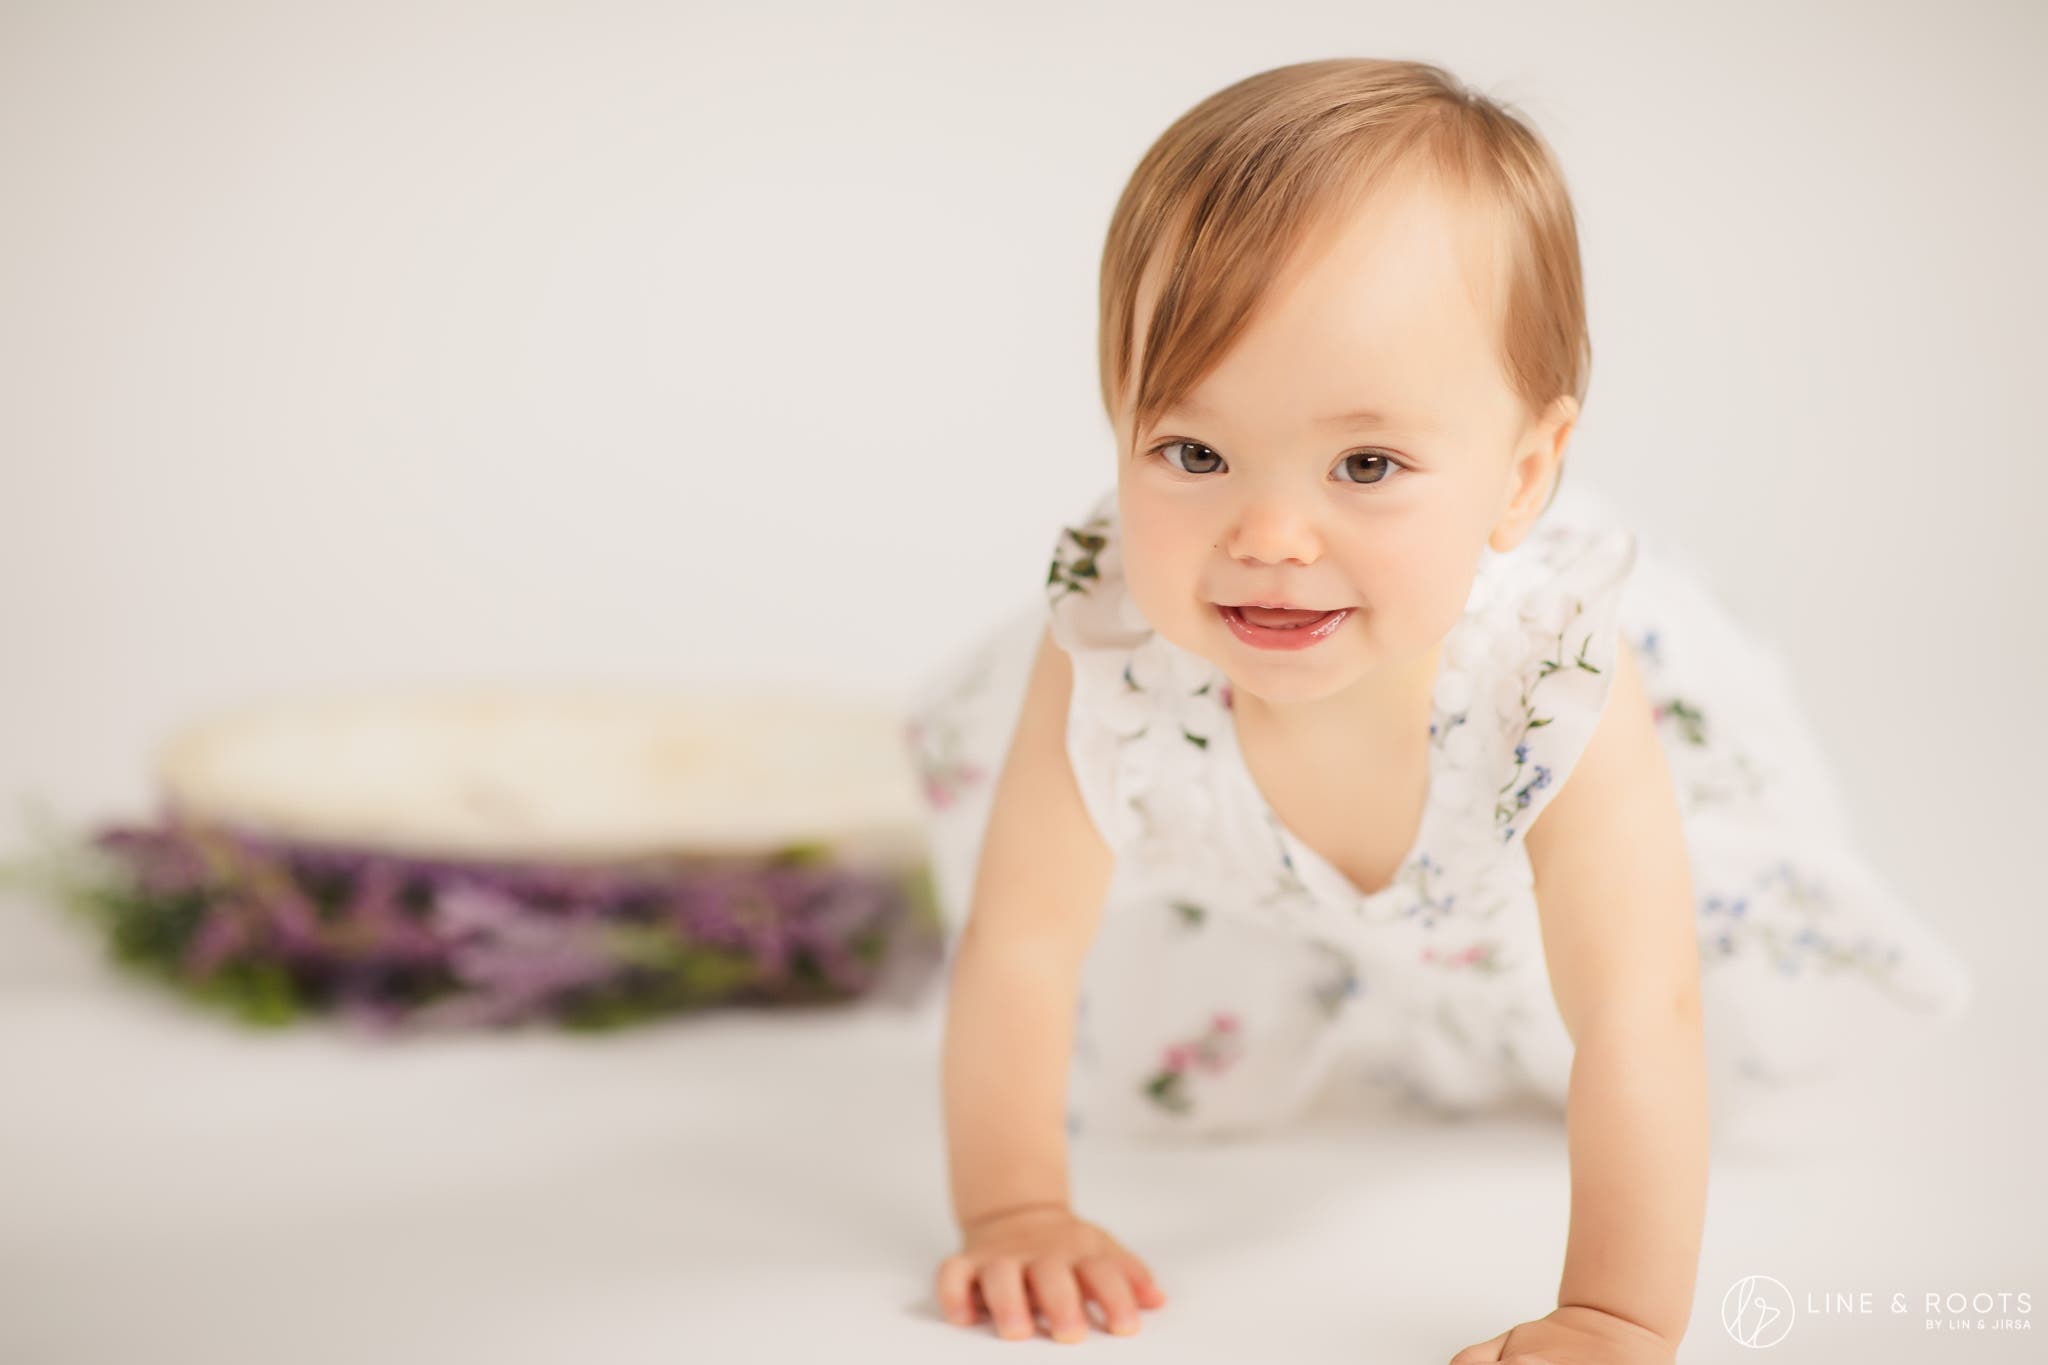
Let the Baby Be

Babies are going to be babies. An obvious statement, sure, but also a reminder to keep a firm grasp on reality and not try to oversteer the session. Sometimes, we need to let the baby be. To help get the best results for your cake smash photos without stressing too much on the baby’s behavior, I recommend the following:
- Schedule Accordingly: Try to schedule the shoot for when the baby is generally up and active, and ideally hungry but not hangry.
- Give It a Minute: If the baby won’t touch the cake, give him or her a minute to take in the scene and get a handle on what’s happening. After some time has passed, you or the parents can help the baby, as they may not understand what is expected of them. If the baby dives right in, well, then click away.
- Take a Test Run: It’s good to ask the parents to do a test run at home before the day of the actual shoot to get an idea of how the baby is going to respond.
- Let It Ride: Simply put, allow for a range of emotions and photograph the baby’s response to the situation.
At the end of the day, we should try to remain flexible with our expectations and use our creativity to make the most of what we have to work with.
Edit Cake Smash Photos with Consistency
In most genres of photography, consistency is key. Just as you should capture photos in a consistent style during a session (bright and airy vs. dramatic or editorial), so should you edit with consistency. You may need to place these portraits alongside one another in an album spread or a wall art cluster. In other words, if you edit with a bold, contrasty style, edit that way for the full collection. Or, if you choose to edit an image in black and white, consider editing other images in black and white that might fit alongside the first image in an album spread. When it comes to editing, I recommend using professionally designed presets to help speed up your post-production workflow and achieve professional results in as few clicks as possible.
Price It Right
Depending on your business model, whether you simply deliver digital files or include a design consultation and sell prints, albums, or wall art, pricing for cake smash photo sessions will vary. If you’re not selling prints, albums, or wall art, I highly recommend doing so. Otherwise, you’re potentially leaving a lot of money on the table. Plus, it adds value to your work for your clients. They will have something tangible to look at regularly.
For general prices, you can look online and find examples that range from $150 to $700+ per session. Some include the cake, outfit, and thematic backdrop, while others are limited to capturing and editing photos. In case it helps, most studios price their cake smash sessions similarly to their child portrait sessions.
Conclusion
I hope you found these tips for cake smash photos helpful. Cake smash photography fits neatly into a typical client’s lifecycle, which often includes engagements, weddings, maternity sessions, newborn sessions, cake smash experiences, and family photos to mark the holidays and other special occasions like graduation. If you’re already working within any of these genres of portrait photography, you can easily integrate cake smash photos into your workflow. Follow the tips above and flex your creative skills to make cake smash experiences worthwhile for the babies, their families, and your business.
**All photos by Line & Roots Photography