All images created by Dawn M. Wayand unless otherwise noted.
You are starting to build your arsenal of gear and have possibly photographed a few subjects in your home studio space. At this point, you may have realized that there are a few things you could really use to make your shoots go a whole lot easier and something you absolutely need. In this part of my home studio series, we’ll go over some of the necessaries and some of those odds and ends you may have never thought of.
BASIC MODIFIERS
As you are building your lighting gear portfolio, you will find the need several basic modifiers to add to your arsenal. Such modifiers might include some of the following:
Portable/Collapsible Reflectors
Reflectors come in two sorts: the hard metal reflectors that are attached to strobes (which I will cover in a separate article on strobes) and portable/collapsible reflectors. Portable/collapsible reflectors are foldable lighting tools that simply function as their name suggests: they are used to reflect/bounce or absorb light onto a subject. They are mainly used to fill in shadows caused by a main or key light source.

The image on the left was shot without the benefit of a reflector.
The image on the right was shot with a 32” silver round reflector.
As you can see with the image on the right above, the reflector helped to fill in the under-eye and under-chin shadows, shine a little more light onto her hair, which in turn, created a little more texture as well as put an extra catchlight in her eyes.
Sizes, Shapes, Colors and Their Purposes
Portable/collapsible reflectors come in a variety of sizes and shapes. So what do they all mean and what do each do?

Collapsible reflectors come in a variety of sizes, shapes and colors.
Sizes
The size of a reflector that you will want to use in a situation will depend on how much light you want to bounce back on your subject. The quality of that light will depend on how close or far away you hold the reflector.
At the same distance of 30-inches away, check out the difference in the amount and quality of light bounced back on my model, Katie, in the images below.
In the first image here, I used a 24-inch silver round portable collapsible reflector. The light is very concentrated to mostly her face with a small hint of additional catchlight in her eyes. Her hair is a little darker and there’s a bit of a darker shadow under her chin and above her eyes.

Features are all a tiny bit darker.
In the second image, I used a 32-inch round silver portable collapsible reflector and her hair is a tad bit lighter. The shadows above her eyes and below her chin are minimized.

Hair is a little lighter and features a bit more defined.
In this last image below, I used a 43-inch silver collapsible reflector to bounce light back onto my model. Her skin is a porcelain white and soft as a lot of light is being bounced back onto her skin. The additional catchlights in her eyes are huge. The reflector’s large circumference of light bounced back onto her eliminated all unwanted shadows.

Porcelain skin, minimized shadows, textured hair – great shot!
Shapes
Circle. The most popular portable reflector shape is the circle. Many photographers prefer a round collapsible reflector because it will bounce back a pleasing circular reflection into the eyes, similar to the shape of the pupil. You can get circular reflectors anywhere between the range of 12-inches to almost 5-feet wide. I have a 24”, 32” and 43” reflector on hand in my home studio. You can also get these with handles built in for an easier grip.

Phottix 42” 5-in-1 Collapsible Reflector
Image courtesy of Adorama
Rectangle. Rectangular reflectors are typically quite large and their surface area produces a lot of bounce for lighting. You can clamp a rectangular reflector top to bottom to a lightstand for full-length bounce.

Westcott Illuminator 48”x72” Rectangular Reflector
Image courtesy of Adorama
Square. These shapes of reflectors typically require two hands and come in sizes ranging from 14”x14” to 48”x48”. Larger square reflectors will usually require two hands due to their weight. These can also be attached to light stands for use.

Westcott Illuminator 14” Sunlight/White Reflector
Image courtesy of Adorama
Triangle. I’m a big fan of the triangular reflector for reflecting light as it is designed with a handle to use with one hand. These also come in a variety of color options.

You can see the triangular reflector a little bit in the catchlights.
No matter the shape, if I don’t have an assistant working with me, I utilize an Interfit Photographic Bracket for Portable Collapsible Reflectors mounted onto a light stand to hold my reflector. While this gear is guaranteed to work with circular and rectangular reflectors, it does also work with triangular reflectors as shown below.

My use of the Interfit Photographic Bracket for Portable Collapsible Reflectors on a recent shoot.
Image courtesy of Connie Arevalo
Colors
You are not stuck buying one reflector color at a time. They are available in as few as 2-in-1 color reflectors to 9-in-1 color reflectors. Not sure which color you need to use? Below are some guidelines on what each color will do for you.

| Gold: | Adds a warm tone to your subject. |
| Silver: | Adds cooler tones to your subject while increasing specular highlights. |
| Diffusion / Translucent | Like a softbox, provides a layer of diffusion between your light source and subject. |
| Sunlight: | A combination of silver and gold adds a hint of natural warmness to your subject while still obtaining some specular highlights. |
| White: | Helps to fill and create highlights almost like a second light. |
| Black: | Takes away light to increase color saturation. |
| Blue or Green | Often used in video as a background, creates an easy way to remove and composite your subject onto another background. |
Umbrellas

A white umbrella used to diffuse strobe light onto a subject.
Umbrellas are great portable tools that serve to diffuse or bounce light back onto your subject when shooting in a studio or on location. Whether you are a new photographer or a photographer on a budget, umbrellas are your best bet in getting professional results in your portrait work. I go into great detail on umbrellas in my article: Umbrellas: Good for More Than Just a Rainy Day.
Softboxes

A small octabank softbox used in a studio environment w/ a larger one in background.
Image courtesy of Yann Bizeul
Softboxes are an invaluable tool used to diffuse harsh light. While there are many light modifying tools out there, a softbox is probably the one tool with the most variations be it size, shape, color and way to be used. Whether using continuous lighting, speedlights or strobes, softboxes prove to be one of the best light shaping tools for any professional photographer’s to have in their toolbox. You can read more about softboxes in my article: Softboxes: Containing, Directing and Diffusing the Light.
TETHERING EQUIPMENT
Technology has made it much easier to get results of each shot you take – instantly – on the LCD screen on the back of your camera, however, can you really rely on such a small screen to review every detail of the image? Yes, you can zoom in and scroll around, however, that takes time – and time is money. Shooting “tethered” can help you review details of each image in full resolution without the need for stalling to zoom and scroll to check an image for issues. You need only a computer or laptop, tethering software and a tethering cord for tethered shooting. You can check out my full article on tethering: Preview While You Shoot: The What, Why, When, Who and How on Tethered Shooting for more on tethering and recommended gear.
Computer/Laptop

I use my 27” iMac In the studio and a 17” Dell laptop in other rooms of my apartment of on location.
A laptop or computer system is necessary for viewing the results from your tethering session. The bigger the screen, the easier it will be to review your images.
Software

Various photo editing/tethering software such as PK Tether, Camera RC, Control My Nikon, Aperture, Capture One and Lightroom.
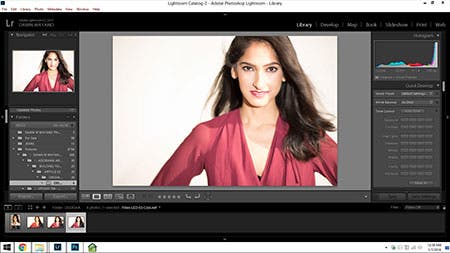
There are several types of software out there to connect for tethering. I choose Adobe Lightroom because it’s very user-friendly and it not only allows you to tether but to organize, edit and send out your images all in one program.
Tether Cord

Image Courtesy of Tether Tools
There are a variety of different kits based on your camera port, so be sure to ask an Adorama Associate which kit will work with your camera model. This kit has made a huge difference in my productivity time as I no longer have to stop and figure out if its a bad connection or if I accidently physically disconnected the cords when determining why I’m no longer connected to my computer.
PROPS
Props are a fun part of any types of studio and any type of shoot. They can consist of just about anything that helps to define your subject’s personality. Here are just a few different props that can be useful to have on hand for a photo shoot.
Umbrellas/Fans
Umbrellas or fans can be just one small interesting prop to add to a photo shoot to help define your subject.

Umbrellas or fans can be one small prop to add to a photo shoot.
Throws
Throws added on or under a piece of furniture of around your subject can help make your subject comfortable and provide a nice prop in your image to boot.

Throws can help make your subject comfortable.
Flowers
Flowers can add to your subject’s interests or help to make a photograph more appealing.

Flowers can make a photograph more appealing.
Accessories
Accessories like jewelry, purses, scarves and/or hats can also lend to a subject’s personality in an image. Have a client bring a cherished accessory or add your own.

I like to keep a stash of accessories to add to a finishing touch to a client’s wardrobe.
Furniture
Having a client sitting, reclining or posing on a futon, couch, stool or other stylish furniture can be a nice touch for an image.

I keep a few different posing stools for clients to sit and pose on.
Furniture Covers
Want to change up the look of a couch or chair? Keep a few different colors or designs of chair or sofa covers on hand to throw over furniture to change up a look over your furniture without buying new furniture.
Throw Pillows
You can also make a small change to image by adding a throw pillow to your set by having a client sit on, near or hugging a throw pillow.
Throw pillows are a nice touch to an image.
Other Props
Other fun props you can add to an image include things like painting equipment, musical instruments, sports equipment or other defining props that help define a subject in your image.
THE NECESSARY ODDS AND ENDS
There’s a lot of odds and ends that you don’t really think about as you start building up your home studio until you absolutely need it and you don’t have it. Here are just a few things I recommend having on hand:
Different Colors/Designs of Seamless Paper/Muslins
One easy way to change your image look is to change the color or design of your seamless paper or muslin background.
Gels
Don’t have a lot of money to spend on multiple colored backgrounds? A set of Rosco Color Gels work great for getting creative with coloring light onto a white background or onto your subject.

A new gel can be thrown on to change the color of a background.
Gaffer’s Tape
Gaffer’s Tape is a great tool for taping down electrical wires or seamless. It’s also useful for taping a flag to your speedlight or lens, taping equipment to clamps, tripods, light stands and taping wardrobe in the back when it’s too big, etc.

Gaffer’s Tape is an awesome tool for holding something in place.
Multiple Sizes of Clamps
A- clamps can be similar to gaffer’s tape in that it has many uses such as clamping wardrobe when it’s too big, clamping a muslin background to a background support system or clamping a seamless roll so that it does not roll out farther than you want it to. Super clamps are good for clamping rod hooks or seamless background support systems to autopoles and/or light stands.
 A-clamps (a/k/a spring clamps) are great for clamping chains, seamless and clothing (left) while Super Clamps are great for holding seamless systems onto Autopoles.
Clothespins
Clothespins are a terrific household tool for clipping gels onto hot continuous lights or pinning things like clothing pieces together.
Batteries
Batteries are needed for many things in your home studio such as your transmitters, receivers, speedlights and your camera. Always have a large stash of backups (I usually have 2 sets of batteries for each piece of gear that requires it as backups…) With that many batteries, it can get expensive replacing batteries all the time. Eneloop Rechargeable Batteries are a good solution to saving you money and saving the environment. Energizer Rechargeables work well too.

Green Extreme Dual Battery Charger for Nikon Camera Batteries
Battery Chargers
Along with rechargeable batteries, you need battery chargers. Depending on how you shoot and how many backup batteries you buy, you might want a lighting fast battery charger that charges two camera batteries at a time. I use a Green Extreme Dual Battery Charger for Nikon Camera Batteries. You’ll want to find the charger that works with your make of camera and make sure it comes with the plates.
Green Extreme Dual Battery Charger for Nikon Camera Batteries
As for AA and AAA batteries, the Maha Powerex MH-C801D 8-cell 1-hour Charger is a reputable charger at a competitive price.
Extra Bulbs
It’s really important once you own and start using strobes that you have backup bulbs. These can get really expensive, but if you are on an assignment and one or more of your bulbs blow, you could be screwed. Having additional bulbs can save the situation. I tend to keep one backup bulb for each strobe I own…
Cloth Gloves for Changing Bulbs
Want to preserve the life of your bulbs? Oil from fingers decreases the life of your bulbs. Be sure to use an oil-free paper towel or cloth to change bulbs.
Camera Remote
A camera remote is a good tool to have as it allows you to put your camera on a tripod and step away to shoot. This gives you more of a chance to interact with your subject after you have framed the shot.

I use a simple Nikon ML-L3 IR Remote Control Transmitter for my D750.
Tripod
Want to guaranty of sharper images? Use a tripod. Tripods are not a weak man’s tool, they are a smart man’s tool. Check out my recent article on Tripods: Choosing the Right Support for Your Investment for more information and recommendations on tripods.
Fan(s)
 Fans have multiple uses on set.
A fan can have several uses on a set. One use is to make wind to blow on your subject to create movement of hair and some types of clothing like fur. Another use is to cool down a set. Remember, when using lights of any kind, they can put off anywhere from a little heat to a lot of heat. Add in shooting during the summer and you might be cooking in your home studio without the use of food. A good commercial fan is best as they tend to last a little longer and will put out more wind, but a lesser expensive box fan can work too. As a double use in a home studio, they can cool you off in any room anytime. When I’m not shooting, I leave my commercial fan on all day for my cat during the summer.
Long Tablecloths or Sheets in Black/White
I typically keep a stash of different colored sheets for boudoir shoots and as an inexpensive alternative as a diffuser outdoors. I also keep several very long tablecloths for covering things up including unwanted backgrounds or even becoming a partition for models when they are changing clothes on location. They also work well to cover furniture.

Different colors of sheets and tablecloths.
Surge Protectors & Extension Cords
If you work with strobes, unless they have power packs in the heads or external power packs, you will definitely need surge protectors and extension cords. For surge protectors, be sure to get a high absorption rating and a low clamping voltage. Also, make sure it has a warranty. I do not buy surge protectors unless I know I am covered with a warranty that puts out enough money to replace my equipment if the surge protector fails. Last on surge protectors, don’t plug one into another one. It can cause an electrical problem.

A bag full of power.
As for extension cords, get only the length that you need because you lose voltage across resistance. The shorter the cord, the more voltage you actually receive. Also, be sure to avoid thin appliance cords. The lower the number of gauge, the better.
Sewing Kit w/ Safety Pins
A sewing kit can be useful for any type of fitting or fashion emergency no matter it being a portrait shoot or a fashion shoot. Safety pins are a godsend for pinning minor adjustments to clothing. Clothes are not all that sometimes need to be fixed or revised. Curtains and sheets can sometimes need a quick fix.

A good sewing kit can come in handy on set.
Good Scissors
While there are too many uses to list, if anything ever needs to be cut (like used seamless paper), a really strong pair of scissors can be invaluable.

ARE YOU STUDIO-READY?
You may find that you need other odds and ends as you start shooting. Weigh in how much you need them as well as their priority of purchase when you are on a budget. Definitely, make sure you get a portable reflector. If you cannot afford the 5-in-1, get a silver/white reflector. Collect each of these and other odds and ends as you go and find you need them. This was a list of my odds and ends that help me on my shoots and guarantee I shoot better safe than sorry.
