If you are like me, you started creating images for the love of it, and maybe like me you’ve decided to take that next step in developing your skills to improve your work and possibly take on some professional gigs. Many people entering the photography field start out as enthusiasts, we often have some gear in the beginning and just add stuff as we think we need and desire it. When one is ready to move in the direction of even part-time professional, though, it’s time to evaluate the needs of potential clients versus the budget you have to invest. This is true both at start up and the various stages of business growth.
In this series of articles I will guide you through a path towards your goal of expanding your photography toolbox to include a lighting kit. As we all have different goals and budgets, I will break these articles down by category of photography and budget for a “starting kit”.
Let’s take a minute to discuss categories. This is probably something most of us don’t really think of when we start shooting. You see a moment or imagine a concept and create an image. Simple as that, right? I understand that many of us want to photograph “everything” or “lots of stuff” but for the purpose of creating a budget and making a buying choice, it will be important to distill your focus a bit. That being said, many lighting tools can be used for a huge range of tasks and some needs overlap pretty easily, so I have decided to make a few key notes about each of the categories I’ll discuss and focus on gear that fits. Could a wedding shooter use her gear to make studio portraits or food photos? Sure! But someone focusing on food photography might make a different choice in gear up front.
In this first article, I will discuss the general category of PORTRAIT PHOTOGRAPHY. Many of us have made photos of people, but a portrait photographer is a master of this art. Whether they are making school portraits, images of a CEO for an annual report, musicians for album artwork or celebrities for magazine covers, the portrait photographer needs to have equipment that is versatile, does not get in the way and is capable of producing soft and flattering light.
These articles will be written at a semi-advanced level so I will not be explaining in detail what aperture/shutter/ISO are, so I recommend you check out these great resources from Adorama if you need a bit more info there or to brush up on terminology.
- Learn more about exposure basics in this article by Dawn M. Wayand.
- Learn more about the “Exposure Triangle in Practice” in this video for AdoramaTV by Mark Wallace.
Portrait Lighting under $500
I’ve decided to start this series with under $500 as my budget. This is typically the budget level for someone who is just starting their career (or hobby). I won’t say you should not buy any equipment if your budget is even lower, what I would suggest is reading through this article and investing in the items that are part of these kits or similar and build at the pace you can afford. Keep in mind of course that buying things a little at a time versus in a kit is generally more costly in the long run. This level of equipment is typically not going to last you a lifetime, but can be a perfect stepping stone to professional quality images.
I’m going to offer two options for this price point, the first will appeal to those looking to create more traditional types of portraits, included are three lights which will open many options for variation. The second is a simple one light kit, I will mention this as many photographers like the idea of working primarily with available light and adding just a single light to control the look is a great way to cross the bridge from available light.
Three-Point Lighting:
“How many lights should I own?”
When asked this, my most common reply is: “You can do most things with three lights.” To this end, I’ll talk about a three light kit to get things rolling.
The JTL TL-160 Versalight Kit is an entry level kit with everything you need to do various three-point lighting setups. It all fits into a small bag and comes with a wireless transmitter. With the small softbox, umbrella, barn doors, and snoot you can produce nearly endless variations with one or many subjects.
Three-point lighting is one of those terms we see used quite a bit in photo and video and is quite simply lighting with three light sources. For example I may take one light and place it in front of my subject and at a 45-degree angle to be the main or “Key” light. I might take a 2nd light also from the front, possibly with a bit less power with the purpose of brightening or “Filling” any shadows on the subject’s face and finally take my third light and direct it at the background to give it a nice even exposure. This could be described as KEY/FILL/BACKGROUND.
Another common term is the “Separation” light, and this can go by many names including but not limited to:
- Kicker
- Hair Light
- Back Light
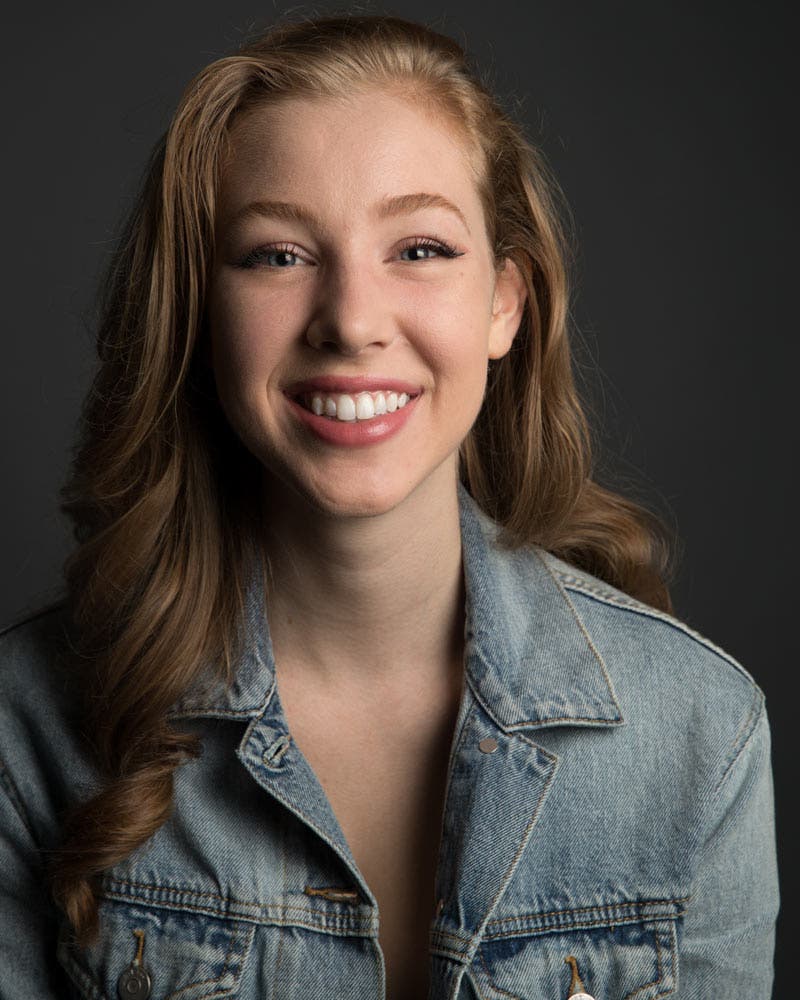
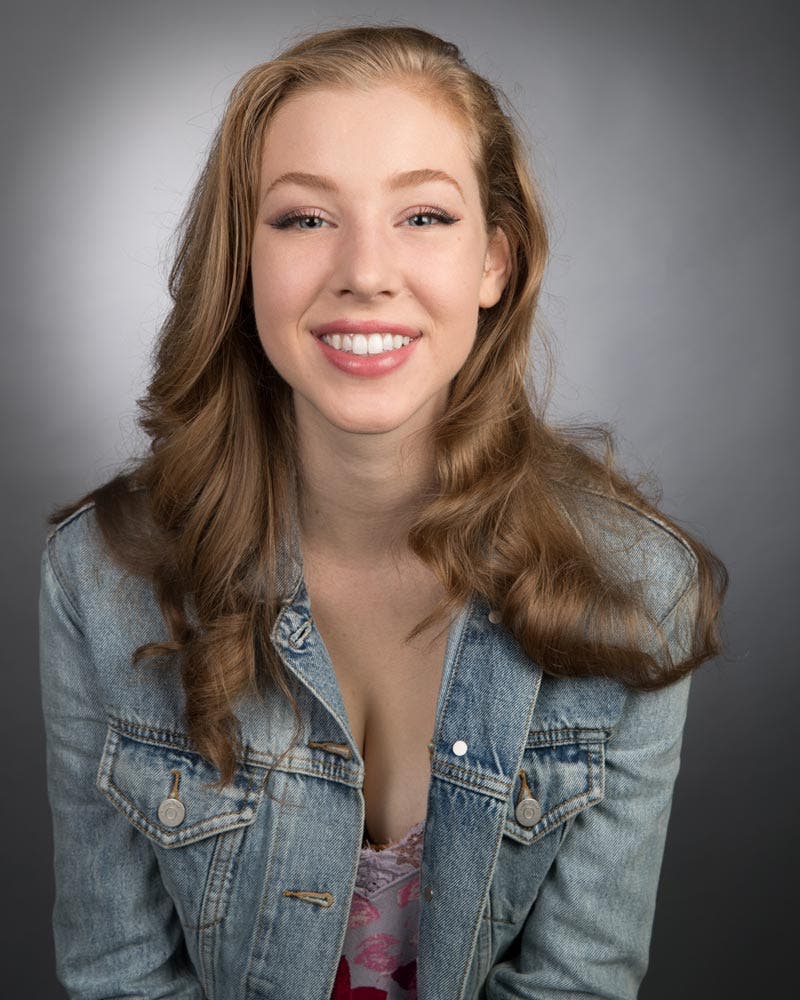
To illustrate some options, I brought Marisa into the Adorama Learning Center and set up a few portraits. In this first example I decided to set up each of the lights one at a time, adding them to create a completed portrait. You can see in [Image 1] that she is lit from camera right with a softbox key, creating nice light on her skin with shadows on camera left and virtually no light on the background.
In [Image 2] I have added an umbrella just to the side of the camera (left), this is bringing up the detail in the shadows fill and some light is hitting the background as you can see it is now a bit brighter.
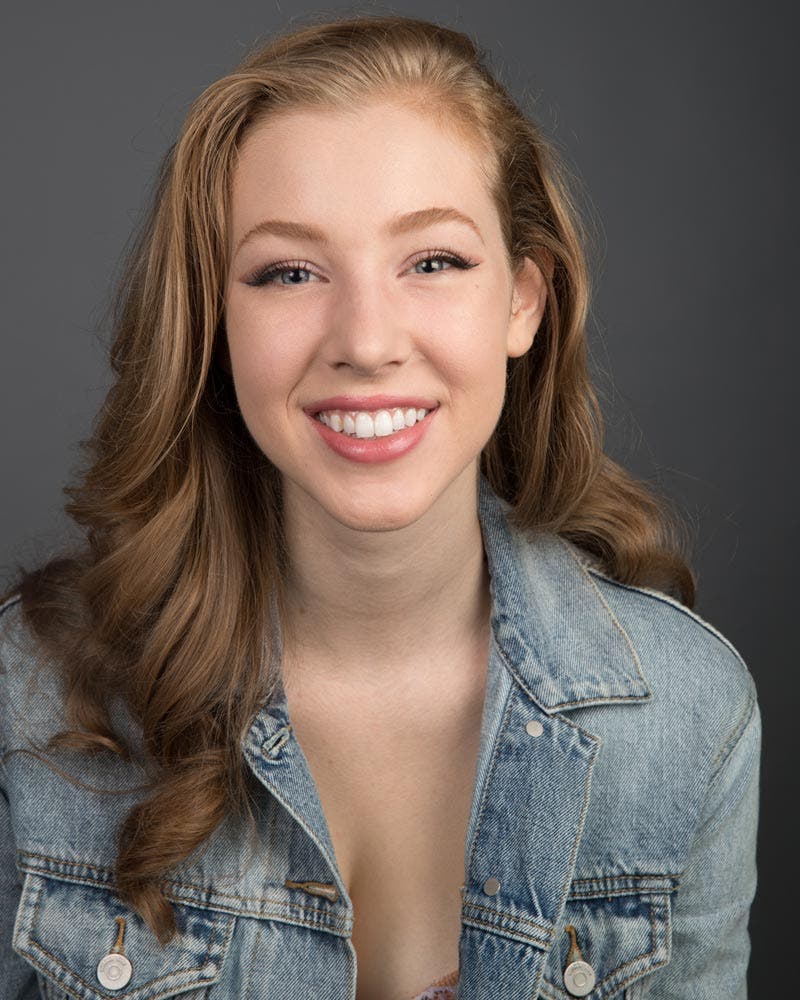
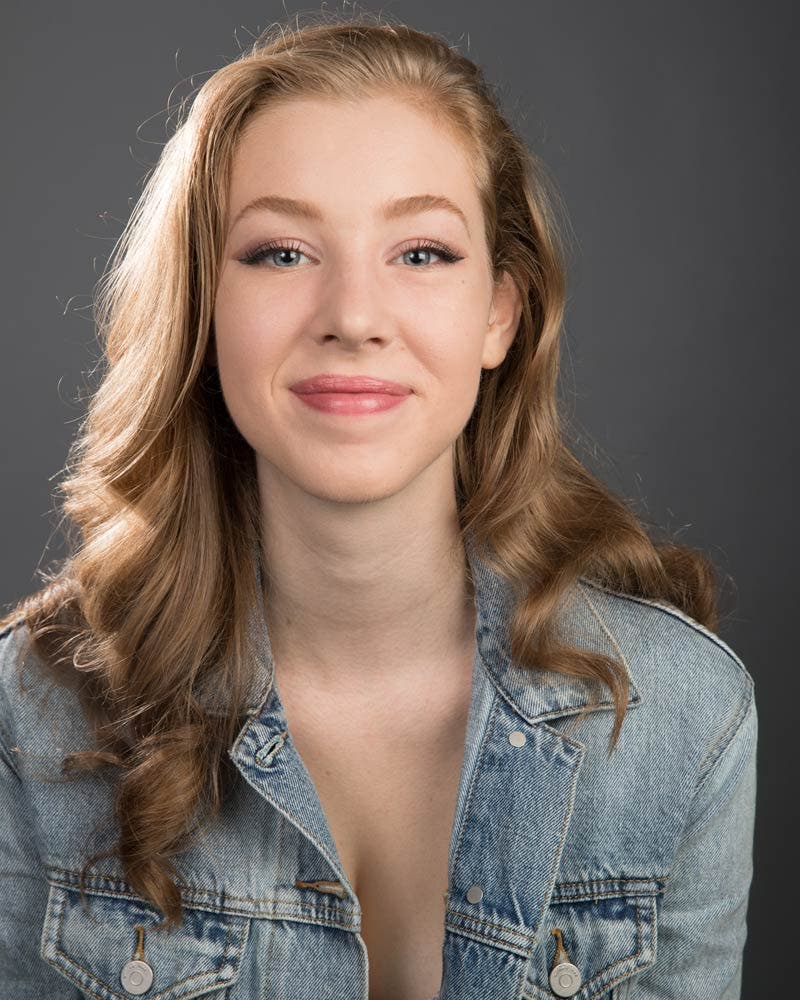
For [Image 3] I placed my third light fitted with the barn door to create a “hair light” and add three dimensionality to the image separation.
So in this example I am using a KEY/FILL/SEPARATION setup.
In [Image 4] I swapped the barn door for a snoot and pointed it at the background creating a KEY/FILL/BACKGROUND combination.
Finally in [Image 5], I moved the umbrella light to the background and used the softbox key and barn door separation as in [Image 3].
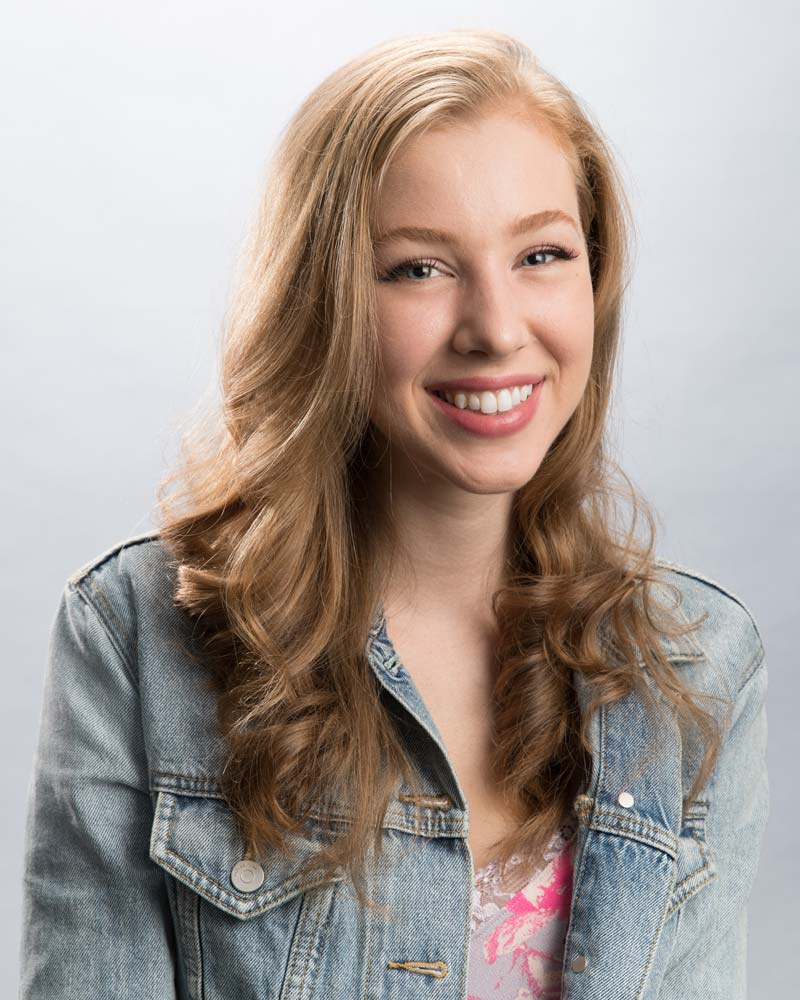
As you can see, having three lights in your kit opens up a world of options. This kit provides you with the most common means to modify your lights, thus allowing a large variety of looks, from soft open light to hard and contrasty. This will give a photographer new to lighting many options for experimentation. Some more specialized modifiers are not available for this system (or many at this price point) and these options we will explore in future articles.
Minimal Lighting: Using a Single Light Kit
For those who want to keep things a bit simpler I suggest the Westcott Erin Manning Strobelite Plus 1-Light Kit.
While having only one light in your kit (along with a reflector) is somewhat limiting, creating traditional three-point lighting is not the goal of this kit. I instead recommend this to a photographer who favors available light shooting and just wants to add the most minimal lighting to mold and shape the scene.
With a single light kit you will find yourself mixing flash exposure with the existing or ambient light in the space to get a more or less dramatic image. You could place the 32 inch softbox that comes with this kit at a traditional 45 degree position and use the reflector to fill in the shadows, then expose to control the level of brightness behind your subject by adjusting your shutter speed until you reach a level you are happy with. This allows you to use your strobe to create a dark scene or use it to work with the light in your environment to create flattering light on your subject’s face.
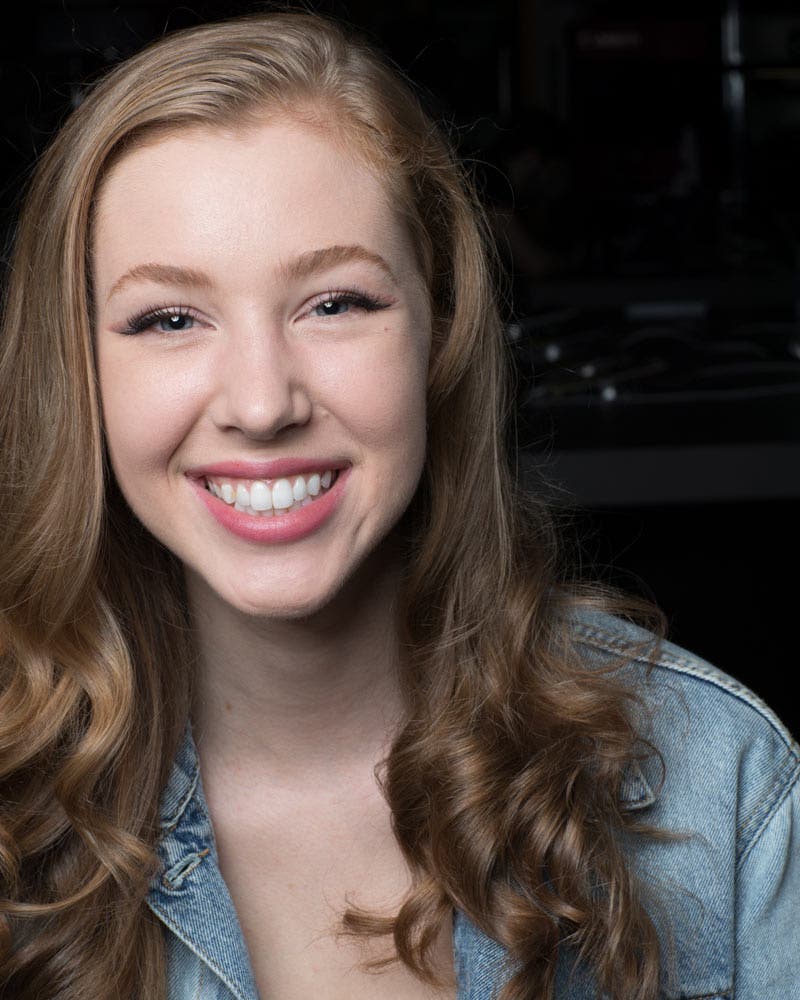
In the first example here [Image 6] I placed Marisa in the Adorama retail store and lit her with a single strobe head in the octagon softbox key without regard for the ambient light in the space, thus producing an evenly lit image of her with a background that is quite dark. Adding a reflector in [Image 7] helps the shadows on her face fill but still leaves the background in darkness. To create a more professional looking shot, in [Image 8] I adjusted my shutter speed to get the exposure I liked in the store background. This final combination, though I am technically using one one light can still be explained via our three-point lighting terms [KEY/FILL/BACKGROUND].
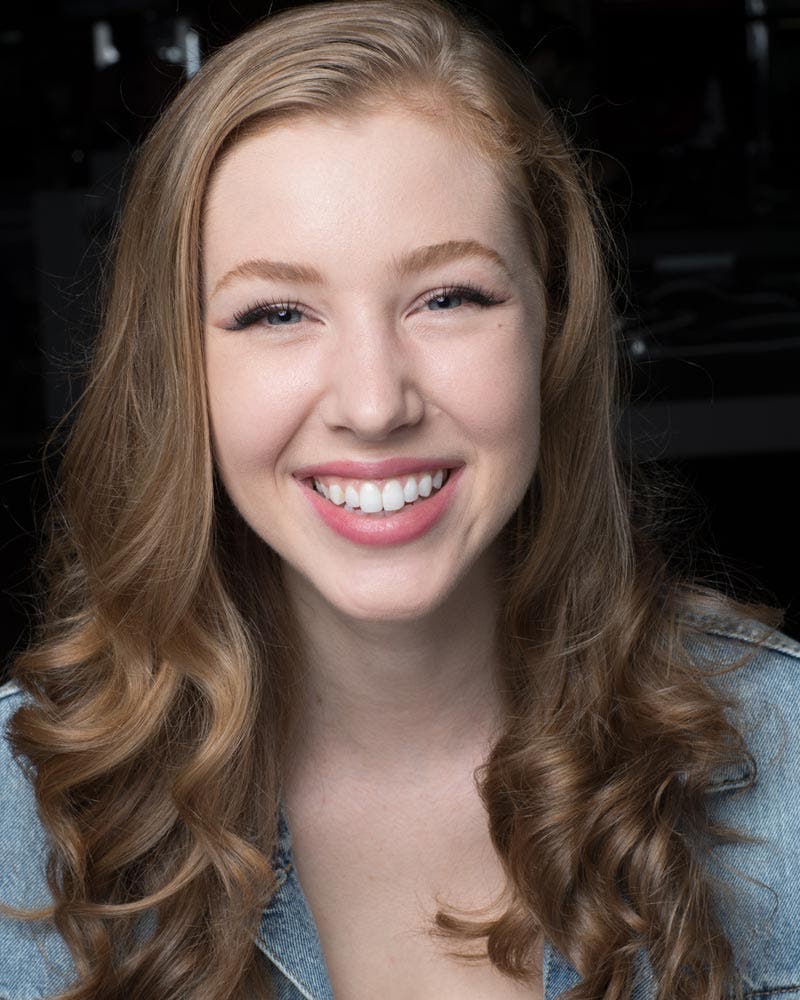
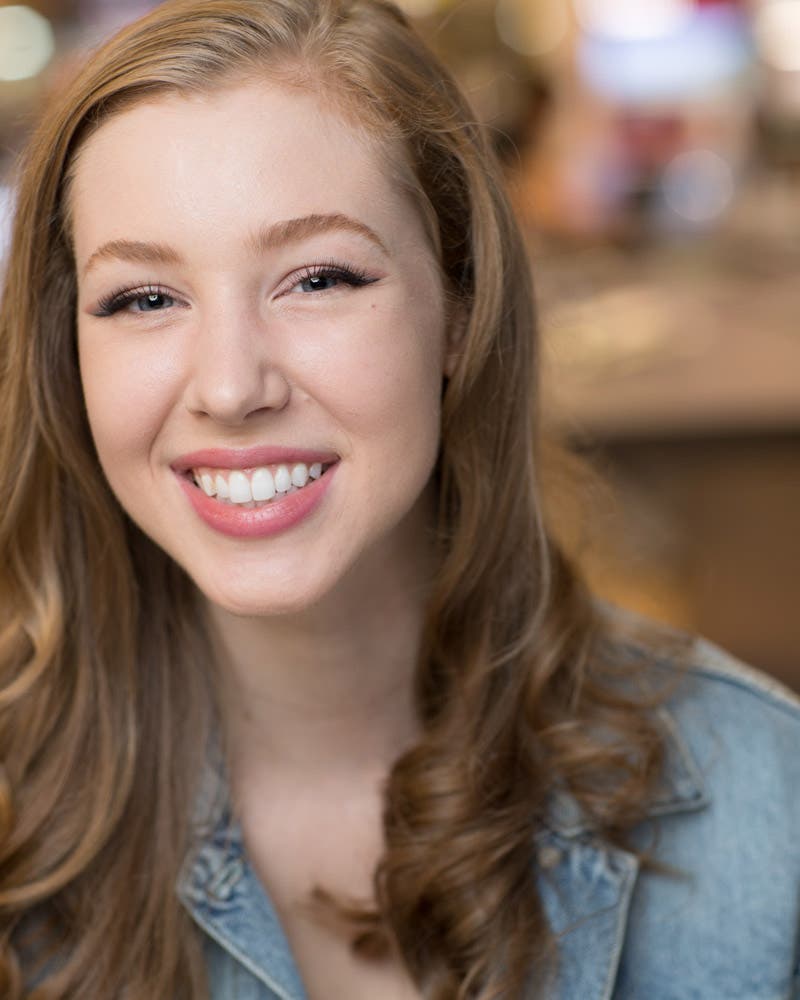
In the final example, I stepped out onto the street with Marisa and used the available light only [Image 9].
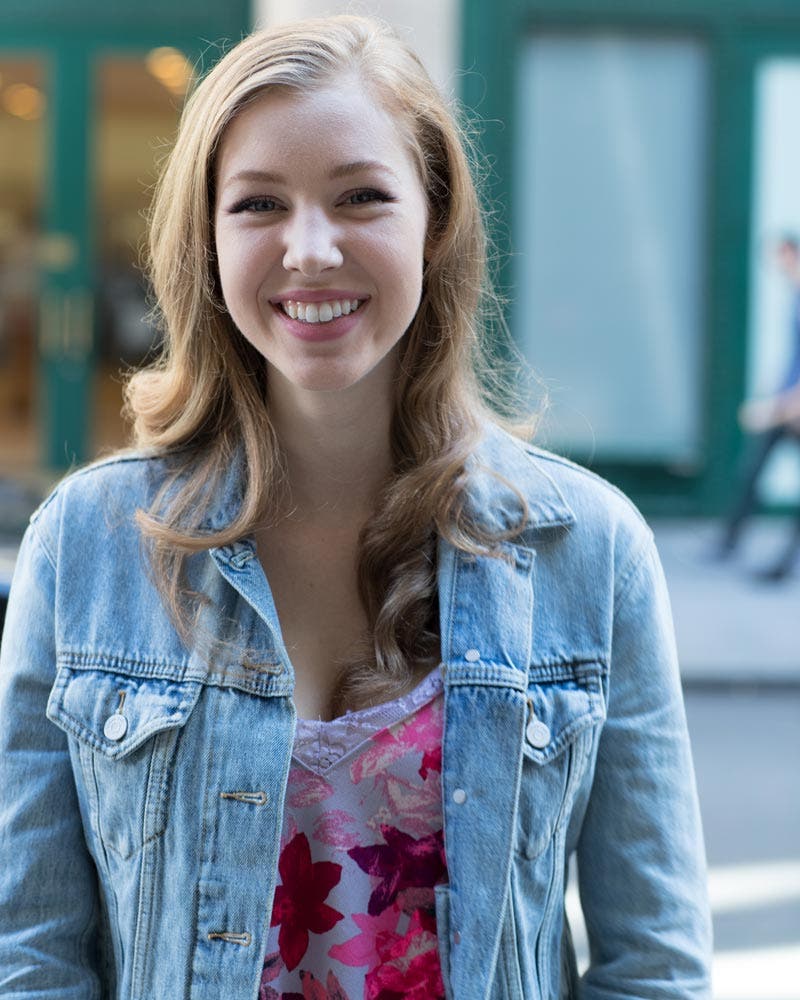
This produced very unflattering light on her face, so I added my strobe light in the same octagon softbox and balanced the exposure to make it my key, the available light providing the separation and background for [Image 10].
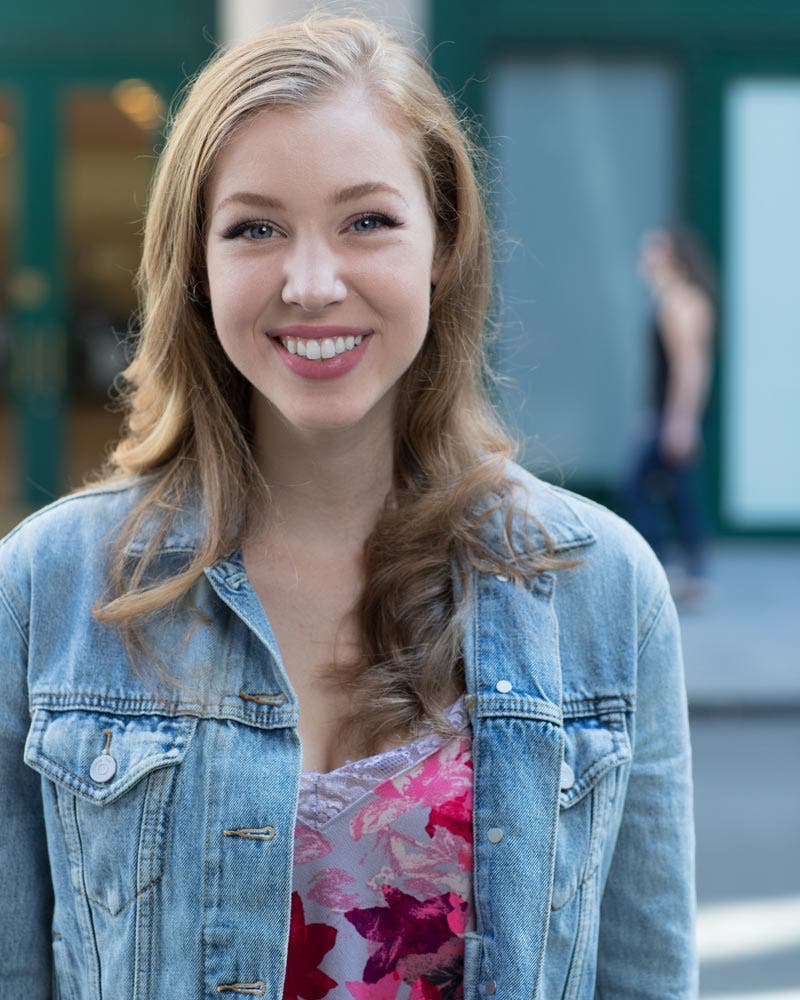
With so many options available at this low price point, you may be asking why would I ever pay more? Well, at some point, you may need more power to create smaller apertures either for more depth of field, or to overpower light you may not like in the space. In addition, some specialized accessories that could help you create the images you want may not be available in these budget systems.
Finally, and maybe most importantly for a professional, durability and longevity. These less expensive systems will eventually require upgrades if you stick with photography for any length of time. If your budget it such you can skip this step, you may save yourself money in the long run.
