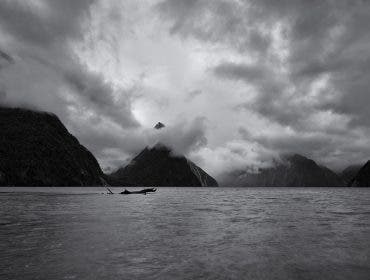
Aerial photography is one of the most rewarding and exciting types of photography. Whether you’re flying in a helicopter or airplane, over a beautiful city or epic landscape, you’re able to capture a unique and powerful perspective that’s truly hard to beat.
However, shooting this type of aerial photography also comes with a list of challenges. If you’re not ready for them, you might have a disappointing flight that costs you both time and money.
With that in mind, here are eight professional tips for shooting aerial photography in a helicopter or plane to help maximize your success and minimize your frustration.
What is aerial photography?
Aerial photography is the taking of photographs from an aircraft or other airborne platforms. Popular means of capturing aerial photography are airplanes, uncrewed aerial vehicles (UAVs) like drones, and helicopter photography. It also includes balloons, blimps, rockets, or action cameras while skydiving or wingsuiting.
Because of its unique, “birds-eye view” perspective, aerial photography is one of the most exciting and popular styles of photography today, partially due to recreational, consumer-based drones being more accessible than ever.
Why is aerial photography important?
Since its beginning, aerial photography has been an important way to capture imagery and information from above. We started with balloons and kites, and now use helicopters, planes, and uncrewed aircraft like drones.
Aerial photography has been an important tool for agriculture and cartography since the late 1800s and was adopted during WWI and WWII for military strategy and scouting behind enemy lines. As the methods of aerial photography increased and improved, so does its use. Now, hundreds of industries use aerial photography, including real estate, architecture, engineering, and science. Over the past 10 to 20 years, aerial photography has been specifically used to monitor and evaluate the constant effects of climate change.
And now, aerial photography is widely used in the creative industry. Photographers hire guided plane and helicopter tours to create incredibly powerful imagery with their cameras. Drones have also become a primary way content creators capture extraordinary bird-eye imagery of landscapes and cityscapes. Image quality in the recreational and prosumer drone space has improved dramatically over the last five years, making drone cameras and sensors competitive with pro-level cameras.
It’s safe to say that aerial photography is here to stay and will continue to grow in importance, as more and more industries adapt to using it.
Tips for Aerial Photography
1. Determine lenses based on the aircraft
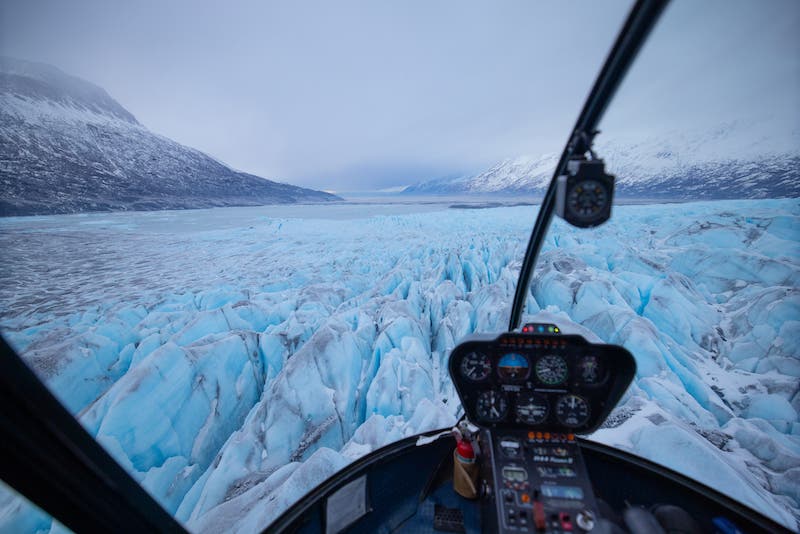
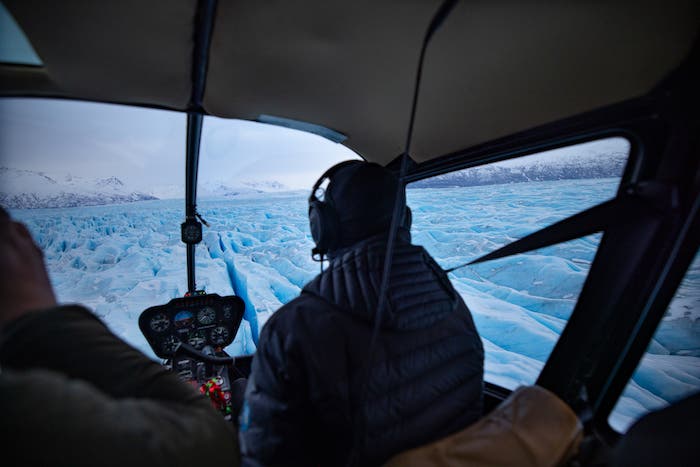
The lenses you use for aerial photography will change depending on whether you’re in a helicopter or airplane. If you’re flying and shooting in a helicopter, you’ll be a lot closer to your subject, thanks to a helicopter’s ability to hover at slower speeds with far greater maneuverability and control. Because of this, you’ll want to stick with wider lenses, like 16-35mm f/2.8 or something comparable.
In addition to an ultra-wide zoom lens, a versatile mid-range zoom lens, like a 24-70mm f/2.8 is also fantastic for aerial photography in a helicopter, especially if you want a little extra reach for details or textures in the landscape or city.
Now, if you’re flying in an airplane, your lens selection will vary slightly because airplanes fly much farther away from their subject than helicopters. They are limited in their turn radius and maneuverability, so you want a lens that is incredibly versatile, with a large zoom range to reach your subject throughout the flight. For example, a lens like a 24-105mm is perfect, and if you need even further reach, a 70-200mm f/2.8 will most certainly do the trick.
However, no matter what lens you choose for the job, be sure it’s a professional-quality lens with built in IS or Image Stabilization. Most professional lenses are much faster and sharper, with brighter flat apertures. Having that improved speed, image quality, and stabilization in your lens will help elevate your aerial images dramatically.
2. The less gear the better
While it may be tempting to bring several lenses and camera bodies along for the flight, it almost always does more harm than good because you’re typically in a very cramped cockpit or fuselage with limited access to your gear. Trying to fumble around and switch lenses or camera bodies while in mid-flight can not only be frustrating, but it can cause you to miss incredible shots.
So stick with one to two lenses and one to two camera bodies, max. Designate one as a primary camera, and the other as a backup in case you experience camera malfunction or failure. Have them cleaned and ready to go, with any corresponding filters attached.
Time speeds by during an aerial photography shoot. An hour can feel like a few minutes in the air, simply because you’re constantly shooting and moving. Every minute lost is an opportunity wasted, so be sure you have a simple, effective aerial photography kit ready to go.
3. Adjust your settings around speed and depth
Whether you’re flying in a helicopter or airplane, there are two things that are almost certain: You’re moving incredibly fast and you’re shooting a subject like a landscape or a cityscape that requires more depth of field. With that, it’s important to adjust your camera settings for speed and depth, then focus on setting your ISO and exposure.
First, let’s focus on shutter speed. The rule of thumb for aerial photography is to shoot at shutter speeds that are eight times your focal length. So if you’re shooting at 200mm, your shutter speed should be a minimum of 1/1600 sec for tack sharp images. This rule applies to all aerial photography, whether you’re shooting landscapes or another aircraft flying at around the same speed, like in air-to-air photography.
Second, set your aperture so you achieve the depth of field you’re looking for. A safe bet would be to stay between f/5.6 and f/11, making sure not to go under the minimum f/5.6, so your images don’t look too flat. The goal is the edge-to-edge focus when shooting aerial photography, so a higher aperture is a must.
Third, set your ISO settings around your aperture and shutter speed. Don’t be afraid to shoot at a slightly higher ISO, because most newer mid-level and pro-level cameras have much more powerful camera sensors that perform at higher ISO settings without significantly less noise.
So take the time to set your camera properly when doing aerial photography, and be ready to change settings on the fly. Light conditions change dramatically in the air, especially when you’re going over 100 miles per hour.
4. Aerial photography requires pilot communication
Communication is key in aerial photography. If you’re on a photography-based flight, it’s important to have clear communication with your pilot before and during a flight.
Before a flight, if you have a list of shots or ideas, be sure to run those by the pilot you’re flying with. Not only does this help you plan your shot list—the pilot can tell you what’s possible or not based on the aircraft or current weather conditions—but it also helps the pilot. Explaining your shot list beforehand can help the pilot prioritize certain areas and maximize overall flying time.
During a flight, be sure to consistently communicate with the pilot. As I mentioned, you’ll be constantly changing and adjusting your gear and settings, and sometimes, you may miss a shot or opportunity. If that happens, kindly ask the pilot if it’s possible to do another pass or turn. Pilots are used to requests like this from photographers, and will help in any way possible—as long as it’s safe.
Changes happen all the time in aerial photography. Sometimes you might want to try a different angle, fly lower, prefer the wing out of the shot, or want another pass, so just ask! The worst thing that will happen is the pilot will say is no, and you move on to the next area.
5. Bring the right memory cards
Fast, reliable memory cards are incredibly important in aerial photography. You don’t want your memory cards buffering and camera stalling during a beautiful moment you can’t have back. So be sure to either shoot with CFexpress, XQD, or UHS-II SD memory cards. You need memory cards with blazing-fast reading and writing speeds that can also process and handle hundreds of frames in a matter of minutes. Don’t overlook these small-but-critical tools!
6. Secure your aerial photography gear
If you haven’t been on a doors-off photography flight before, it’s an incredible experience. However, not having any doors or protection means your gear is more at risk. While almost all doors-off flying tours require photographers to wear a safety harness and strap on all camera gear while in flight, accidents can still happen. You never want to see your favorite camera body or lens fly out of an aircraft. Not only is it a nightmare for the photographer, it’s an incredibly dangerous safety hazard.
The same goes for a doors-on flight. Some aircraft have windows you can open and shoot out of, depending on what the pilot allows. However, a lot of people don’t understand how powerful wind can be when you’re traveling over 100 miles per hour in the air. If you’re shooting out of a window, your camera will most likely get sucked out of your hands if it’s not secured to your body. Not only is that a huge bummer, but a massive safety hazard for you, the pilot, and people below.
So if you’re on a doors-off flight or a flight where you can shoot out of the windows, be sure to secure all your gear. Another pro recommendation: never change lenses or camera bodies mid-flight, and keep your camera bag shut at all times. That will lead to more enjoyment, less heartache and fewer safety concerns when you fly.
7. Keep the windows clean
For doors-on aerial photography tours, it’s important to have and maintain clean windows for clear images. Before a flight, be sure any and all windows you’re shooting from are clean on the inside and out.
During a flight, it’s very easy for windows to fog up because of the constant temperature changes in the fuselage or cockpit. Be sure to bring along several clean microfiber towels for mid-flight wipe-downs. That way you’ll never get stuck with fogged up windows interfering with your shots.
8. Wear dark clothing
Finally, it’s important to wear dark clothing when shooting aerial photography. Brighter clothing creates more glare on windows, which can completely ruin an image. Even in a doors-off tour, you’re surrounded by glass, and you don’t want pesky reflections you have to edit out of your images. So wear darker clothing, and you’ll be much happier with your aerial photography results.
Aerial photography and safety: What you need to know
While aerial photography is a wonderful type of photography to pursue, it’s important to know the risks of flying in smaller aircraft, that sometimes fly in very difficult, tight terrain.
Unfortunately, there are accidents, crashes, and deaths every year due to weather or mechanical issues. It’s important to know these risks and do your research before setting out on your next aerial adventure.
To minimize those risks, only fly with pilots you know, trust, and have years of experience in the area you are flying. If you’re flying with a tour company, do your research and make sure they have a track record of responsibility and safety. Pilots or tour companies that flirt with the line of safety and responsibility should not be flown with.
However, most pilots in the aerial photography industry are talented, safe, and smart. Trust their experience and expertise, and if they call off a flight, even an hour before the flight, know they’re doing it with your safety in mind. No image is worth losing your life and the life of others on board, so just do your best to work with the pilots and reschedule.
Feature image by Nathan Lee Allen