Contrary to what one might think, blurry is not always bad when it comes to photography. When only certain parts of your image are blurry, it can help bring interest and attention to the parts that are in focus. This blur is called bokeh, and it is a very sought-after effect that photographers love to use. Ideally, bokeh is captured in the field. However, if it isn’t, it is still possible to add it in Photoshop.
What is Bokeh?
The term comes from the Japanese word “boke.” This refers to blur or haze. In photography, bokeh is considered the blurry background of an image. This can help bring attention to the subject of the photograph when done well. It is generally aesthetically pleasing and is an effect often desired by portrait photographers. Not only is it pleasing to the eye, but it helps create depth and add dimension. Creating bokeh can be done in the field or on the computer, and there are a few key ways to go about it. Before we jump into how to create bokeh in Photoshop, let’s talk about a few ways to create it in the field.
How to Add Bokeh While Shooting
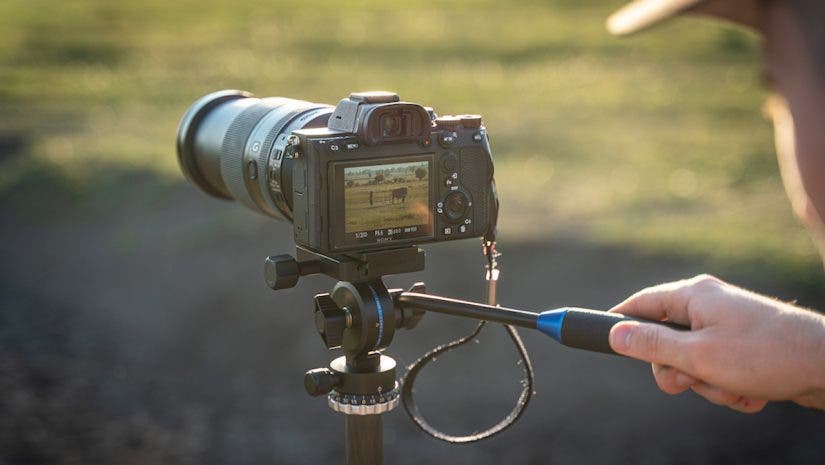
Creating bokeh boils down to three things: your camera settings, lens, and the distance you are away from the subject. Each and every lens handles bokeh differently, so finding the lens that provides the exact results you want can take some time.
First, your camera settings will dictate how extreme the blur is in your image. The aperture is the setting that controls the bokeh in your scene. To create it, you’ll want to open up that aperture as much as possible for the most extreme effect. For example, f/22 would have little to no bokeh, while f/1.8 would have extreme bokeh. This is where the choice of lens comes into play.
Choosing the right lens to create bokeh makes a huge difference in the amount you can create. You’ll want to choose a lens that has the option to open up as wide as f/2.8, or even wider. These lenses are often times more expensive. Although, if you want to create bokeh, you’ll need to open up the aperture as much as possible.
Lastly, the focal length of the lens and the distance between you and the subject make a difference in the amount of bokeh you can create. Generally speaking, the further you are from your subject, the more extreme it will be. For this reason, lenses with a longer focal length often work best for creating bokeh. This is because you can afford to back up from your subject when using a lens with a greater focal length. For the best results and most extreme results, use a lens with a focal length of 50mm or greater with an aperture of f/2.8 or more.
Check out 5 Tips for Capturing Bokeh for more advice on this subject.
How to Add Bokeh in Photoshop
There are a wide range of ways to create bokeh in Photoshop. Let’s look at two of the most effective ways to do it.
Option #1: Field Blur Effect
Open your photo into Photoshop. Then, go to Filter > Blur > Field Blur.
Next, click on the spot in your photo that you wish to stay in focus. Go to the top right hand corner of the screen, and reduce the Blur slider to 0 px.
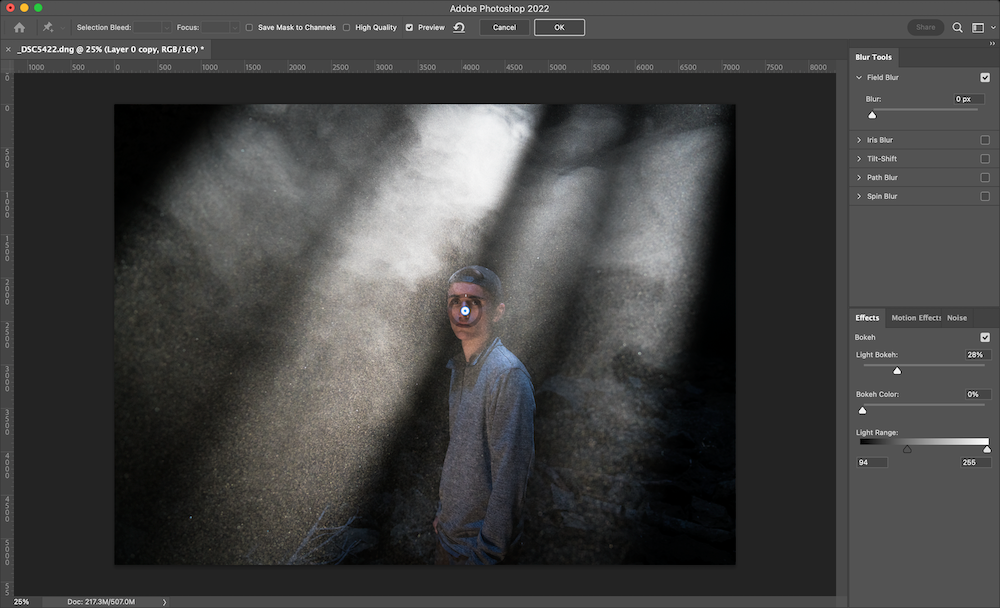
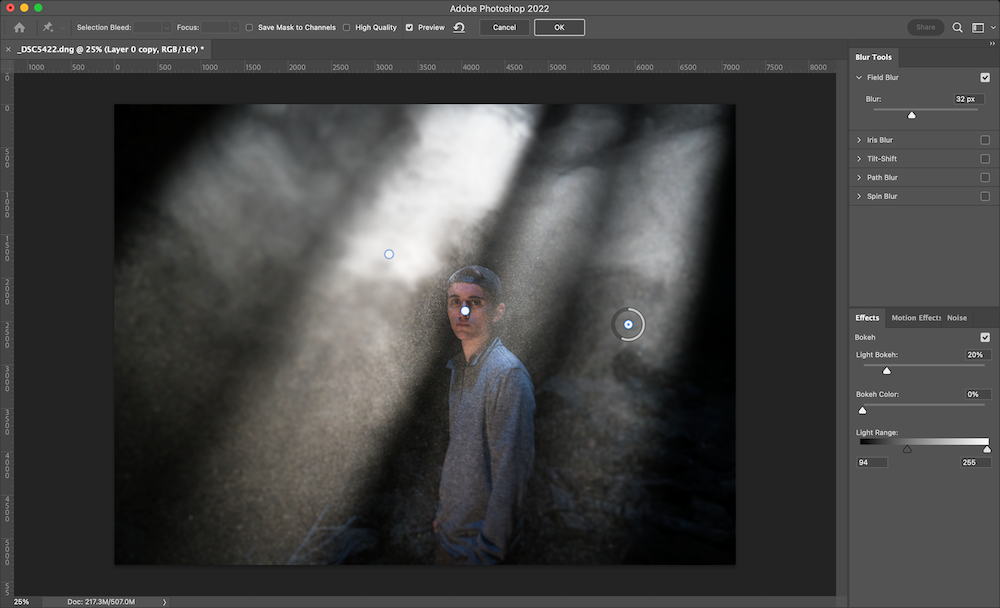
Then, click on the spots in your image that you wish to blur. The Field Blur will select similar spots in the same area you clicked and blur that area as well. On the right side of the screen, you can adjust the Blur slider to add more or less blur.
You can also go into the Effects tab (bottom right by default) and increase the amount of Light Bokeh, Bokeh Color, and Light Range.
- Light Bokeh will brighten the brightest spots of the blur in your photo to create a brighter background bokeh.
- Bokeh Color will saturate the area you are applying bokeh to.
- Light Range adjusts the selection of areas that these two adjustments are applied to.
Changing this slider makes the selection become more or less restrictive. Apply as many areas of Field Blur as you’d like until you reach the desired effect.
Option #2: Using Bokeh Overlays
Bokeh overlays are a great way to add blur to your image in Photoshop, but they can be more challenging to use than Field Blur. First, you’ll either need to download or create an overlay. If you wish to create your own bokeh overlay, grab a photo you’ve taken and follow the steps in Option #1 to blur the whole image. Then, reload the image back into Photoshop as a layer on top of the photo you wish to apply the overlay to.
Put the bokeh overlay on top of the image you want to add the overlay to. Then, change the blend mode to Screen. This blend mode hides dark pixels and shows light pixels, so it should shine through.
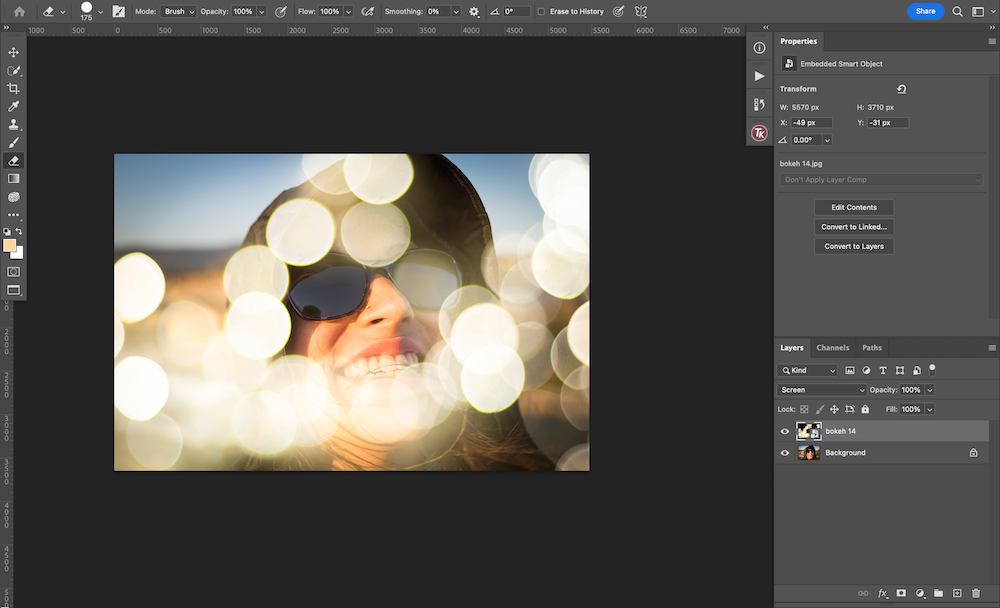
Upon first glance, the results don’t look great. However, this can easily be refined. Open a Levels or Curves layer (whichever you prefer) and clip this layer to the bokeh layer. This can be done by selecting the square with the arrow pointing down in the Properties panel.
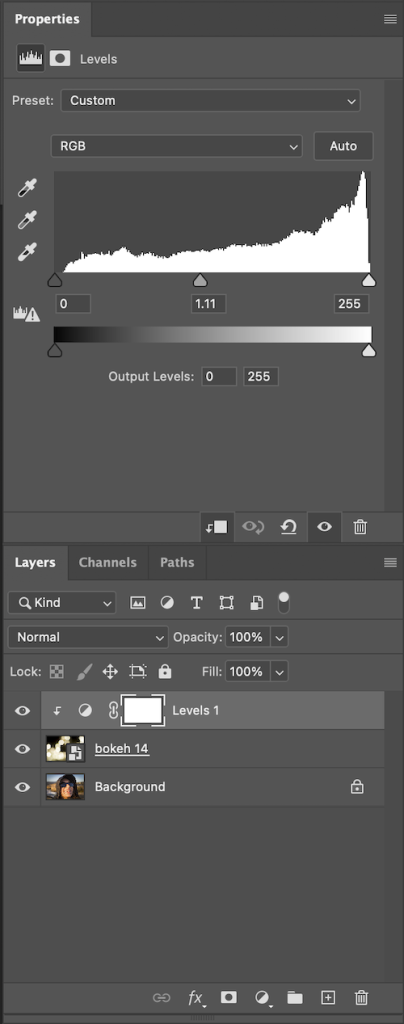
Then, adjust the brightness of the layer with either the curves or levels adjustment until you are satisfied with the results. You can also adjust the opacity of the layer to reduce the bokeh effect. Lastly, you can use a layer mask to paint it out in places where you don’t want it.
Need help with this? Read How to Make a Layer Mask in Photoshop.
Once you’re done, be sure to save your photo with layers so you can always come back and re-edit if you want to make a change.
All things considered, adding bokeh in camera is the easiest and most effective way to add it to your scenes. If you have a photo that you love and wish it had bokeh, it is possible to do it in Photoshop if you’re willing to spend the extra time and effort. This is one of the best ways to give your photos a professional, high-quality look and bring the viewer’s eye into the important parts of your photo.
