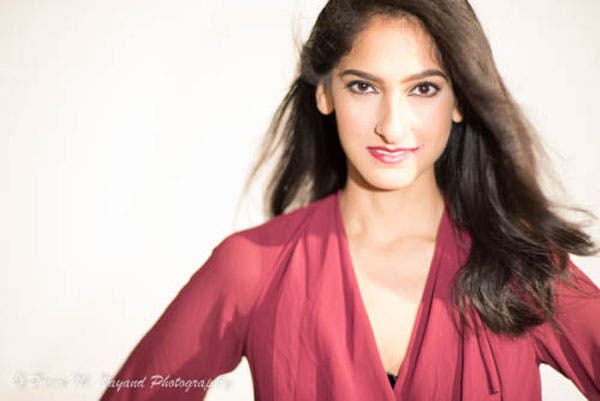
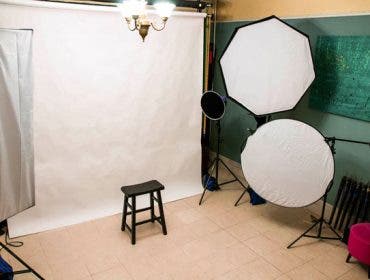
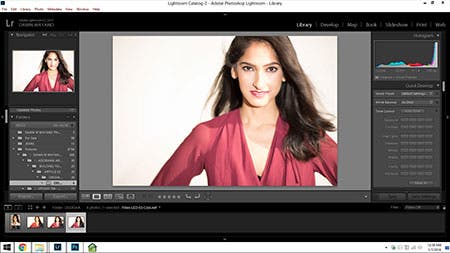
All images by Dawn M. Wayand unless otherwise noted.
On our last segment of this series, I provided you with information on actual shooting necessities like cameras, lenses and harnessing tools for your investment. I also addressed concerns on actual shooting space within your home. Once you have your space situated, the shooting gear that’s right for you and you’ve learned how to use that gear (and you’ve mastered your manual settings!), it’s time to start building your studio. So let’s talk about continuous lights.
Benefits of Continuous Lights
There are many benefits to using continuous lights as a first light set or as an added set to your existing studio. For beginners, you get to see your end result before taking the shot. Beginner photographers can use continuous lights as a tool to see light quality and different light ratios by moving a light around their subject at different heights and angles. Continuous light uses are not limited only to beginner photographers though. Other reasons a photographer might choose a continuous light setup include:
- There’s no worry about getting the right flash exposure or sync speed when using continuous lights as it’s much like shooting in the daylight, allowing your mind room to be more creative.
- People tend to be more relaxed under constant light than under a flashing strobe, especially when you are shooting babies and young children.
- Continuous lights allow you to shoot at wider apertures so that you can draw focus more on your subject or part of your subject – leaving the rest out of focus.
The Downside
The only real downside to continuous lights is that there are very few modifiers out there for them, with barndoors and scrims being the most common and readily available.
Continuous Lighting: Hot & Cool Lights
There are three types of continuous lights: tungsten, fluorescent and LED. Each light has its own personality where the light tonality is concerned and which to use is really up to the personal preference of the user. I’ve worked with all three and personally fell in love with LEDs, but that’s just me.
Color Temperature
First let’s take a quick look at color temperature as the different lights have different color temperatures. Color temperature is based on the Kelvin scale of 1000 to 10,000. The lower the number on the Kelvin scale, the warmer the color. The higher the number, the cooler the color.

Kelvin Scale
CRI
On a scale of 0 to 100, the Color Rendering Index or CRI measures a light’s ability to reveal accurate colors, hues and skin tones. Think washed out vs. vibrant. The higher the CRI number, the closer the light is to perfect light. I would not recommend anything less than a CRI of 90 when choosing lights.
Tungstens
Tungsten lights, literally hot lights, are quartz halogen lights that require a lot of amps – I would not recommend tungstens studio lights for small home studio spaces – especially in older homes – because they may not be properly grounded and can actually be a cause for an electrical fire. Since they require so many amps, you really can’t have much else going on at the same time on the same circuit otherwise you will overload the circuit, like I did, trying out a couple of Mole Richardson Tweenies and blowing the electric out in the whole front end of my apartment! If you choose to go with tungstens, be sure to figure out your home circuits and what each they can handle before plugging in your lights. Also, be sure that if you plug a second Tungsten into an outlet or surge protector, that you do so on a separate circuit.
One other thing to note with Tungsten lights is that with smaller spaces, the heat alone produced by these lights can be very uncomfortable, except when shooting in the winter! I did, however, find an interesting alternative that could withstand the circuits of my old building and produced beautiful light for a portrait. The Lowel Rifa 66ex – 750 Watt Light at $475.11 each at Adorama. It’s originally a fluorescent light setup but you can get an alternate Tungsten light to swap out and use with it.

Image courtesy of the Lowel manufacturer website.
I only used one light for this beautifully soft portrait below. I liked that the light is inside the umbrella, which is collapsible, which is a plus for storing in small home studio spaces.

Photo taken of model Deeksha using the Lowel Rifa 66ex. ISO 800. Shot at F/2.8 and 1/125 of a sec.
Another great choice for a Tungsten setup is the Interfit Photographic INT457 Stellar XD Twin Softbox Kit – retailing at $485.95. This kit works pretty well and you get two lights in the kit – but at only 300 watts each.

Image courtesy of the Adorama website.
Fluorescents
Fluorescent lights are an excellent alternative to tungstens as they closely match daylight in CRI and are much cooler to the touch. One of the top choices for fluorescent lights out there right now is the Westcott Spiderlite TD6 at $429.90 each at Adorama. All-metal, the Westcott Spiderlite TD6 has the versatility to be used as either a tungsten or fluorescent light with the simple switch of bulb types. This bad boy puts out approximately 1200 watts of daylight power with replacement bulbs costing around $6 each.

Image courtesy of the Adorama website.
An alternative choice for fluorescents is the Flashpoint CoolVee 7 at $199.95 each which includes a reflector and a softbox for each light.

Image courtesy of the Adorama website.
LEDs
LED lights are much cooler lights, and much more compact than tungsten and fluorescent lights making them a great alternative if you are looking for more portable lights. The newer LEDs have color temperature and intensity options, which puts them a little more on the pricier side of continuous lighting.
I had the chance recently to use a set of Fiilex P360EX Variable Color LED Lights at $895.00 each. These LEDs have a CRI rating of >92. At least two of these LEDs are needed for shooting individual portraits. Each light comes with a warranty and barndoors for modifying and shaping the light to your liking.

Image courtesy of the Adorama website.
The great things about using these LED lights is that they vary in light temperature depending on which way you turn the smooth rotating temperature knob, a few stops of which you can see below.

Hot. ISO 800. Shot at F/1.4 at 1/80 of a sec.

Warmer. ISO 800. Shot at F/1.4 at 1/80 of a sec.

Cooler. ISO 800. Shot at F/1.4 at 1/80 of a sec.
They offer a kit: the Fiilex K302 3-Light P360EX LED Lighting Kit for around $2,849 at Adorama, which has everything you need to get started shooting with continuous lights. The kit includes three (3) of each:
- P360EX Light heads,
- P360EX barndoors, and
- Light stands;
Plus,
- one (1) 15″x15″ Softbox with speed ring, and
- one (1) nice padded case to carry it all in.
This is a really a great deal for all that is included and the high CRI rating. After using all three types of lighting in the past, I would recommend these lights over the fluorescents and tungstens for a first (and possibly only) continuous light setup any day of the week. They are versatile in color temperature, portable (really small) and create beautiful light quality. I’m actually contemplating getting rid of my old continuous light setup and making a new investment in a set of these!
Another interesting choice for versatile LED lights is the Westcott Ice Light 2 at $499.90. This is a great handheld, wraparound, daylight and portable light with an output of 1740 lumen and a CRI rating of 96. It can mount to a light stand or tripod or be used handheld at any angle you want.

Image courtesy of the Adorama website.
You can even shoot and hold the light at the same time should you not have an assistant available. The Westcott Ice Light 2 lasts about an hour on a full charge.
Much Needed Support: Tripods
Continuous lights are invaluable pieces of equipment. They allow you to see what you are going to get as far as the end result image prior to clicking the shutter and they produce beautiful flawless light. Unfortunately, they tend to not produce enough light and often times require you to crank up your ISO and slow down your shutter speed which means you will need a tripod for a tack sharp image. It’s about time we talked about tripods now anyway…

Image courtesy of the Manfrotto website.
There’s nothing shameful or amateur about using a tripod to keep your camera stable when you take any shot whether it’s out in the field or inside a studio. All professional photographers own and use a tripod regularly. If you are shooting in a small space, a tripod can be a great tool to get that spot-on tack-sharp image every time. You can read more on tripods in an article I recently wrote on how to choose a tripod that is right for you.
Light Stands
As you begin to add expensive pieces of equipment like lights to your home studio, you’ll want to make sure you buy proper light stands to support your investment. Regardless of the type of lighting you may use now or in the future, light stands are a piece of equipment that you will want to think a little more long-term about as there are so many types, sizes and options available.

Just a fraction of my light stand collection…
Considerations for Choosing the Right Light Stands for You
There are several considerations that factor in when choosing light stands for your home studio. Some things to think about include:
What is the maximum height of the light stand? While you do not have to extend most light stands all the way to use them as you want, some combi-boom stands (like the one shown above) require at least a 10-foot ceiling height in order to turn it from a regular light stand to a boom stand to use as a hair light. In this case, the height of your ceiling might affect your choices for using certain light stands.
What is the minimum height of the light stand? If you are looking for something that sinks low to the floor to pop light on things like feet/shoes, a pet, a baby at play, etc., most regular stands have a minimum height of 2-½ to 3 feet. In this case, you would also need a floor stand (shown at the far left in the image above) to light things low to the ground.
How much weight can the light stand carry? Whether you are using a portable flash, a small LED light, a heavy tungsten light or a strobe, you will need to make sure that the light stand you put underneath that light will support it without it collapsing.
How much does the light stand weigh? If you plan to move it from your home studio to the field and back often, a steel light stand probably isn’t the best choice for you. You would want something portable and light.
All of this information is typically found on the light stand package or on the specs page of the light stand’s location on a website.
Types of Light Stands
Tripod Stands
Tripod stands can be useful for both inside the studio and outside the studio because they are lightweight and portable. However, aluminum light stands do tend to wear out a little quicker and can get bent if moved around often if you take them out of the studio and on location – especially those thin cheap stands. If you decide to save a few bucks in the beginning and go the aluminum tripod stand route, check out the Manfrotto 1004BAC 144″ Air Cushioned Aluminum Master Light Stand at Adorama for $114.99.

Image courtesy of the Adorama website.
I own a few of these due to the girth of the column and legs. Note that this is an air-cushioned light stand. This is really important as if you have a heavy light on top of your light stand and you lose your grip while lowering the light, the air cushioning will take the sting out of the light’s plummet to the next level of the stand – which could result in damage without this.
Sometimes you need a short light stands to light feet or to light a background behind a subject and while they are aluminum, I have found the Interfit Compact Light Stands which Adorama sells for $26.93 to be very convenient to have on hand.

Image courtesy of the Adorama website.
When purchasing a light stand, don’t forget sandbags!! You will need these to keep your light stand from toppling over..
C-stands
Strictly in the studio, C-stands are a great choice as, because of their weight and construction, they feel very solid and tend to last substantially longer than aluminum stands. The downside is that they do not have that air-cushioning option and you would have to be very careful using them.

Image courtesy of the Adorama website.
I just recently started the process of replacing my old Manfrotto aluminum stands and purchased an inexpensive Avenger 9.8′ Chrome Stell C-Stand 30 found at Adorama for $168.99. Some C-stands have adjustable legs for uneven flooring or for use on staircases. This can also be found in a kit form as the Avenger 9.8′ C-Stand 30 Kit with A2030D Turtle Base C-Stand, D520L Extension Arm and D200 Grip Head for $215.99. The extension arm and grip head are useful when using the stand to hold a light at a particular angle like overhead as a hair light or to hold a flag or scrim.
While I’ve mentioned a few light stands here, the right light stand(s) for you really depend on your preferences and accommodations posed in the questions I’ve included above.
Sandbags
Whatever light stand you choose, don’t forget to invest in sandbags! While the load capacity of a light stand will hold the weight of your light, it doesn’t guarantee that the gravity from the weight of your modifier hanging off of the light will not have it topple over. A good practice to have is to be sure you position your light over a leg for stability and place heavy sandbags on the legs opposite your modifier to help prevent a heavy light modifier from dragging your entire set up to the ground.

Image courtesy of the Adorama website.
An inexpensive option for sandbags, which I actually own are the Flashpoint Weight Sand Bags which you can find for $12.95 each at Adorama. Start with at least two per stand, though you may find the need for more as you continue to build your home studio.
Building Your Portfolio:
Photography Workflow and Data Asset Management
As you are beginning to build your portfolio with beautiful images in your home studio, I think now it’s a good time to start thinking about workflow and a photo editing software that you would like to include in your workflow. I say this from experience that it’s a good idea to have a good workflow in place at the start, unlike I did, because before you know it, you will have taken 26,000 images and not have any idea how to organize and edit them in an efficient streamlined fashion. I’ve recently written a great article on Photography Workflow and Data Asset Management on ALC here.
I think this is a good point to break away and allow you to take time to digest some of these next steps in building your home studio project. Continuous lights are not only the best first step in studio lighting because they teach you how to position your lights for your intended vision but they also produce beautiful light with flawless results on your portrait subjects. As we begin discussing light types going forward, regardless of the type of light you decide to add to your gear portfolio, you will need a good quality light stand to support your investment. No matter if you are going with continuous lights or for any use in photography, tripods can be key in getting a tack-sharp image and I’ve provided you with more information on those here. Lastly, whether you are in the studio or on location, as you are building your portfolio, you need to have a good workflow in place – which includes the use of a way of organizing and backing up your images as well as a preferred photo editing software program – that will get you from capture to distribution.
While the choices in this article are just a few suggestions. I encourage you question yourself about your purposes and needs for what you want to accomplish with your home studio and then read up more on specific continuous lights. Rent them. Try them out first and then make a decision.
Until next time…
_____
Dawn M. Wayand is owner and photographer for Dawn M. Wayand Photography. She also owns and runs NYC Digital Photography Workshops, a successful 5-instructor, 3,500 member photography group in NYC. Since inception in 2011, NYCDPW has been geared toward helping photographers of all levels find their own unique style and hone their craft through various group and private workshops.


