Capture One is a professional photo editor used by many photographers and photo editing agencies. It’s a complex software that requires learning and practice, but it is hard to settle with less once you get to know it.
Capture One has impressive editing tools that give you complete control over the editing process, high color accuracy, and extreme versatility. It may be the only photo editor you need if you learn to use it properly. Check out the following tips to use Capture One features at full power and create an efficient workflow.
Customize the interface as you like
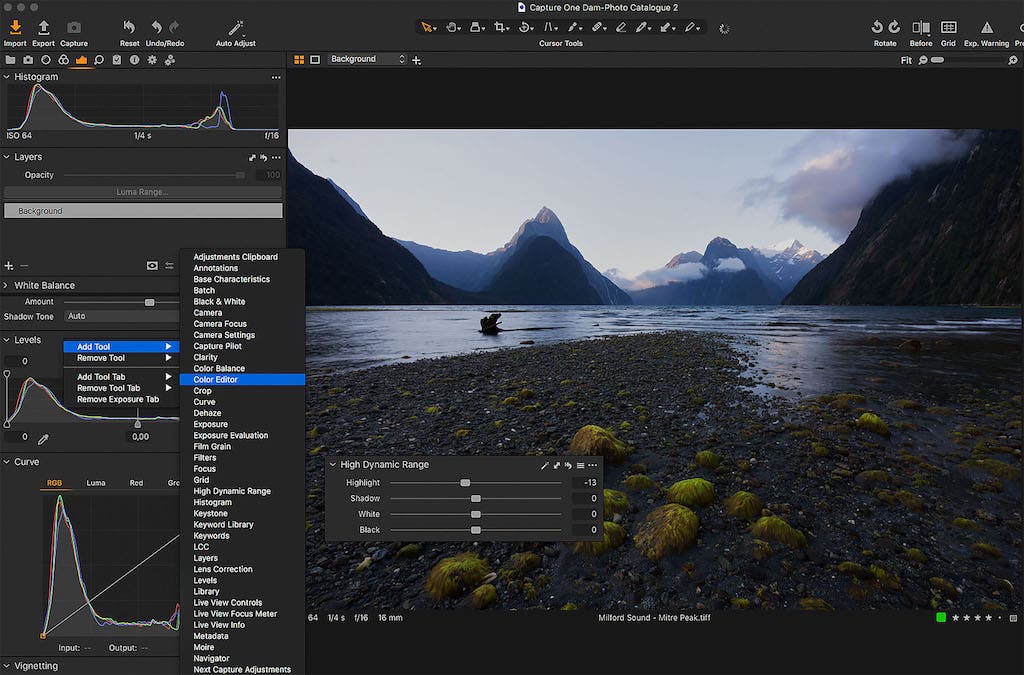
Capture One takes interface customization to a new level. It allows you to match the interface with your requirements and level of expertise. For example, you can open panels with the tools you need even if they have similar functionality (e.g., Curves, Level, and Color Balance); add tools to panels; scale and place panels anywhere you like; and customize the shortcuts. Also, Capture One allows you to dock or float the panels.
Although, you can go even further with interface customization. Capture One allows you to save a particular interface configuration for later use under the name Workspace. For example, you can have a dedicated workspace to edit macro photographs, travel photos, and general editing. You can also use the default workspace, which is very well organized. Its panels lead you through the major editing steps from left to right (e.g., browsing through your collection of photos to lens correction, adjustments, metadata, and exporting).
Tethered shooting
Tethered shooting allows you to connect the camera to the photo editor and preview the result of your shooting in real-time. Capture One has one of the most advanced tethered shooting functionality you can find on the market, and it would be a pity not to use it. The editor lets you control the camera, including settings such as aperture, shutter speed, ISO, exposure compensation, flash, and metering. In addition, Capture One’s tethered shooting provides Live View and remote focus control (for some cameras), which means you can preview the image on a large monitor before you take it and make sure the focus is where you want it.
You can also create templates for each photo session and save the photos automatically in folders. Using Capture One, you can overlay a style over the photo you take and see the result in Live View. This is excellent when you want to share a glimpse of the final result with your client on the set. While tethered shooting is often used in studios, you can also use it for outdoor commercial photography. All you need is a stationary set up with a tripod table and a laptop.
Export an image in multiple file formats
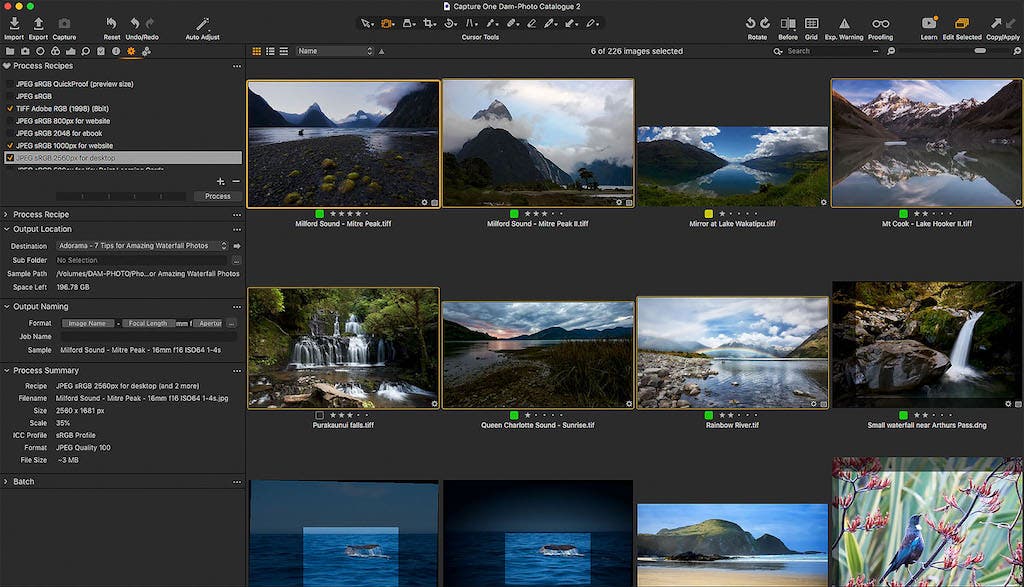
Another functionality that proved to be very useful is the customizable export. You usually need a photo in multiple file formats and sizes. For example, you may want a high-quality print and a low resolution for social media. Or you may want an optimized JPEG file to publish on your website and a full-size JPEG file to keep in your portfolio. Capture One allows you to define process recipes and export the same image in multiple configurations at once. A process recipe includes settings for file names and output folders, file format, size, the styles you want to apply at export, and even the level of sharpening.
Capture One’s export options speed up your workflow considerably and allow you to create an efficient editing routine.
Cull images with Focus Mask
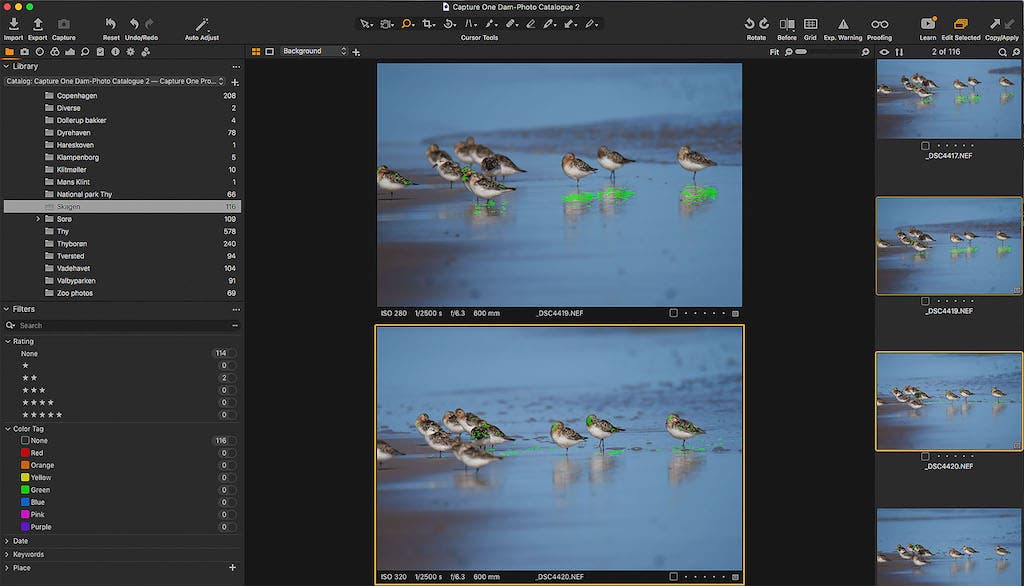
Focus Mask is a tool that shows you the area in focus by masking it. It’s useful when working tethered but also when you cull your photos. Especially for similar photos with a very shallow depth of field, it’s challenging to see if you nailed the focus or not. So instead of zooming in and examining each photo individually, you can use the Focus Mask and make the culling process easier and faster.
Explore Capture One’s color tools
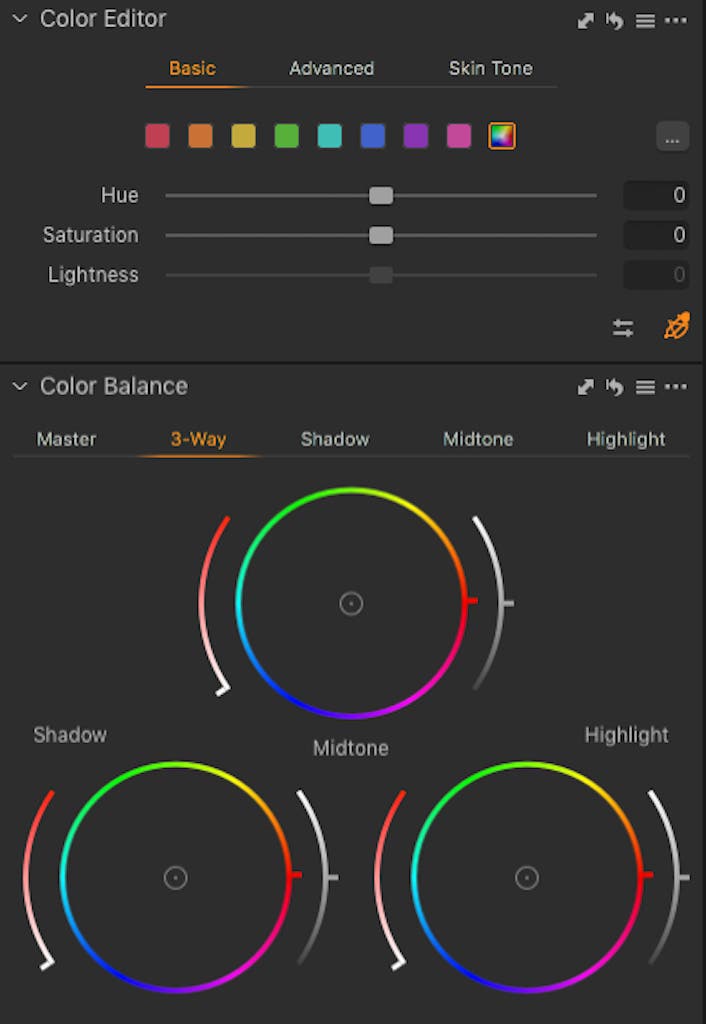
Capture One’s Color Editor is available in three modes (Basic, Advanced, and Skin Tone) and allows you to adjust individual colors, a range of colors, all colors but one, or all the colors. It enables you to enhance specific colors, replace one color with another, correct color cast, or blend targeted colors for natural-looking results. Portrait photographers will be happy with the Skin Tone tool, a dedicated feature for enhancing skin tones, removing spots, and correcting color imperfections.
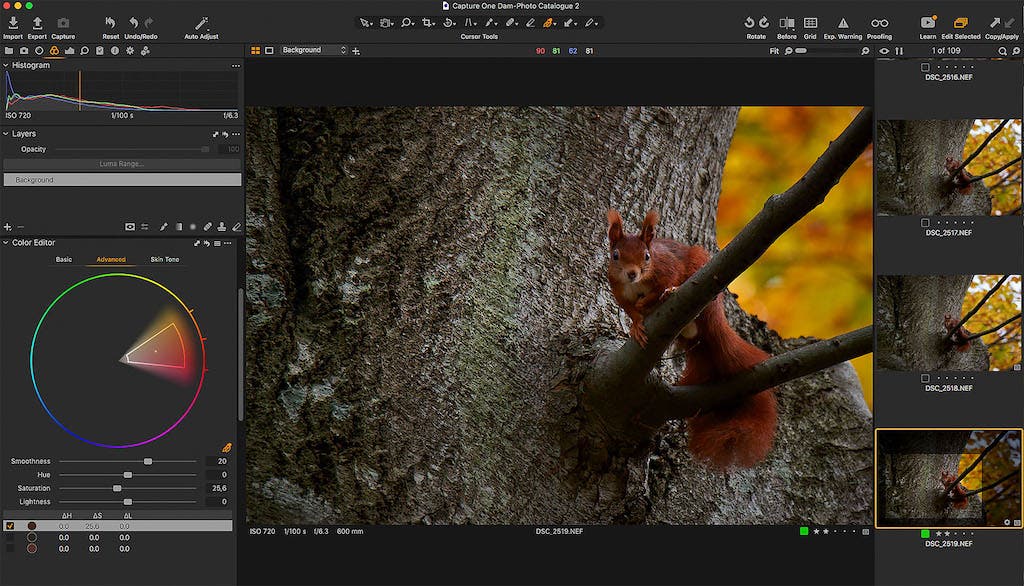
You can adjust the hue, saturation, and lightness of each color. Furthermore, color edits may be saved as presets or styles. Additionally, you can use color tools to create a mask based on the selected colors. This allows you to add sharpening to a specific color range if you want. All these color tools help you make subtle adjustments and achieve natural-looking images. At the same time, they are very versatile and provide endless possibilities to edit your photos.
The Color Editor is also great for color grading because it allows you to adjust shadows, highlights, and midtones colors individually. It may take some time to master Capture One’s color wheels, but it is worth it.
Take advantage of clarity modes
For a landscape and nature photographer, clarity is a must. Capture One provides four ways to enhance clarity, and none of them affects the colors. Instead, Capture One’s Clarity modes enhance the contrast to the luma range. The four methods for increasing clarity and adjusting local contrast are Natural, Punch, Neutral, and Classic. To each of them, you get to control Clarity and Structure. Clarity affects the difference in contrast of larger-scale areas (e.g., use it for reducing haze), while Structure affects smaller-scale areas (e.g., use it for foliage, fabric texture, grass).

If you’re a beginner, start with the Natural method because it’s the most general and works well for all types of photos. The Classic method works best for portraits, while Neutral is fantastic for architecture and commercial photography. Finally, the Punch method is similar to Neutral but more dramatic and powerful, as the name says.
Stack styles and presets
When you’re on a schedule and have hundreds of photos to edit, you want to use styles and presets but still maintain a flexible workflow and control. The beauty of Capture One is the possibility to stack styles and presets as separate layers and optimize your workflow. You cannot do this in other popular apps like Lightroom. Make sure you choose styles and presets that address different aspects of the images. Otherwise, they will cancel each other.
For example, you can create individual presets for edits you often use, such as Exposure, Clarity, Curves, or High Dynamic Range. You can even create multiple presets for the same actions with slightly different parameters, then enable the stacking option and apply the presets your photo needs.
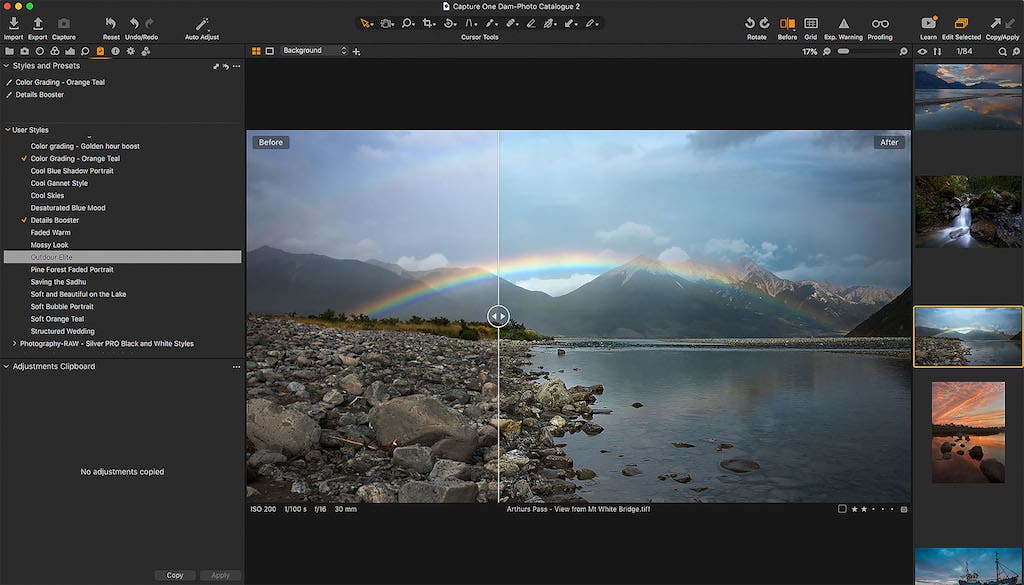
As styles have settings from multiple tools, there is a greater risk that stacking styles influence each other. Yet, stacking opens endless editing possibilities. For example, styles are applied to layers so you can control opacity, blending modes, and masks. You’ll never run out of creative ideas.
Publish directly to your portfolio
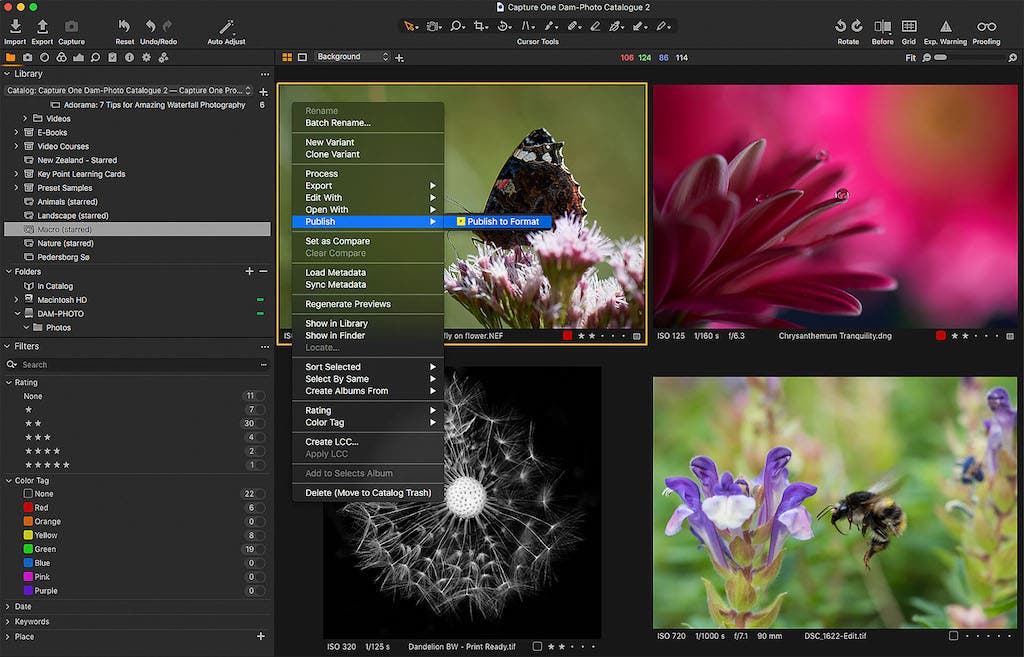
When you are finished editing, you will want to publish your best photos in your portfolio as easily as possible. Currently, Format is the only portfolio provider that has created a native Capture One plugin for uploading photos directly from Capture One to your Format portfolio. After installing the plugin in Capture One, the upload process is straightforward. To upload your photo to the portfolio, you simply have to right-click on the image and choose Publish > Format. Although you can edit some export settings, all you need is to make sure that you upload to the correct gallery in your online portfolio.
Concluding words
Mastering a photo editor such as Capture One is challenging and can take some time. Although, if you want to invest in editing your photos, this editor provides everything you need and more. It allows you to personalize the workflow, speed up the process when needed, and take your time with manual controls to fine-tune your photos. It’s a powerful RAW processor and delivers high color accuracy and natural-looking photos. Capture One works very well for all types of photography. Get the most out of it and improve your editing routine today.
