

As photographers, we’re always looking for creative new ways to capture the world around us. Sometimes, however, we fall into a funk and hit the photographer’s version of writer’s block. That’s why it helps to build up a bag of tricks you can turn to whenever you need to kickstart a creative streak. One of my favorite creative tools to use for this purpose is a prism. That’s right. Just like the ones you used in science class back in school. Prism photography provides an affordable, (mostly) easy-to-use means to get creative with your photos. Prisms can be used to conceal unwanted objects or create reflections, flares, and more to add visual interest in portraits captured with DSLR or mirrorless cameras, as well as phones. As a result, prisms make for great creative tools for portrait, landscape, and other genres of photography.
What Is a Prism?
You may already be familiar with prisms in general and how they work. Just in case, however, we’ll quickly talk about what a prism is and why it makes such a great creative tool for photography.
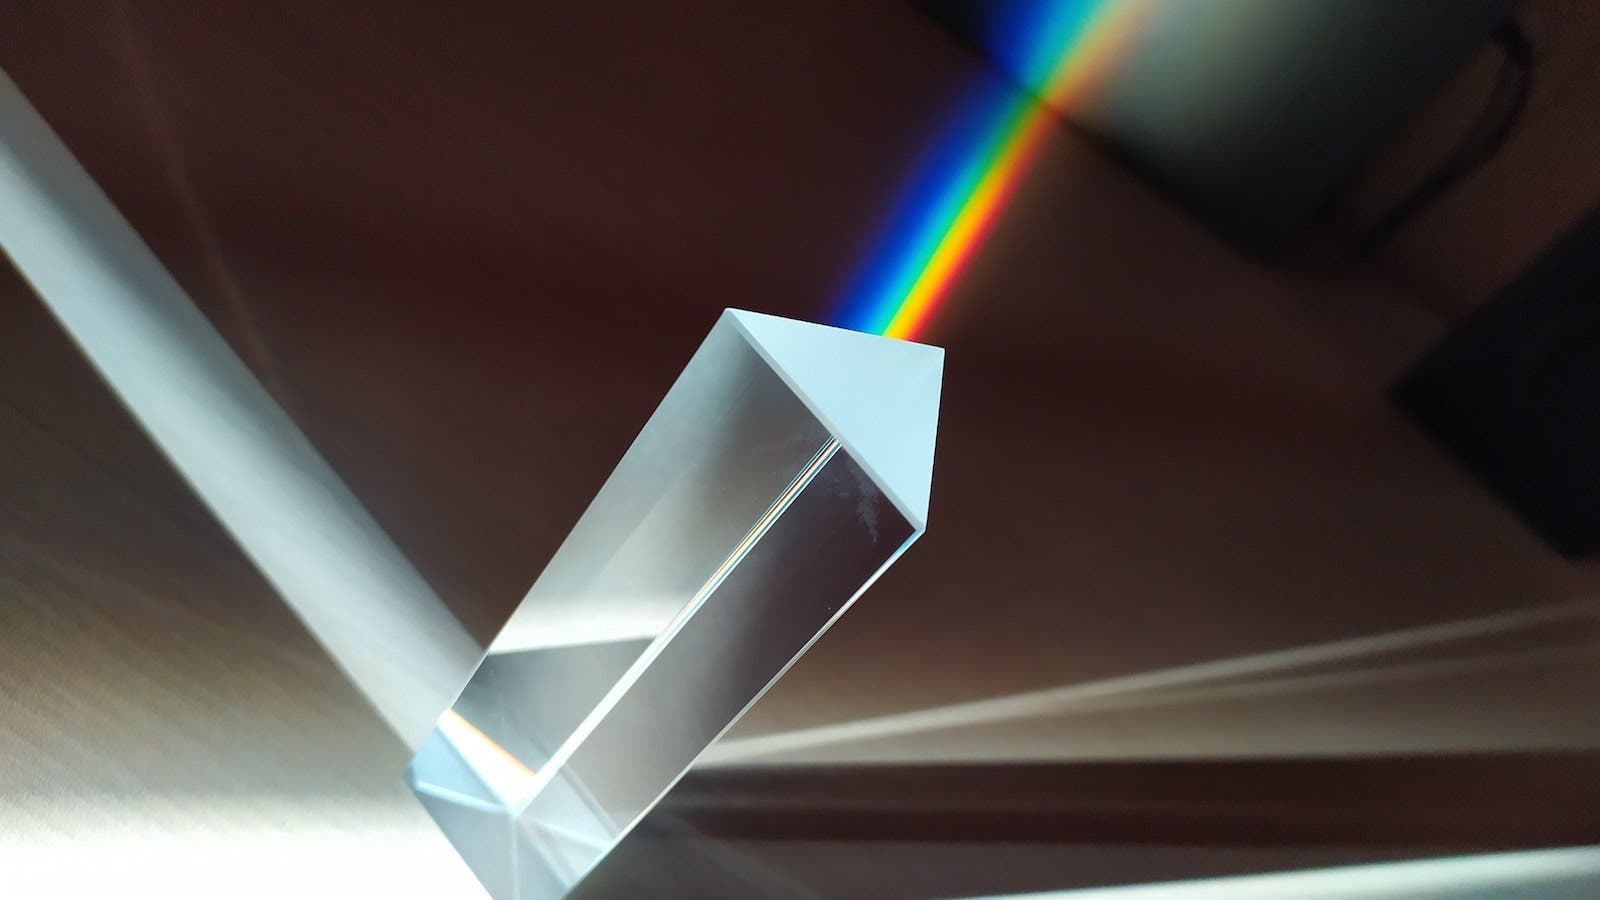
A prism, by definition, is a glass or other transparent object that is triangular with refracting surfaces at an acute angle with each other and that separates white light into a spectrum of colors. When we use prisms in photography (and elsewhere), we’re dealing with refraction. Refraction refers to light passing from one medium and into another, affecting the speed and direction of the light. When light passes through a prism, for example, the various wavelengths of white light refract at different angles, causing a rainbow effect. Ever see the cover of Pink Floyd’s Dark Side of the Moon album? That’s a graphic example of the refraction! As I mentioned above, the effects of the light passing through the prism and into our lenses leads to interesting reflections, flares, colorful streaks, and more. Although refraction occurs through transparent objects that are plastic, you’ll get the best results when using glass.
That said, here are 8 prism photography tips and ideas you can use to add an extra flash of creativity to your next shoot.
8 Prism Photography Tips and Ideas
- Choose Your Prism
- How to Handle a Prism
- Shoot at a Wide Aperture
- Conceal Distracting or Unwanted Elements
- Add Rainbow-Colored Lens Flare
- Multiply Interesting Elements in a Scene
- Create a Kaleidoscope Effect with Your Smartphone Camera
- Get Abstract with a Full-Size Kaleidoscope Lens and/or Fractal Filters
Prism Photography Tip #1: Choose Your Prism
Once you decide to give prisming a try, you’ll need to choose which type of prism to buy. Most of the prisms you have to choose from work in similar fashion to one another and produce effects like rainbow streaks, reflections, and so on. However, some are easier to work with than others and provide a wider variety of effects overall. I’ll include a short list of go-to options below and then expand on the prism I’d recommend getting first.
Prism Photography Options
- Long 6-Inch Triangular Prism (Recommended)
- Pros: Easy to Use
- Cons: Heavy Weight
- Note: Triangular prisms are available in various sizes and can be purchased in kits
- Large Prism
- Pros: Large Size, Great Bokeh Effects & Reflections
- Cons: Heavy weight
- Double Convex Lens
- Pros: Affordable
- Cons: Hard to Control
- Kaleidoscope Prism Lens
- Pros: Semi-Affordable
- Cons: Singular Effect
Of course, there are others, but this should help get you started. The reason I recommend starting with the 6-inch triangular prism is that it delivers multiple effects and is relatively easy to use and convenient to carry. I noted that it is heavy, but it is manageable. I use it often in wedding photography and general portraiture.
Bonus Tip: Whichever prism you opt for, be sure to keep it clean to avoid creating smudges. These can translate into unwanted soft spots in the focused areas of the image.
Tip #2: How to Handle a Prism
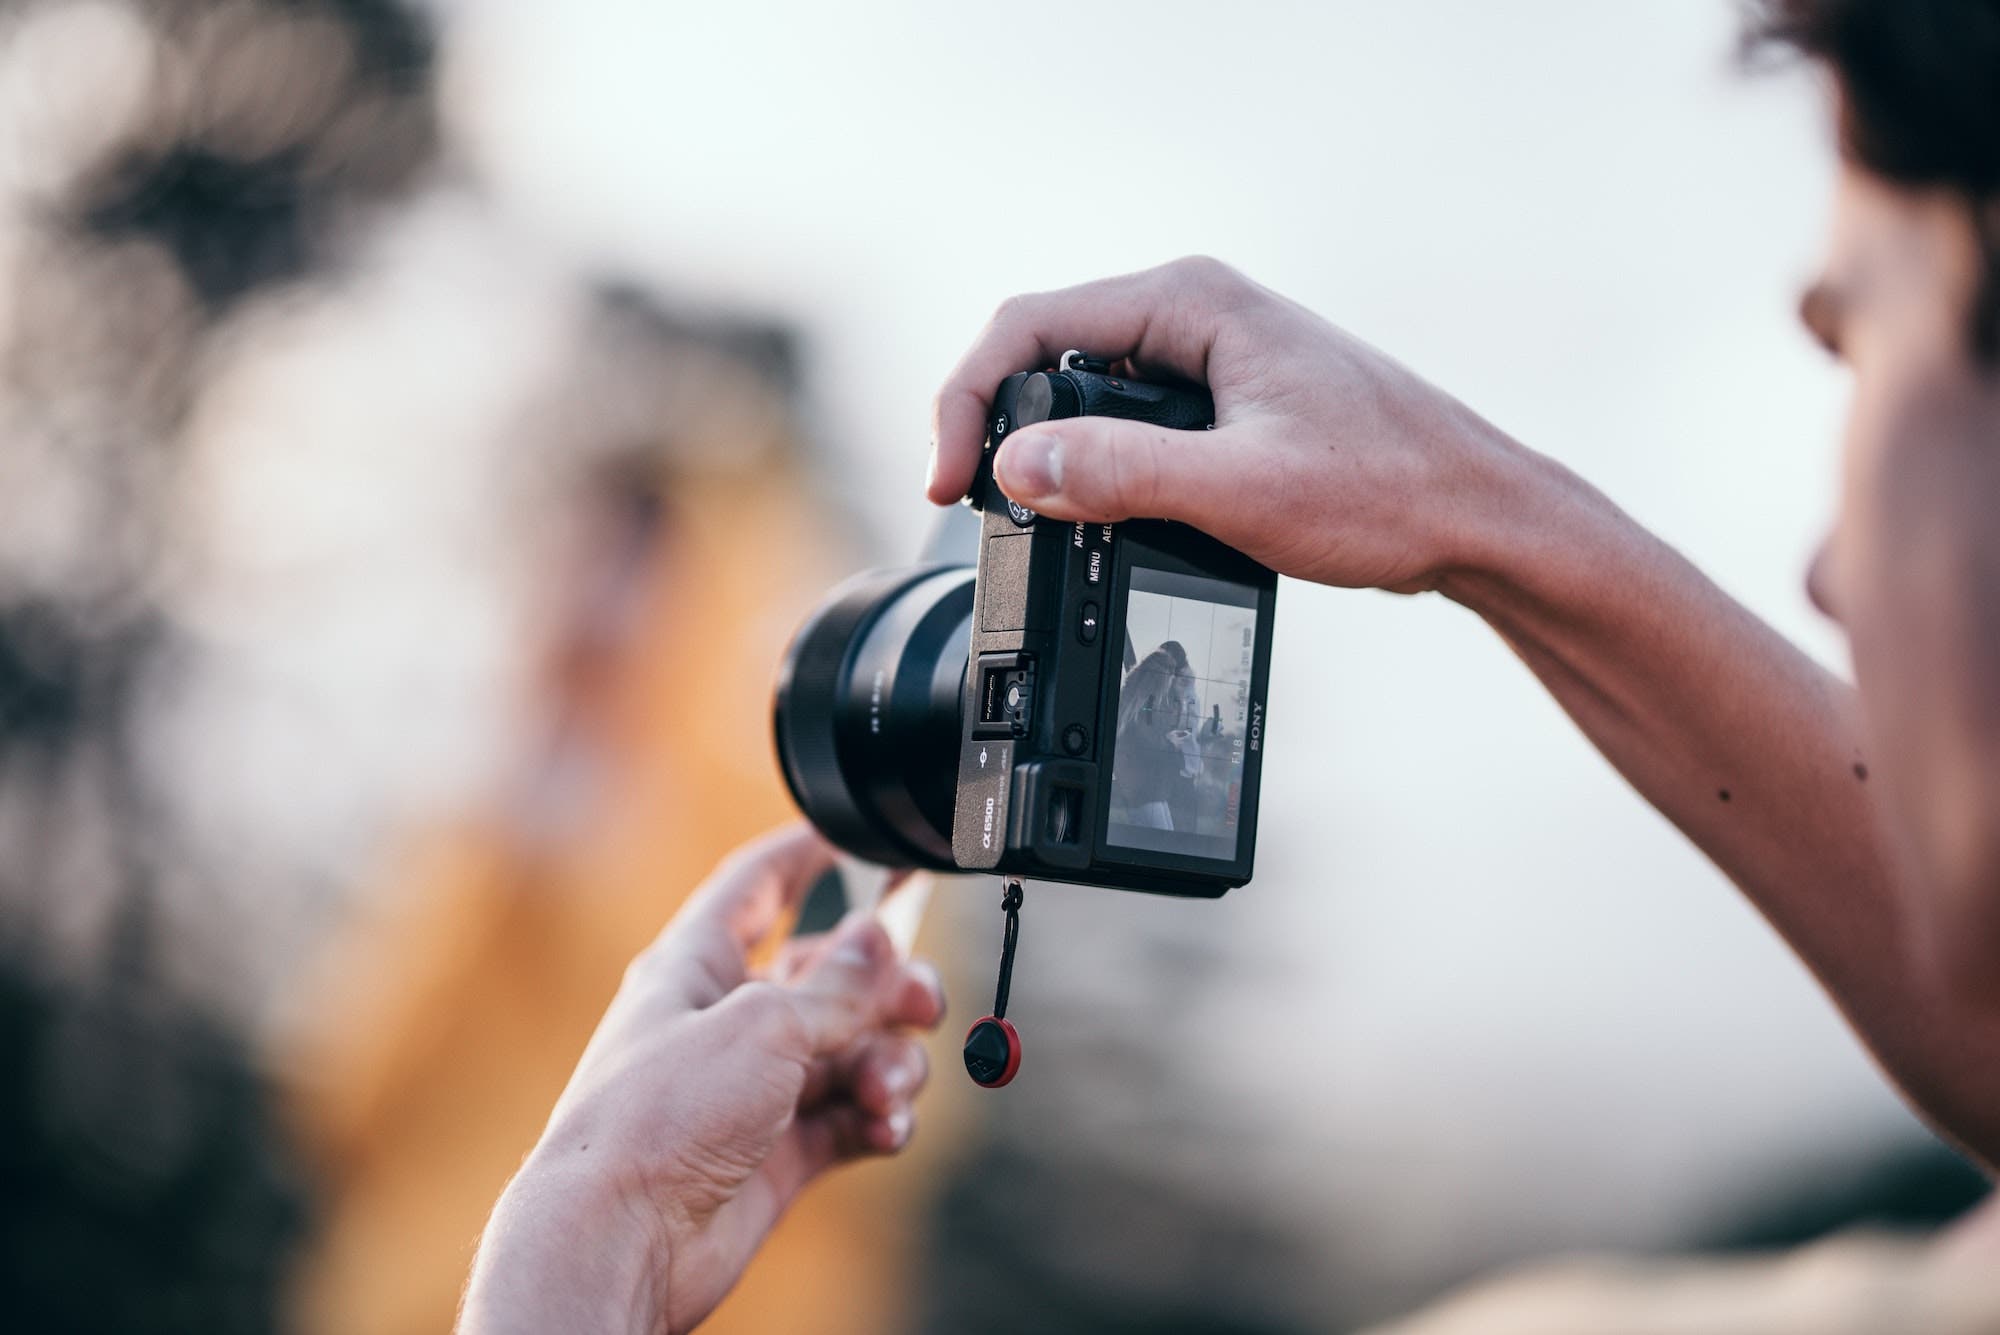
Before using a prism to capture photos, be sure to remove the camera lens hood. Next, hold the prism in front of the lens, either on the side or in the middle (depending on your focal length), and angle the prism against your lens toward a light source. Then, shift the angles of the prism to control the effects until you get the look you’re after. While working through this process, experiment with small movements, and use live view if possible. Also, be sure to frame your subject so that they are visible and not hidden behind the reflections or lost in the light streaks.
Prism Photography Tip #3: Shoot at a Wide Aperture

I recommend shooting with a wide aperture for a smoother transition between the prism and the rest of the frame. The soft transition helps create a dreamier, more surreal effect in the final image. I’ve also found that using a 50mm or 85mm focal length typically renders the best results. If you shoot wider than this, you risk revealing the prism in the shot (rather than just capturing its effect). If you have one of these prime lenses, then you can knock out both of these recommendations in one shot. Finally, be aware that you may need to use manual focus in the event your lens struggles to lock focus with a prism in front (or on the side) of it.
Tip #4: Conceal Distracting or Unwanted Elements

This tip relies more heavily on the reflective qualities of prism photography for the purpose of concealment. I’ve used the surface of my cellphone to do this as well, but a prism works great for adding visual interest while also obscuring unwanted elements in the scene. Simply hold the prism up to the lens on the side of the frame you want to conceal and adjust the angle until you’re satisfied with the results.
Tip #5: Multiply Interesting Elements in a Scene

We’ve already discussed how to use a prism to conceal unwanted elements in a frame. This time around, we’re going to use a similar technique to enhance already existing interesting elements. That’s not to say the obscured elements in the frame are unsightly, but rather that we want to focus more on the exceptional elements. Watch this video on Adorama TV to see how I used a candle holder from a craft store to create a prism effect with LED lights in the image above.

For more inspiration, check out this article on the Adorama blog to see how Kei Kinoshita used a prism to create the amazing image above.
Prism Photography Tip #6: Add Rainbow-Colored Lens Flare
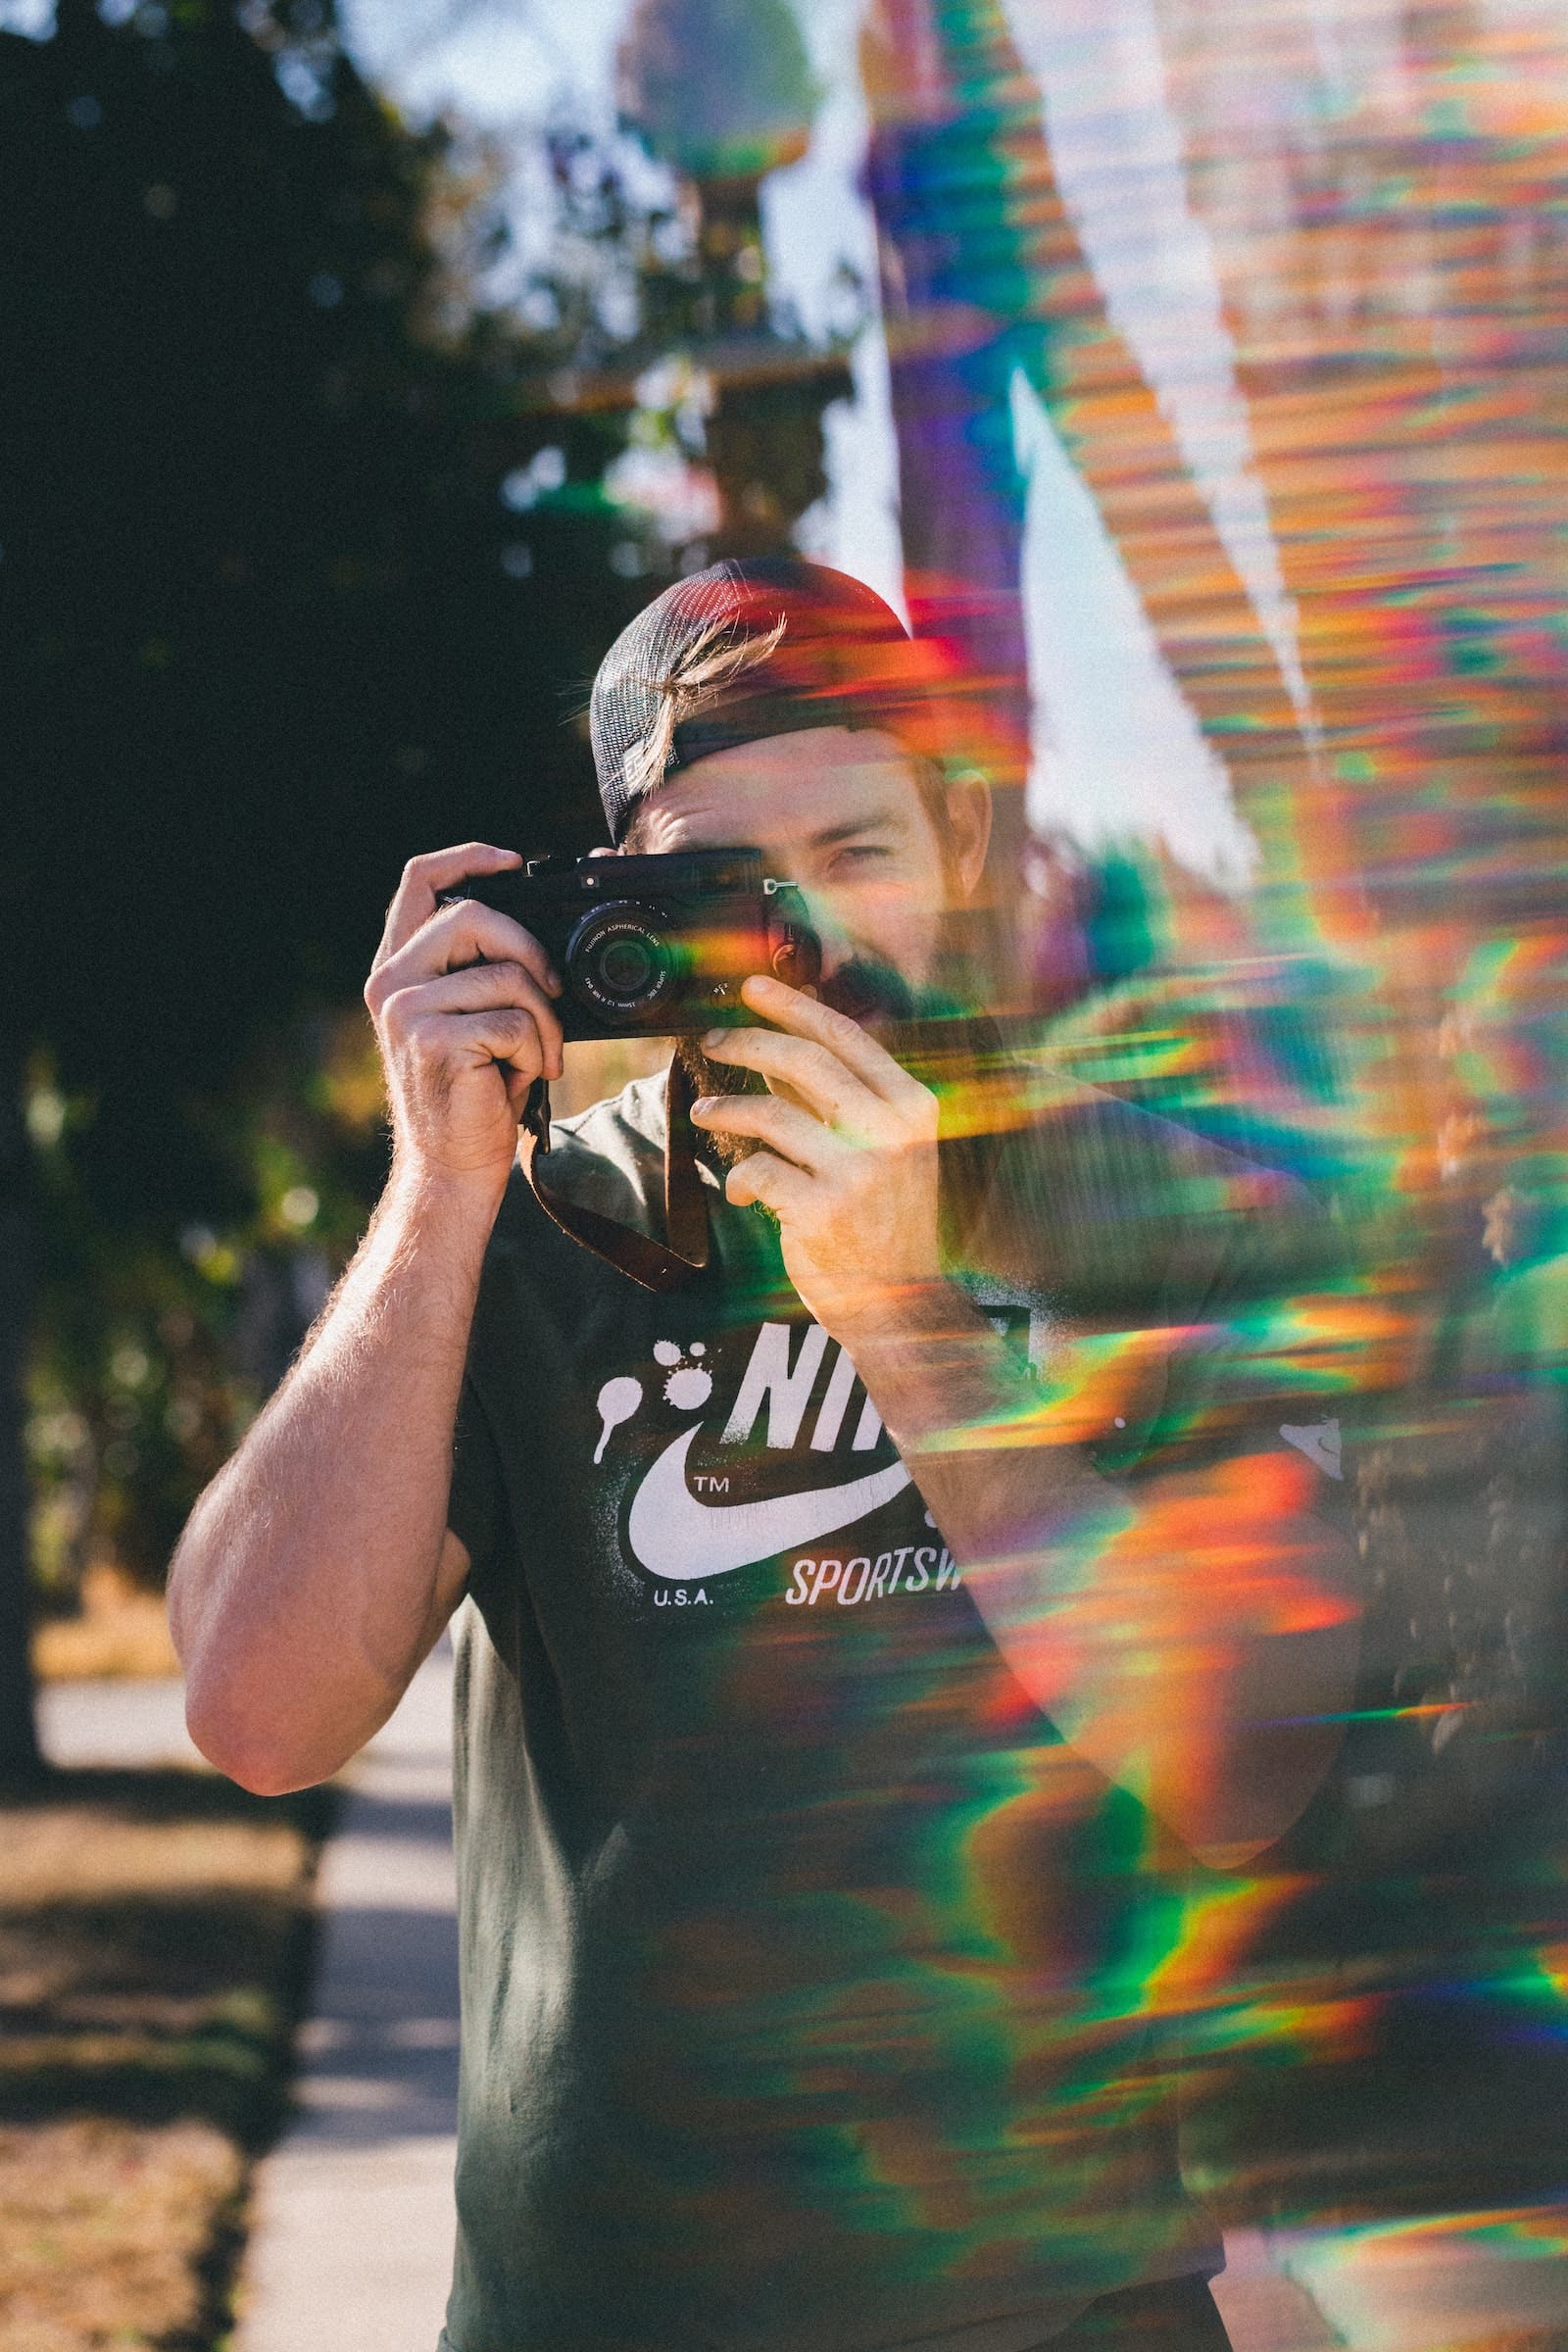
You do this one of two ways, really. The first method involves placing the prism in front of your lens and rotating it until you’re able to capture colorful streaks in-camera. It helps to use live view whenever possible to more easily see your results in real time.

The second method will find you holding the prism away from your lens and placing it between the light source and your subject. The prism will serve as a sort of GOBO and cast colorful lights on your subject. It’s another way to add off-camera lighting effects to your portraiture, albeit a slightly unpredictable one. The light source can be natural or artificial. The important part is getting the angle of the prism just right. Expect to work through some trial and error before you get it right.
Prism Photography Tip #7: Create a Kaleidoscope Effect with Your Smartphone Camera
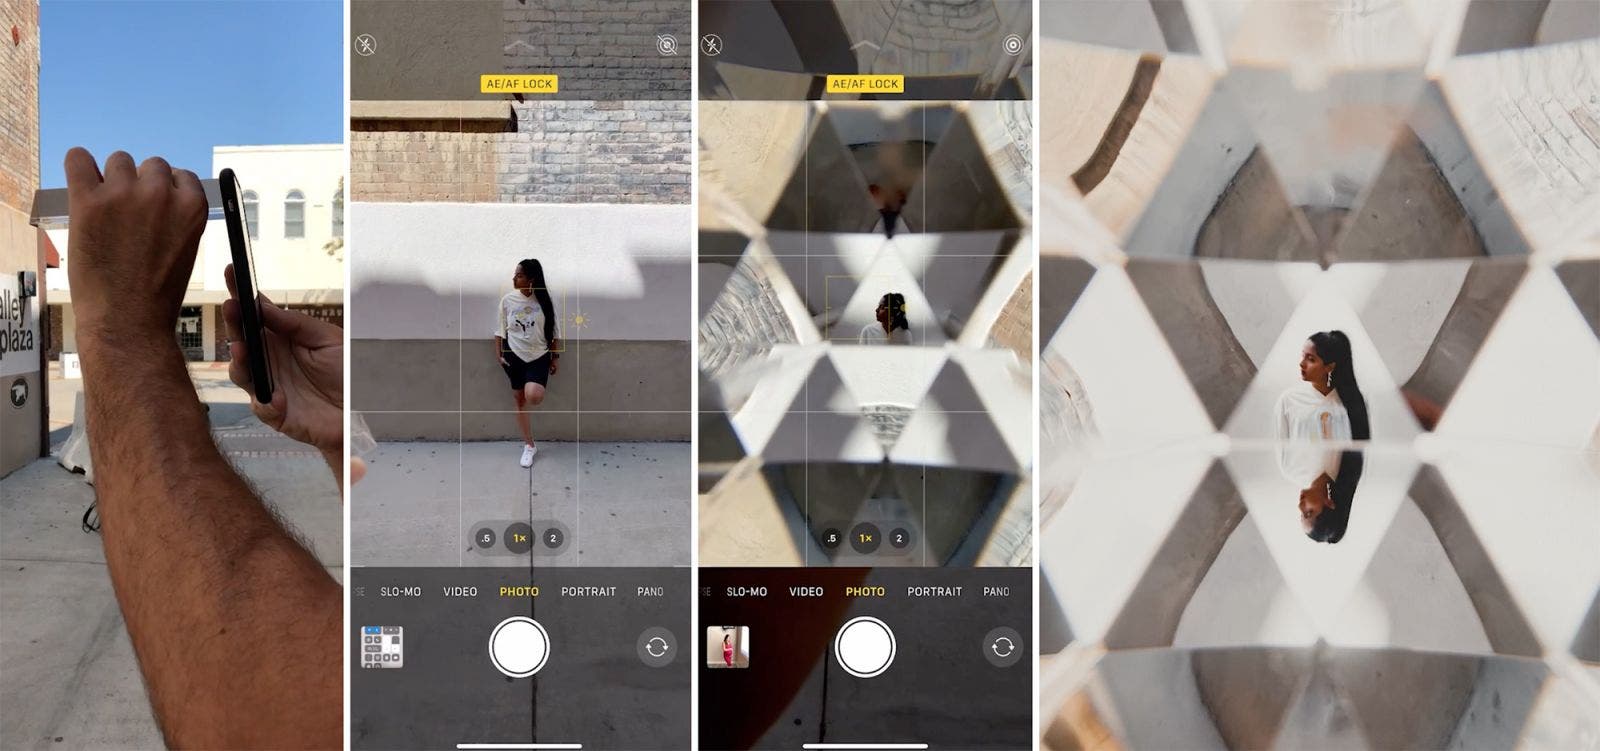
You’ll need a phone for this specific technique when using a triangular prism, like the one I recommended. Start by locking focus and exposure on your subject (press the screen over your subject until you see the AE/AF Lock). Next, place the prism directly in front of the phone camera and fully cover the lens to create the kaleidoscope effect (see the image above). It’s important to fully cover the lens, which is why you need a phone camera. The prism won’t fully cover the lenses on DSLR or mirrorless cameras.
If you want to achieve similar (yet not exactly the same) results using a standard camera, our next tip has you (and your lens) covered.
Tip #8: Get Abstract with a Full-Size Kaleidoscope Lens and/or Fractal Filters

Although I recommended the long triangular prism at the top, I also like to use other types of prisms for creative effects. One in particular, the fractal (or kaleidoscope) filter, works especially well for creating unique patterns in the frame. These patterns combine to create abstract art, right in your camera. The only real drawback here is that you can only really get one look out of this filter. If you take some time to play around with it, however, who knows what you might come up with.
Conclusion
I hope you enjoyed these 8 prism photography tips and ideas. If you’re new to “prisming,” I recommend that you start with one type of prism and play with it for a while. Experiment to see how you can use it to add a creative touch to your portraits. When you feel you’ve maxed out that particular prism, explore some other options. Adding a prism to your bag of creative tools will allow you to push your creativity and get some unique shots. When you’re ready, you can find more photography accessories to boost your creativity here.