If you want to become a better landscape photographer, you must understand and know how to utilize camera lens filters. Filters are designed to go in front of the lens to help create many different effects. Most essential camera filters create effects that cannot be replicated easily in post processing, so adding a few filters to your kit is essential to achieving those ultimate landscape shots.
As a landscape photographer, I personally have four types of camera lens filters that are always in my kit. These are the varieties you should always have in your bag, no matter what location you’re photographing.
Circular Polarizer Filter
Hoya 55mm HD3 Circular Polarizer Filter
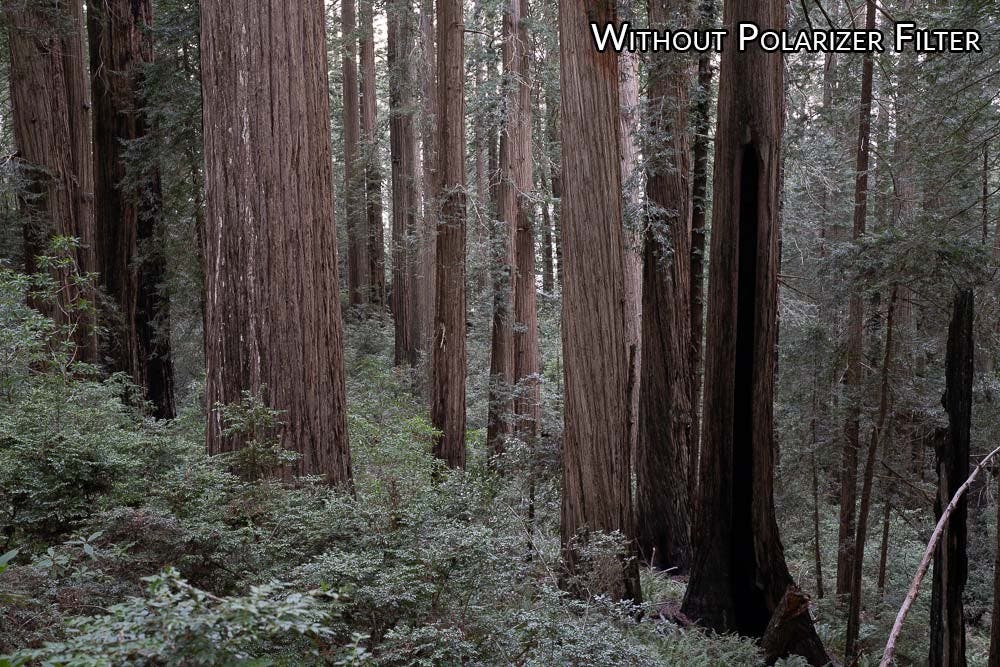
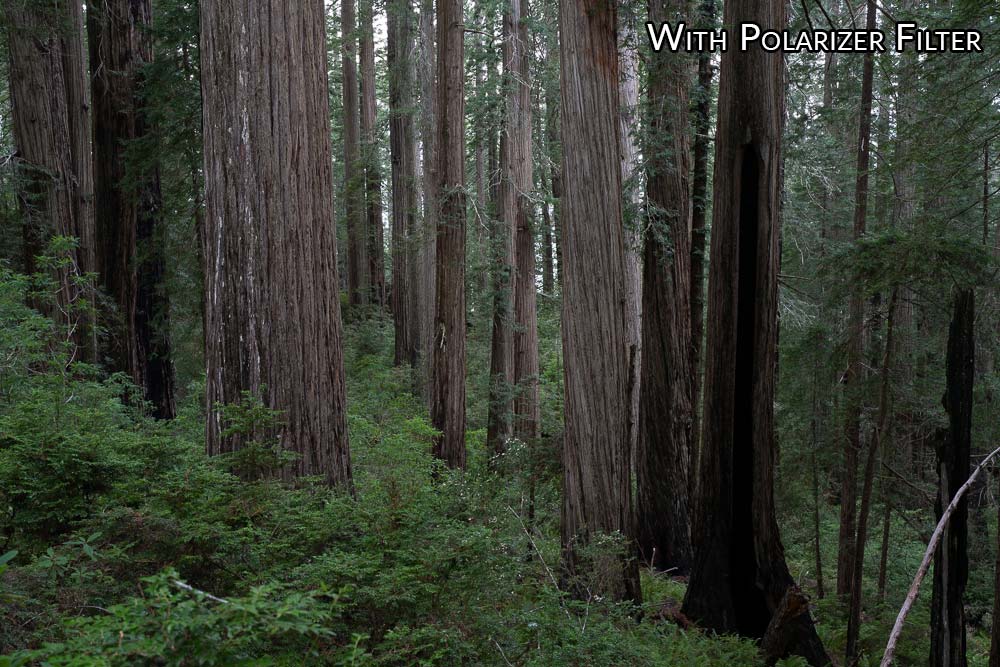
A circular polarizer is a landscape photographer’s best friend. This filter removes glare from things like water, foliage, windows, roads, and more. It helps colors pop and allows you to see through glare to the details of your scene. I use a polarizer on nearly all of my photos.
A circular polarizer allows you to dial in the amount of polarization on each of your photos. Once it is on the front of your lens, you are able to spin the front of the filter, which dials in the polarization.
My polarizer of choice is the Hoya HD3 Circular Polarizer. I’ve used many different polarizers and found Hoya’s HD3 to be the most neutral. Hoya’s HD3 is also incredibly thin, making it a great choice to put on wide angle lenses to avoid vignetting.
Ultraviolet (UV) Filter
Hoya 77mm HD3 UV Filter
UV filters don’t have much effect on your photo, but I have them on all of my lenses for their protective value. When you drop the lens, the filter captures most of the impact, and it can also weather sand, freezing temperatures, and rain.
Another perk to using a UV filter is that they’re generally much easier to clean. Many lenses have dome-shaped glass, which can be very difficult to clean, especially when out in the field. A UV filter provides a flat surface on the front, and many are treated with a special coating to allow them to be more easily cleaned.
I use the Hoya HD3 UV Filter. The HD3 UV is my filter of choice because you’d never know it’s there when reviewing your images. Some UV filters reduce the quality of your images, but the HD3 has been engineered to not lose any resolution or negatively effect the image.
Neutral Density (ND) Filter
NiSi ND16 4-Stop Filter
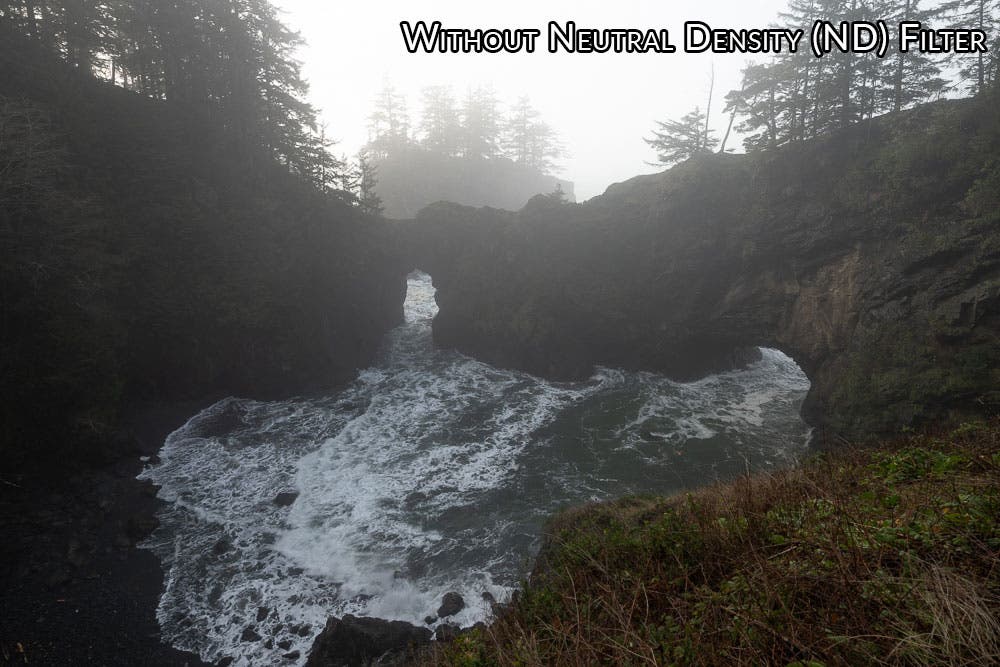
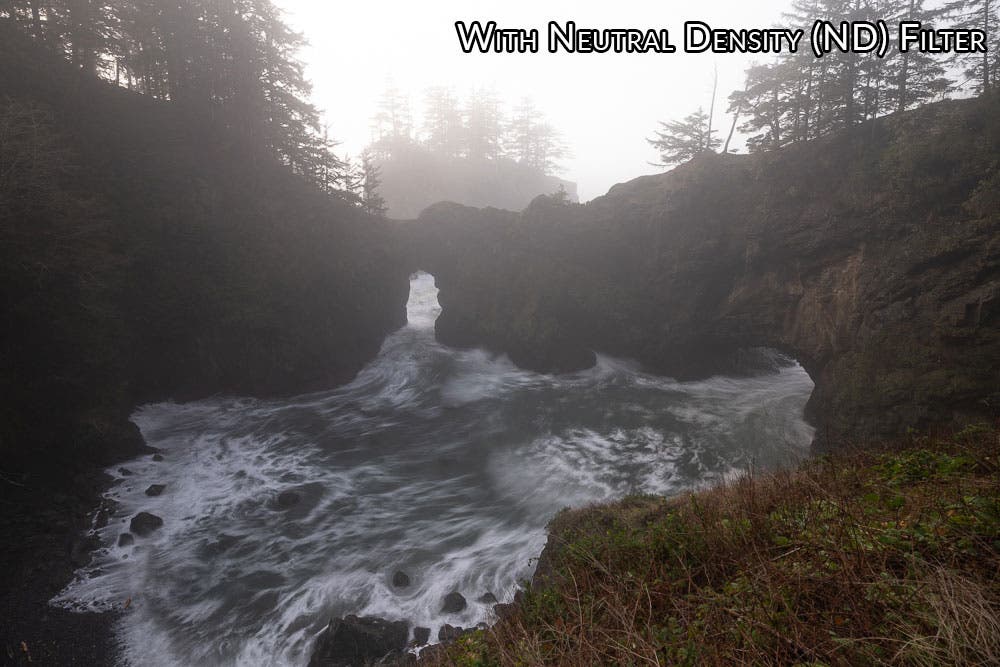
Neutral density (ND) filters are like sunglasses for your lens. These filters add a dark layer in front of the lens, which can allow you to shoot longer exposures and/or open up your aperture in the brightest conditions. For landscape photographers, these filters are great when you want to shoot long exposures during the daytime. Long exposures can look great for moving fog, clouds, or even water.
ND filters are categorized by their strength. The higher the number, the darker the filter. I get the most use out of my ND3 and ND10 filters. When I want an exposure that is just a couple seconds long, I use my ND3. When I am looking to expose a scene for 30+ seconds, I’ll switch and use the ND10. Using these filters, I’m able to smooth water or clouds moving through my scene.
I own the 3-stop, 6-stop, and 10-stop versions, but I find myself using the 3 and 10-stop versions the most. I love using this filter for shooting long exposures of waterfalls or fast-moving clouds.
Graduated Neutral Density (GND) Filter
Tiffen 77mm Digital HT Color Graduated ND .6 (4x) Glass Filter
Graduated neutral density (GND) filters are similar to regular neutral density filters, except that they gradually go from light to dark. GND filters come in handy when you’re shooting a scene with a lot of dynamic range, such as a sunset where you’re shooting into the sun. The darker part of the filter would go in the sky, which darkens just the top part of your frame (where it would be brighter), allowing you to increase the exposure. Graduated neutral density filters allow photographers to capture more dynamic range in their photos.
Camera lens filters are crucial to the success of landscape photographers. Don’t make the mistake of spending thousands on a camera and lenses, and then overlook filters. When purchasing filters, be sure to purchase the correct size to fit on the front of your lens.
Feature photo by Austin James Jackson
