Flash-lit flower close-up photography can be beautiful if you have the technique; now let’s look at the gear you’ll need to pull this off.
Previously, we wrote about the kinds of creative flower close-up and macro photography that’s made possible with the use of electronic flash. Now in this exclusive article for the Adorama Learning Center, let’s look at the gear itself, based on three lighting techniques. All products described in this story are available at Adorama.

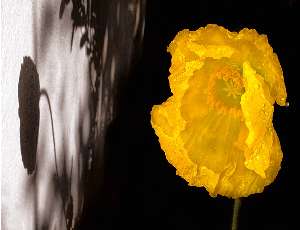
Magnolia marvel: I wanted to darken the background so this magnificent magnolia at Central Park’s Conservatory Garden would really stand out. I added light using a single flash off the camera placed above and to the right of the flower and reduced the power by 2 f/stops. Nikon D200, Nikkor 105mm f/2.8 ED-IF AF-S micro lens, which is available at Adorama, and the Nikon SB-24 speedlight, which you may find at the Adorama Used department.
1. Single off-camera flash: At the very least, you should have a single flash unit that can be fired off the camera. That will give you a light source that you can direct as you wish – for sidelight, backlight, overhead, or frontal fill light. Controlling the direction of the light lets you simulate the effects of natural light, and either enhance or counteract the natural light you are working with. Of course, a single off-camera flash unit also can be used to stop motion or achieve the rear curtain effect for capturing motion.
Almost none of these effects are possible with the built-in pop-up flash that your camera may have. The best you can do with your in-camera flash is add some fill light when you have no other option.
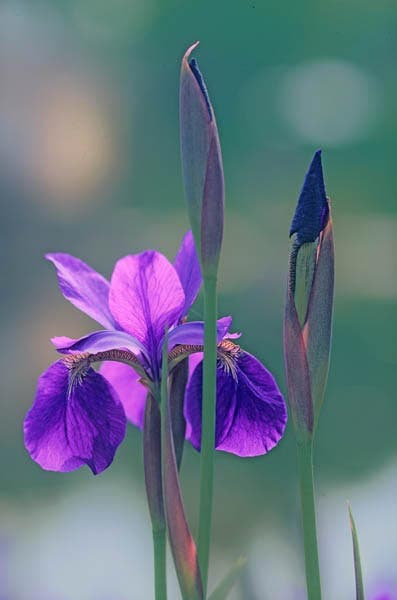
Single-Flash Iris:For this iris at the Dallas Arboretum, I needed to add light to get detail in the front of the backlit flower. My solution was to use a single flash with a diffuser for just enough soft fill light to get the detail I wanted and still retain the backlit effect and the muted background colors. Nikon F4 (look for the Nikon F4 in the Adorama Used Nikon DSLR dept.), Nikon 200mm f/4D ED-IF AF Micro Telephoto Nikkor, Available at Adorama, Nikon SB800 Speedlight, and Nikon diffuser, which you may find at the Adorama Used department.
If you’re in the market for a new flash unit, avoid getting a large, powerful flash since that will overwhelm any flowers you’re likely to shoot. Instead, opt for a small unit that doesn’t pump out a lot of light. I also don’t recommend a ring flash for flower photography. It produces a harsh light and offers no directional flexibility since it’s screwed onto the front of your lens. However, if you have one, it can be useful for fill light, especially to counterbalance strong backlight behind your floral subject.
Make sure the flash unit has a TTL (through the lens) setting so it can synchronize with the meter built into your camera. Some units require a power cord, others are wireless. I use a cord so I don’t have to program the flash unit all the time. I use the Nikon SB800 because it lets me control the light output in any way I want. However, there are less expensive flash units that serve the same function, such as the Flashpoint RL 1200 Speedlight Flash, available exclusively at Adorama, and the Photoflex Starfire, which is also carried by Adorama.
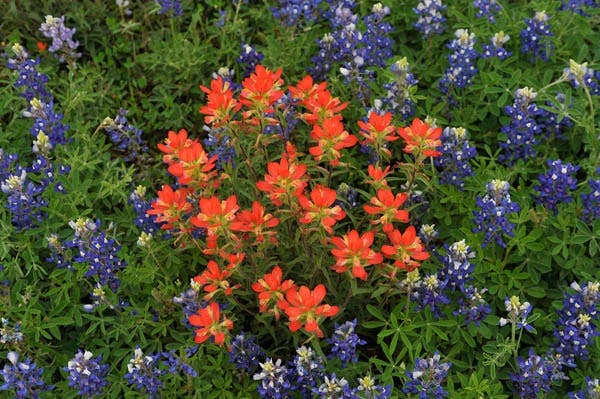
Grey day-glow: It was a dull grey day during one of my workshops on wildflowers in the Texas hill country. This patch of Indian paintbrush and lupines didn’t glow the way I knew they could. I used a twin flash set-up to create a uniform light from two directions so the colors became much more vibrant. Nikon D700, available at Adorama, with a Nikkor 35-70mm f2.8 lens at 52mm + Nikon R1 twin flash.
2. Twin flashes: If your main objective is to get super-sharp images of flowers, or if you like taking pictures of butterflies and insects while you are in the garden or field, your best bet is to use dual or twin flash units. Twin flash systems use a simple flash bracket that attaches to your camera—sometimes to the flash shoe, other times to the lens.
The two flash heads provide uniform light—and plenty of it—so you can stop down to a small aperture and use a fast shutter speed, both of which maximize your sharpness. The bracket lets you position the two flash heads up to about 8” on either side of the camera and up to about 10” above the bracket – the exact distance depends on the model.
Twin flashes are convenient since your hands are not encumbered with holding the flash and you can easily move around without needing a tripod. The great disadvantage is that you don’t have much directional flexibility so you are basically working with front light.
If you are in the market for twin flashes, check that the system you want to buy synchronizes with your camera. Some top-notch flash systems I would recommend are the Canon Macro Twin Lite MT-24EX; the Nikon Wireless Close-Up Speedlight System; and the Olympus Twin Flash System FS-STF22, all available at Adorama.

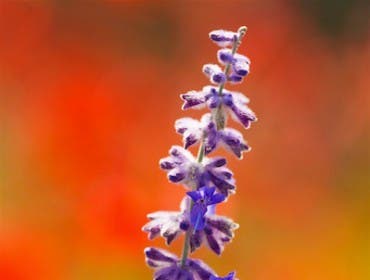
Stop that Lupine! During my workshops on the coast of Maine, we often go out early to shoot lupines in the soft morning mist. The light was uniform but not very bright and this lupine was tossing in the breeze. To stop the movement and add enough light to brighten the colors, I bounced light off my reflector and overexposed by one f/stop. Nikon D700, Nikkor 105mm Micro lens, available at Adorama, and Nikon SB 800 Speedlight.
3. Flash modifiers: Getting the light just right is never simple. While single or twin flash units give us the opportunity to add light, sometimes, even with controls that allow us to vary the light output, the added light is still too harsh, especially for floral close-ups. To soften the light, you can choose from a host of flash modifiers, all of which do a good job at a small price.
The two main categories of flash modifiers are diffusers and reflectors. Diffusers are translucent plastic covers placed over the flash head so the light passes through them, softening the light. Reflectors are made from various materials and are positioned to bounce light from the flash onto your subject, softening the light by spreading it over a wider area. The reflector surface may affect the intensity and quality of the bounced light.

Awesome Orchid: This orchid at the New York Botanical Garden’s conservatory was the perfect situation for using a ring flash: the flower was fairly large and the background was bright and far enough off not to be affected by the flash. I took this shot at f/5.6 to blur out the background so it would not compete with my subject. Nikon F4 (Look for it at the Adorama Used Department with 105mm Nikkor lens with a Nikon Ring Flash, which you can find at Adorama.
My favorite flash modifiers are made by Rogue FlashBenders, available at Adorama, a system of flexible, shapeable reflectors that let you control and modify the light as you wish. Because you can shape them, the Rogue FlashBenders allow you to direct light very easily. Read Adorama’s review of Rogue FlashBenders. Their surface produces a creamy soft light that works well with flowers and they are easy to use, pack and clean.
With the right flash equipment in your camera bag, you’ll be all set to go beyond the basics and create fabulous floral images.
Allen Rokach and Anne Millman are co-authors of “Focus on Flowers: Discovering and Photographing Beauty in Gardens and Wild Places” and “Focus on Travel: Creating Memorable Photographs of Journeys to New Places” by Abbeville Press. Rokach, a longtime magazine and assignment photographer, now teaches at Workshops@Adorama and other venues. His website is www.allenrokach.com.
