

Decorating trees during the holiday season is said to be a practice that first began in Germany in the 16th century. Hundreds of years later, this time-honored tradition is still being upheld in homes all over the world.
For families who pay careful attention to decorating their Christmas tree each year, photographing the trimmed tree is a nice way to commemorate the time and effort spent together. Whether you photograph your tree by itself or as a backdrop for family gatherings and other celebrations, there are a few key techniques that will help your tree look its best in any image.
Just remember that your tree doesn’t have to be perfect to look beautiful in a photograph. Between the ornaments and the memories of time spent together at the holidays, you’re sure to look back fondly on the photos you create.
Christmas Tree Photography Tips:
If you’re looking to immortalize your yearly tree for your photo album, here are some holiday tree photography tips to help you out.
1. Shoot in a Dim or Dark Setting

Photographing your tree at different times of the day will produce different outcomes.
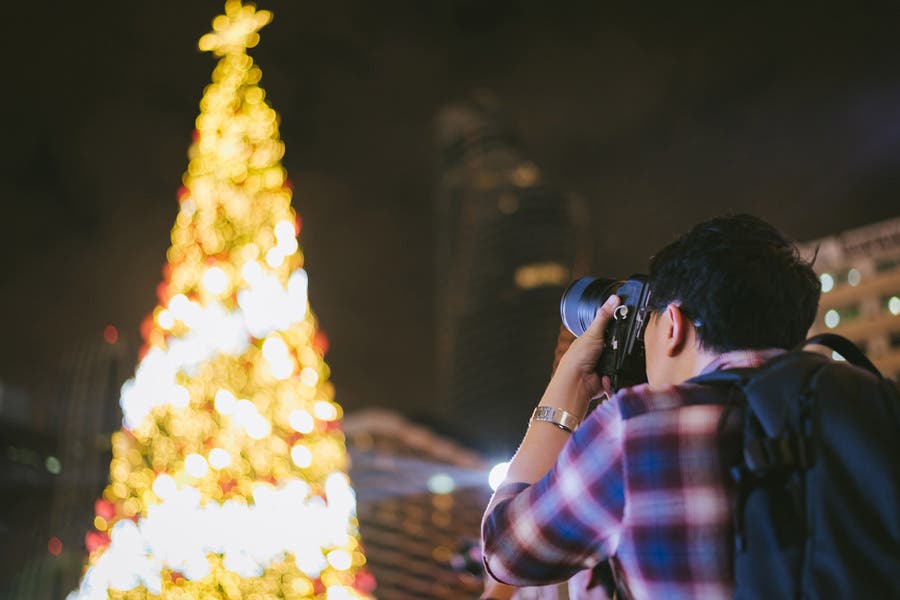
If you want to capture your holiday tree in all its twinkling glory, it’s best to take photos at night. Make sure that the room is dimly lit, preferably with only the string lights to serve as your primary light source. This enhances the appearance of the lights in your tree, allowing you to make them the primary focus.
Make sure to use your maximum aperture, set your ISO to its highest setting (but watch out for noise), and use a shutter speed of around 1/30 to 1/60. The settings that will work for you will depend entirely on your unique photographic circumstances, so take multiple photos and tweak your exposure settings as you go to find the right combination that works for you.
2. Avoid Using Flash
When photographing the tree by itself, it’s easy to work with a tripod or allow the tree lights to provide the ideal atmospheric lighting for your image. When it comes to photographing family moments like opening presents in front of the tree, you may feel compelled to brighten the scene with flash.
On camera-flash will rarely give you the look you want in your photograph. Pop-up flashes are so close to the lens that they illuminate the scene in an unnatural way that’s rarely flattering. If possible, try adjusting camera settings to create the extra brightness you need.
If you aren’t sure if you need flash at all, you can try using a handheld light meter if you have one available.
If you find you do need a bit of extra light, try using an external flash to bounce light off the ceiling and illuminate your family members’ faces in a more flattering way.
3. Use a Tripod
Since shooting handheld will most likely yield blurry photos, you’ll need to use a sturdy tripod or monopod to keep your camera perfectly stabilized. Try underexposing your image slightly to keep from blowing out the highlights from your Christmas tree lights. You can do this by using a slightly faster shutter speed or a narrower aperture.
In the event that you don’t have access to a tripod, you can prop your camera on a chair, countertop, table, or any steady surface, then set your camera’s timer or use a remote shutter release.
4. Keep Your ISO Low

Using a tripod allows you to bring your ISO down to as low as you can, while using a slower shutter speed to ensure ample light.
Camera sensors will generally produce the cleanest results when you shoot with the base or native ISO setting of the camera. The base ISO allows your sensor to get the best signal-to-noise ratio and achieve its full dynamic range. A quick search online can help you find the native or best ISO for your particular camera, and let you take a sharp image with minimal noise.
5. Shoot in HDR

The human eye is capable of seeing detail and clarity in a wide range of light, from the brightest highlights to the deepest shadows. Unfortunately our cameras aren’t quite as capable. To help counteract the limited dynamic range of our cameras, many photographers like to create HDR, or high dynamic range, images.
In most cases, an HDR image is achieved by taking multiple photographs with slightly different exposure settings, then combining them into a single image. You can do this manually, or with automatic settings on many modern cameras. An HDR image will let you capture detail throughout the range of highlights to shadows.
Here’s a tutorial on creating realistic, natural-looking HDR images by Gavin Hoey for AdoramaTV:

6. Zoom In on the Details

Focusing on the tree decorations offers a fresh perspective to the typical holiday tree photo, which is normally captured as a whole. Small details are just as important as the entire thing, and if the tree has details—such as the ornaments or the tree topper—that are particularly beautiful or have significant meaning for you and your family, then you might want to capture those as well.
Feel free to take the photo from different vantage points and angles, and be as creative as you can in showcasing these small details.
7. Get Creative with Bokeh

Bokeh is a photography term that is used to describe the out-of-focus areas in your image. It is achieved by shooting with the widest aperture your lens will allow and using a shallow depth of field while focusing on a particular subject or area in your photo. Lenses with an aperture of f/2 or wider helps you achieve a very shallow depth of field, which blurs out the rest of the scene that is not in the plane of focus.
Since your tree is likely covered in string lights, one way to create beautiful bokeh is to get close and focus on an ornament or some other detail on your tree while keeping the surrounding lights out of focus.
Another way is to play around with front bokeh, which can be achieved by holding up the string lights in front of your lens to create those fuzzy, glowing orbs all around the image.
8. Play with a Variety of Effects

There are a variety of effects you can try to creatively shoot your holiday tree. For example, if you have a rotating stand (or if you can fashion any DIY rotating device) for your tree, then you can create a sort of spinning or light painting effect by turning off the lights, setting your camera on a tripod, and shooting a long exposure of your tree as it spins in the dark.
You can also make it appear as if the lights in your tree are “twinkling” by using a special starburst filter (also known as a cross screen filter) on your lens to create four, six, or eight-pointed flares to any light sources within your photo.
9. Include Other Elements

Don’t just take a photo of your tree. Incorporate other elements into your image to create a stronger and more balanced composition. It can be anything that complements or contrasts with your tree, as long as it adds interest to the photo without distracting from the main subject—which is of course the tree itself.
You may also want to try other composition techniques to further enhance your image.
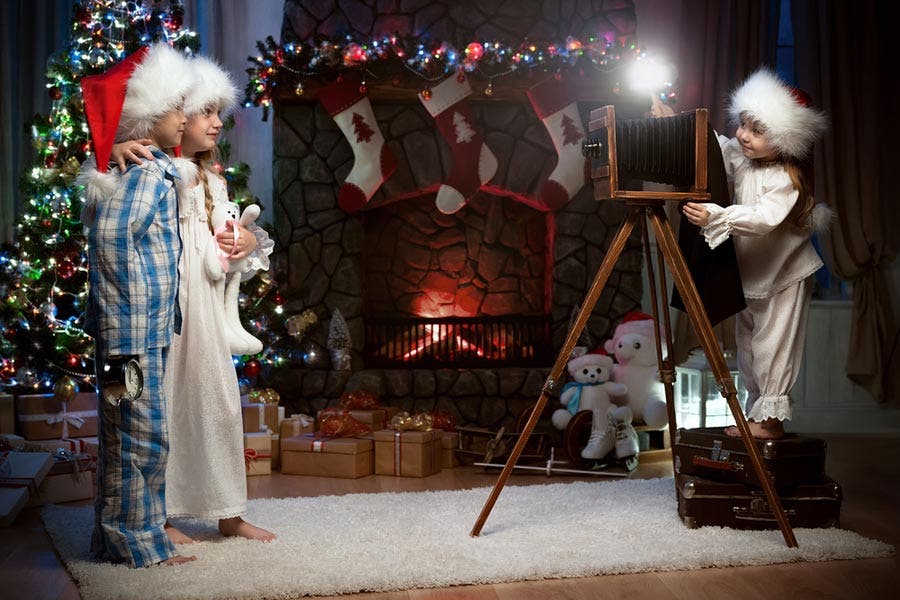
10. Make Room for People

Adding the human element to your photos is a great way to a create a stronger connection between the viewer and the story within. And besides, what better way to immortalize your holiday tree than by including your loved ones in the shots?
If you plan to include people in your photos, keep in mind that you will have to employ some creative lighting (it would also be a good idea to learn more about portrait lighting techniques and styles) to ensure that you’re able to capture their faces properly.
Do you have any holiday tree photography tips and tricks you’d like to share? Comment below!