
Architectural photography requires an eye for detail and a knack for precision, as well as plenty of patience and creativity. And of course, it requires some specialized architecture photography gear and equipment.
If you’re getting serious about architecture photography and want to achieve success in this specific field, you’ll need to make some investments to get professional quality results.
Here is a complete photography gear list for aspiring architecture photographers:
1. Tilt-Shift (AKA Perspective Control) lens
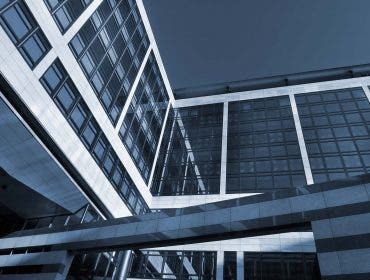
This may be the most important gear investment, besides a camera, that an architecture photography will make. A tilt-shift lens projects an image that is considerably larger than the area covered by the camera’s sensor. The front elements can be shifted so the center of the lens’s imaging circle moves away from the center of the camera’s sensor, and can be tilted to selectively focus the image. When photographing architecture, a photographer shifts the front element to get rid of the “falling backwards” effect that occurs when shooting up towards a tall building, and uses the tilt feature to control depth of field.
Suggested Gear:
Most major camera manufacturers make some of the best tilt-shift lenses on the market, and all are available at Adorama.
- Canon 17mm TS-E F/4L
- Canon 24mm TS-E F/3.5L II
- Nikon PC-E Nikkor 45mm f/2.8D
- Nikon PC-E Nikkor 85mm f/2.8D
2. Wide-Angle Lens
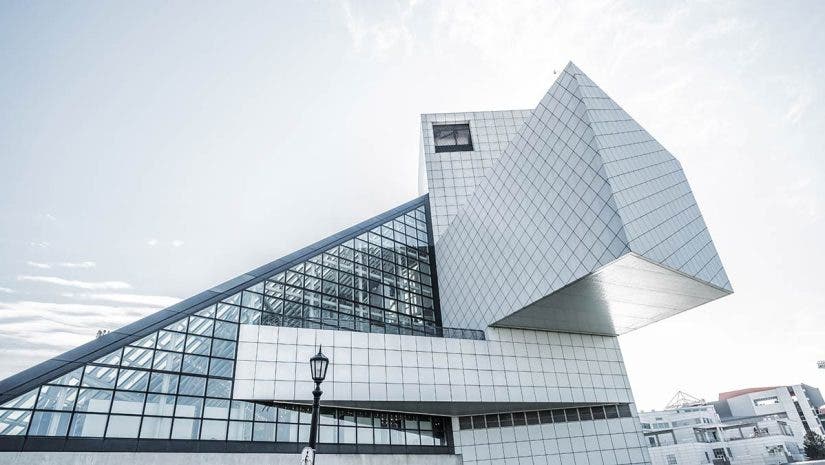
Another more limited way to handle perspective control is to use a wide-angle lens, shooting with the sensor surface parallel to the building you’re photographing. The building will appear on the top part of the frame, and the bottom of the frame may need to be cropped out, but there should be no keystoning effect. The catch? You’ll use only approximately half of the frame, and because it will be cropped, the image quality won’t be quite as good. If you’re shooting for smaller prints or for the web, that may not matter.
Also, in a tight space, you may have no other choice but to use a wide-angle lens and shoot at an angle, then fix the inevitable distortion later in Photoshop. Consider an ultra-wide prime lens for the best results, but a wide-angle zoom will work, too.
Suggested Gear:
If you’re on a budget, check out our list of some of the best budget DSLR lenses, which includes a section on wide-angle lenses. Otherwise, here are some of our more high-end suggestions:
- Canon EF 17-40mm f/4L USM
- Fujifilm GF 30mm f/3.5 R WR Lens
- Sigma 16-28mm f/2.8 DG DN Contemporary Lens
- Sony FE 35mm f/1.4 GM Lens
- Zeiss 18mm f/2.8 Batis Series Lens
- Sony FE 20mm F1.8 G Lens
- Tamron 17-28mm f/2.8 Di III RXD Lens
3. Tripod
Architecture photography is about control over the image, and that includes stability. You may need longer exposures where no amount of image stabilization will be reliable. Using an appropriate tripod head and level, you can prevent unwanted tilted horizons while maintaining exact compositional control.
Tip: If you’re photographing a space with a lot of people moving around, you can shoot using a long exposure to make the people in motion “disappear.”
Suggested Gear:
A lightweight but sturdy tripod is an essential item for every architectural photographer, so make sure to choose the best tripod for your needs.
- 3 Legged Thing Legends Ray 5-Section Carbon Fiber Travel Tripod
- Manfrotto Befree Advanced Lever 4-Section Aluminum Travel Tripod
- Vanguard ALTA PRO 264AT 4-Section Aluminum Tripod
- Sachtler aktiv6 Sideload Fluid Head System with flowtech75 Tripod
- Manfrotto Element MII 4-Section Aluminum Tripod
- Benro MeFOTO RoadTrip PRO Series 1 5-Section 6-In-1 Carbon Fiber Tripod
4. Panorama Head
A subspecialty within architecture photography is immersive panoramas of spaces. This is especially useful when photographing real estate. However, you’ll need an appropriate tripod head for natural-looking images that can be stitched together and posted on specialized websites that display immersive images that viewers can pan or enlarge.
Suggested Gear:
You can buy a simple manual panorama head or a mechanical one.
- SunwayFoto GH-PROII+ Innovative Geared Head with GC-01 Clamp
- Acratech Panoramic & Tilt Head
- Syrp Genie Mini II Panning Motion Controller
5. Bubble Level
Use this simple, inexpensive device to prevent accidental diagonal horizons. There are several models that can be inserted into your camera’s hot shoe, and all cost less than $35. The LensCoat 3-Axis Bubble Level, for instance, is a tripod head bubble level that lets you fix vertical, diagonal, and horizontal positioning, and it can be mounted effortlessly on any full-frame camera with a hot shoe.
Suggested Gear:
Make sure to add a bubble level to your architecture photography gear list, as it will be helpful when precision is absolutely crucial.
6. Full-Frame Camera
Serious architectural photographers need a camera that delivers the best overall image quality, as you never know how much intricate and subtle detail and color you may need to capture. In general, full-frame DSLRs and mirrorless cameras have outperformed APS and smaller-sensor cameras in independent image quality tests.
Suggested Gear:
If you haven’t upgraded to a full-frame yet, here are some of the best DSLR and mirrorless cameras for architecture photography to consider.
7. Color Calibration Setup
Architecture photography is both an art and a science, and while there are times when the color is open to interpretation (especially when shooting in mixed light), getting color fidelity that is faithful to the original architecture is often a client requirement. Color calibration systems such as the Datacolor SpyderCheckr 24 Color Calibration Tool or Calibrite ColorChecker Passport Photo 2 will help you create accurate printer profiles.
8. Polarizing Filter
When photographing architecture, what’s reflected on mirrors and windows is sometimes part of the story you’re telling. But at other times, you’ll need to eliminate reflections on windows, which you can achieve with a simple polarizing filter. Find over 900 of them in our polarizing filter selection.
9. Adobe Photoshop
As much as I’d like to encourage you to do everything in-camera, you’ll inevitably need to tweak your images and perhaps fix keystoning during the post-processing stage. Emulating those lens tilt effects is something Photoshop is very good at doing, if you know the right steps.
10. Lighting Equipment
While using natural ambient light is ideal, sometimes you need to carefully supplement it. That may be the subject of its own article, but do bring a bunch of flash units that you can operate wirelessly. Use them very selectively to emphasize existing light (here’s a good example).
What about you? What are your architectural photography essentials? Do you have gizmos and gadgets you find to be invaluable for capturing buildings and elaborate interior designs? Leave a comment below!