
Aside from being in the company of our loved ones, Thanksgiving is a time to stuff our faces with a delicious holiday feast! In addition to taking photos with the family during your Thanksgiving celebration, what better way to remember these moments than by taking drool-worthy photos of all the food? After all, if there’s another thing that today’s generation loves about food, it’s taking pictures of them. Here’s our list of tips to improve your Thanksgiving food photography.
Recommended Camera Equipment and Settings

Taking photos of your Thanksgiving feast is a lot like professional food photography, which means you’ll need to abide by several food photography rules to achieve appetizing images that stand out.
You don’t need to have a full photography kit in hand, but you will have to be equipped with a few items to help you capture your desired shots. For Thanksgiving food photography, it’s best to use the following items and camera settings.
Camera
Your handy smartphone camera will do, but you can also opt for a DSLR or mirrorless camera if you want higher-resolution images for print-quality images for your photo album.
Tripod
A regular and affordable tripod that can offer different vantage points and support the weight of your camera will do.
Remote Shutter
Mounting your camera on a tripod and using a remote shutter ensures complete stability for your camera, helping you capture crisp, sharp images.
External Flash
For more flattering photos, you’ll need to use an external flash that can be bounced from ceilings and walls.
Reflectors/Diffusers
You can use household items, such as mirrors, white napkins, and even aluminum foil to reflect light towards shadowy areas of the food or scene. Wax paper or a sheer white cloth also helps diffuse and provide softer light for areas that you want to be featured and highlighted.
Lenses
Smartphone cameras, DSLRs, and mirrorless cameras allow clip-on or interchangeable lenses to help you add variety to your shots. If you have a DSLR or mirrorless, 50mm prime lenses are highly recommended by food photographers and bloggers. In case you want to capture minute details, a macro lens would come in handy as well.

Settings
Image Format
Shoot in digital RAW format to be able to preserve as much image information and detail that would otherwise be lost and compressed when shooting in JPEG. Doing so also allows convenience in image editing, thanks to the wider dynamic range and millions of extra pixels.
Aperture
Some photographers recommend the use of wider apertures like f/1.4 to f/2.8 to create a shallower depth of field and give your main subjects very sharp focus while providing a flattering blur for the background. At the same time, it allows more light to enter the lens for shooting situations where you don’t have a lot of ambient light to work with.
Shutter Speed
Unless you’re using a tripod, it’s usually best to use faster shutter speeds to ensure sharp images. For handheld shooting, you’ll need to use nothing lower than 1/60.
ISO
The ideal ISO setting for indoor shots without flash or natural lighting is 800 or 1600. This should be enough to make your camera sensor sensitive enough for ambient light. If you have the ability and resources to use an extra light source, an ISO of 200 or 400 will do.
White Balance
When photographing food, you’ll need to get your colors as accurate as possible. This means you’ll have to use the right white balance. Tungsten usually works for shooting indoors where there are incandescent or tungsten household lamps. Choose fluorescent white balance if you have fluorescent lighting. For best results, use a gray card to customize your white balance or shoot in RAW.
Built-In Timer
If you don’t have a remote shutter, you can always use your camera’s integrated timer. Setting it anywhere between 2-4 seconds is good enough to keep your shots from suffering from internal camera shake that can be caused by manually pressing the shutter.
Thanksgiving Food Photography Tips

You don’t have to be a professional photographer to take better photos of that beautifully roasted turkey, gorgeous table setting, and the holiday merriment that transpires throughout the feast. Here are a couple of easy tips and tricks for taking memorable and hunger-inducing food photos during your upcoming Thanksgiving lunch or dinner.
- Find Out What’s on the Menu
- Use Proper Lighting
- Style and Decorate
- Fill the Frame
- Find the Right Angle
- Photograph Them Fresh
- Highlight the Turkey
- Embrace the Imperfections
- Feature Family Members
- Color Correct Your Images
1. Find Out What’s on the Menu
Before anything, do a little research to help you plan your shots. Start shooting during the preparations or make a quick call to ask your family or whoever is sponsoring the Thanksgiving feast about the food that will be served. While you’re at it, you can also check on the lighting situation. These will help give you an idea about what gear to bring, the number of dishes that you will be photographing, the table layout, and other factors that will influence your Thanksgiving food photography session.
2. Use Proper Lighting
The best lighting will always be natural light. If you’re having Thanksgiving lunch, you’ll be able to take beautiful photos simply by placing the food right next to a window. If you’re having dinner, it’s also ideal to have diffused lighting that’s similar to the sun’s warm white tone, as this brings out the real colors of your dish while adding just enough warmth to make it look delectable.
When using an external flash, just remember to bounce the light from a bright, neutral-colored ceiling, or from the wall on the side to create shadows that will give your subjects more dimension.

3. Style and Decorate
Once you’ve got your lighting ready, make your food almost picture-perfect. If possible, use neutral-colored tableware, placemats, and coasters to allow the food to steal the show. Add some garlands or string lights to provide that holiday cheer to the dining area (and a colorful bokeh).
As for the food itself, you can garnish it to add some visual impact and glaze the turkey with some oil to make it look tastier. Finally, minimize the clutter and use tweezers, paper towels, or even Q-tips to clean up crumbs and small food elements that may be distracting for your viewers.
4. Fill the Frame
While artfully composing your shot, remember to choose your main point of interest. If possible, use the rule of thirds to instantly improve the composition and balance of your photo. But before taking that shot, you may want to fill the frame with complementary items—utensils, condiments, table centerpiece, decorations, pumpkins, or other food items—to make the photo fill the viewers up visually. Or, you can move in closer by zooming in and focusing on a few important details that will make your viewers want to take a bite.
5. Find the Right Angle
Try taking photos of the food at different angles to see which one works best. The top down or flat lay shot usually works well for the table spread or for food with a lot of top detail, such as salads. The three-fourths shot, where you face the subject at a slightly higher angle, is most commonly used for focusing on and accentuating an entire plate or dish.
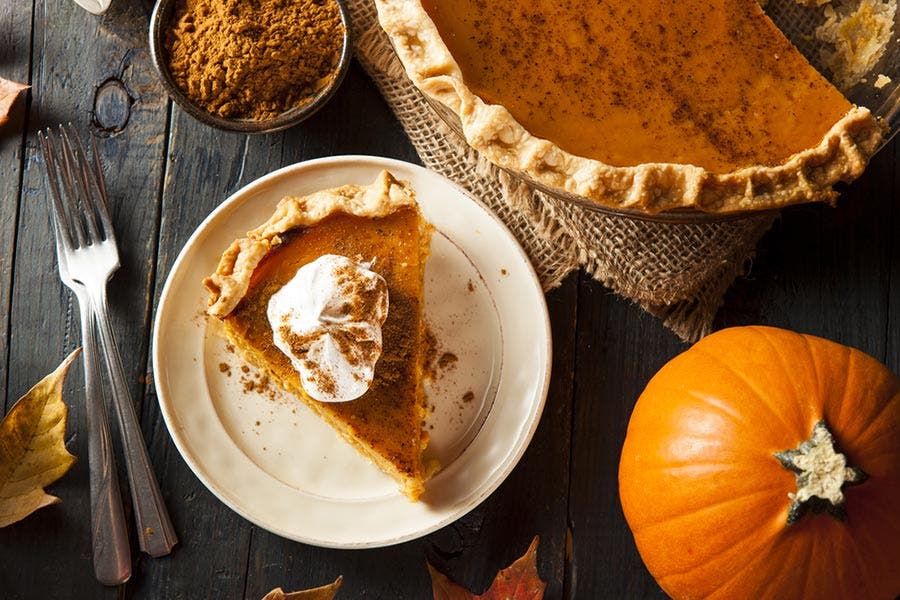
6. Photograph Them Fresh
You’ll want your food and dessert to look as fresh and juicy as possible, so you’ll need to be nearly ready to take your photo as soon as it comes out of the oven or kitchen. For desserts and food with cheese or butter, you may want to just save time, keep it simple, and skip the decorations and styling so you can photograph them before they start dripping and melting. Besides, you won’t want to keep the guests waiting!

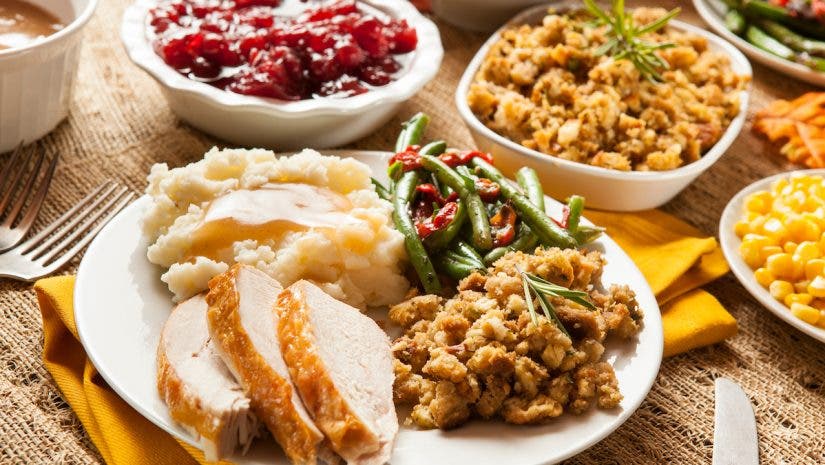
7. Highlight the Turkey
The turkey is the main attraction of your feast and star of the show. Make sure you take a photo of it fresh from the oven, so that the skin is still beautifully crisp and glazed. Don’t forget to dress it up and garnish it with colorful food elements to compliment its golden brown, roasted skin. Use an external flash and bounce it from the ceiling or a wall to create flattering lighting and show off the legs, either in front or towards the side. Finally, place the rest of the dishes around it to show the turkey’s size and to round up the entire feast for that mandatory Thanksgiving table spread photo.

8. Embrace the Imperfections
Given the fact that you don’t have a lot of time to dress up your subjects, you’ll likely end up capturing a lot of unexpected food elements and spontaneous shots—and that’s totally fine! Be open to improvisations and don’t go overboard by aspiring to take lifestyle photography types of images. You’ll want to keep them unique and personal, so that means allowing those fingerprints, scattered herbs, and even those burnt areas to be featured in your photos.

9. Feature Family Members
Thanksgiving is mostly about spending time with your loved ones, so don’t forget to feature them in your photos. Go ahead and take candid shots of the people eating and enjoying the food. Capture those big smiles as your family cuts that delicious turkey open. Featuring people can make your food photos look more appealing and inviting while adding that personal touch, so don’t forget about the human element when doing your Thanksgiving food photography.
10. Color Correct Your Images
If you want more professional-quality images, you can always choose to post-process and edit your photos afterwards. Hopefully, you’ve started shooting in RAW, so it’s easier to make natural-looking image adjustments. Consider color correcting your images in a way that will make plates look whiter, so as to allow the colors of the food to pop. You can add a little warmth to send “hunger signals” to your viewers the same way that restaurants use reds and yellows to make us want to eat.