Have you ever wondered what causes those mysterious spots that appear in your photos? For photographers, particularly those who use interchangeable lens cameras, this is a common occurrence. If you are constantly using your camera and switching lenses during photo shoots, then you’ve probably experienced this problem before. That’s where learning how to clean your camera sensor can really help.
These mysterious spots are caused by dust or dirt on your sensor, which is completely normal and virtually unavoidable. To combat this problem, most camera makers have included a sensor cleaning function in newer camera models. However, sometimes this handy little feature just isn’t enough, which is why cleaning the camera sensor is a painstaking chore that every photographer has to deal with every so often.
What is camera sensor dust?
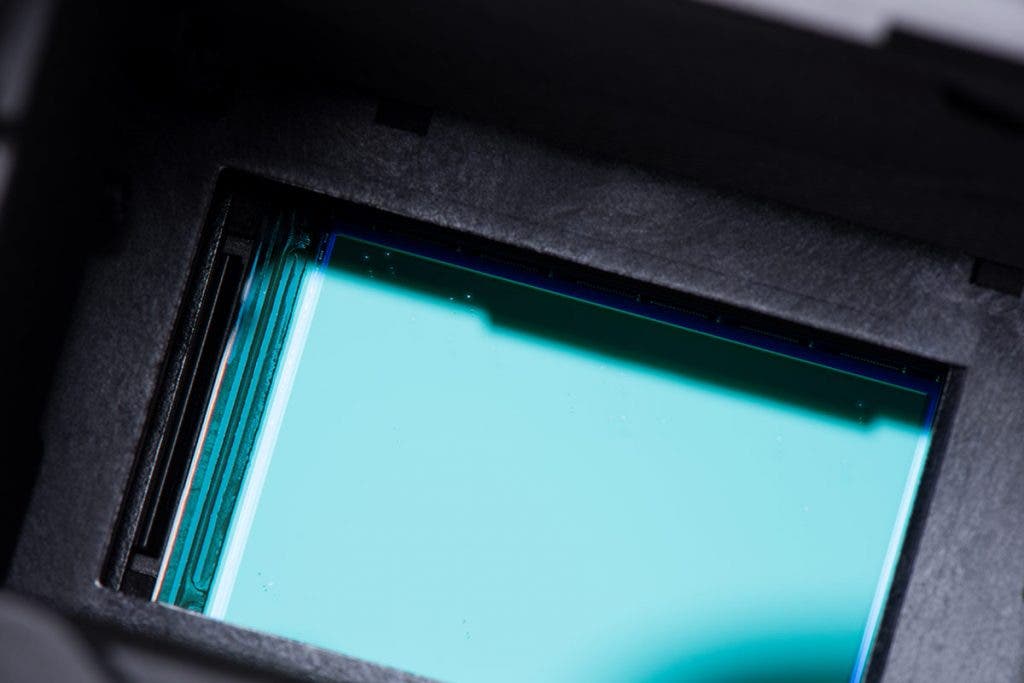
The term sensor dust is used to describe the particles or elements that enter a camera and stick to its sensor. This usually happens when the camera user exposes the sensor by removing the body cap or switching lenses.
Camera sensors are dust magnets and notoriously prone to dust buildup if you’re not careful, so you will inevitably have to clean your camera’s sensor every so often, or once you start to discern those annoying spots on your photos.
Why is sensor dust a problem?

If you’re not professionally selling your photos, sensor dust really isn’t a big deal. As long as you’re satisfied with the photos, you can just crop them out (if they’re near the edges) or use Photoshop to get rid of them.
But if you’re a professional photographer who takes hundreds of photos in a single photo shoot, these quick fixes aren’t advisable since it would be too time-consuming to have to edit out sensor dust in every single picture. So, if you do this for a living, you’ll have to keep your camera’s sensor clean at all times.
Are self-cleaning sensors sufficient?
You can’t always rely on new technology to assure you of a clean digital camera sensor. Many interchangeable lens cameras—DSLRs and MILCs—made in recent years have self-cleaning sensors that vibrate at ultrasonic speeds when the camera is turned on or off. This may help shake some of the dirt loose, but it shouldn’t be a substitute for manual sensor cleaning.
With a self-cleaning sensor, you may not need to clean your sensor as often, but it still needs to be cleaned manually every once in a while to ensure that it’s completely dust-free. Some photographers usually send it in to the manufacturer’s service center for cleaning, but due to the significant downtime (it will take a while for you to get your camera back) and the expensive cost, most just end up doing it themselves.
If you’re planning on going the DIY route, you can find a lot of information online and elsewhere about how to clean camera sensors, but I believe my sensor cleaning method is more thorough than any others I’ve seen.
Even with self-cleaning, sensor spots are actually more of an issue today than they were a few years ago. Image manipulations such as HDR or the tone mapping-like contrast increases, including those in many popular filters such as those from Nik and Topaz, will show spots that you didn’t notice before.
Is DIY sensor cleaning safe?
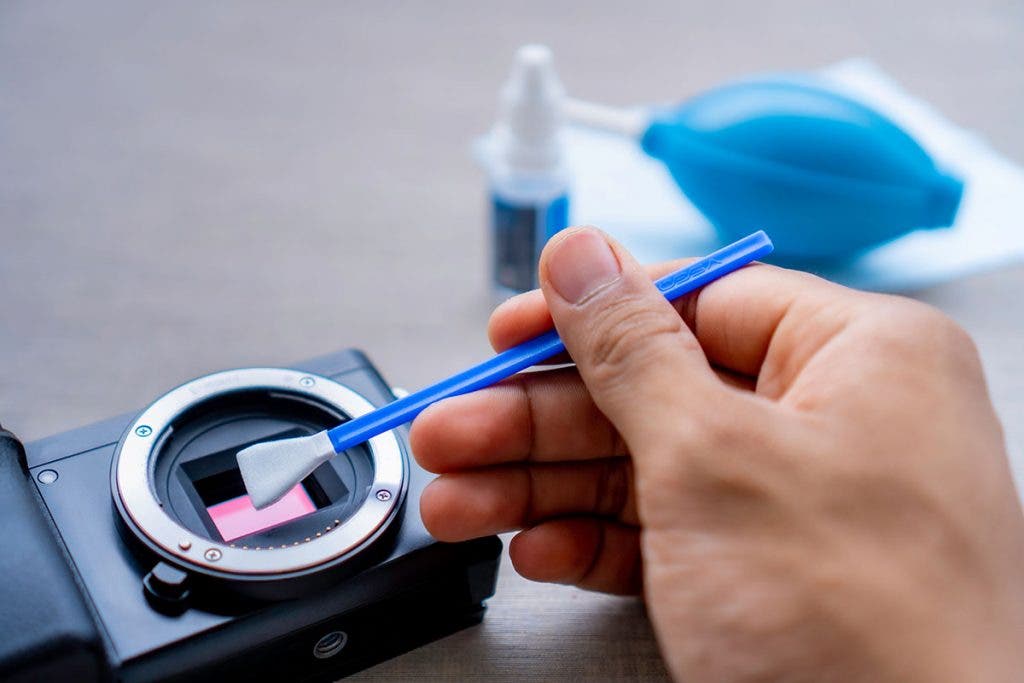
DIY sensor cleaning is completely safe. As long as you do it the right way, you shouldn’t have any problems. Many photographers regularly do their own sensor cleaning without any issues. Yes, there’s always the risk of damaging the sensor if done incorrectly, but if you take a few basic precautions and handle your sensor with care, the potential for damage is small.
There has been a lot of debate on the merits of do-it-yourself versus sending it out when it comes to cleaning sensors. Having it cleaned by professionals is ultimately the easier option, but as previously mentioned, it will cost you money and you won’t be able to use your camera for a certain period of time. I personally want to be able to clean my sensor whenever necessary, which can be at inconvenient times, and I want to have it done quickly. And, frankly, I think I’d do a better job than anyone else.
Sensor cleaning can be tedious, and it’s a job that you wouldn’t want to entrust to just anyone. Sometimes it gets worse before it gets better, but I’ll stay at it until I’m satisfied with the results.
Knowing how to clean your own camera sensor is not only economical and convenient, but ultimately more effective and thorough because you are doing the work yourself. You can save a bundle (you’ll only need to spend on a reliable camera cleaning kit) and do a better job by cleaning your camera’s sensor yourself.
How to check if your sensor is dirty
It’s easy to find out how dirty the sensor is by shooting a clear sky or a clean piece of paper. It will give you an idea of what you’ll need to clone out on the images, as well as how badly you need to clean the sensor.
1. Shoot a sensor check image
- Set your lowest “normal range” ISO (100 for Canon and 200 for Nikon). Don’t set a lower ISO that is in the “extended range.” You’ll get the lowest noise at your lowest normal ISO.
- You want the shot to be out of focus, so set manual focus and focus to infinity for a piece of paper and close-focus for the sky.
- Set to f/22, so you can see any spots. At a wider aperture such as f/5.6, they may not show, and at a smaller aperture such as f/32, you may see too much detail. (The spots are shadows of stuff that is on a glass surface in front of the sensor itself.)
- If you’re shooting a piece of paper indoors, you’ll have a slow shutter speed. That’s fine; you want to blur the subject as much as possible anyway, so go ahead and hand hold. Remember, you just want to shoot featureless light.
- You want a somewhat telephoto focal length to shoot a small segment of the target and to minimize any tonal gradients. It depends on the evenness of the illumination of your target, of course, but 70-100 mm is usually fine.
- If you’re a JPEG shooter, make sure you’re using the highest quality and largest file size. (I would hope you are, anyway.)
2. Post-process to find the spots
Now here’s what to do with the test image (just looking at it on the back of the camera will show the really awful spots):
- Open the image on the computer and desaturate, either in the RAW converter or in Photoshop.
- You might see some spots at this point, but to really see what’s there:
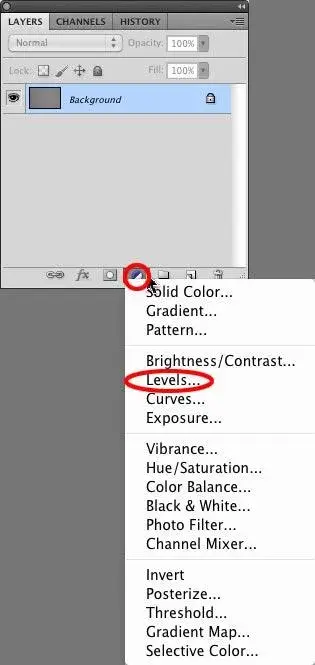
- Make a Levels adjustment layer above your Background image.
- Go to Layer > New Adjustment Layer > Levels, or use the black and white circle icon at the bottom of the Layers panel/palette.
- In the Layer adjustment, the narrowness of the histogram peak will indicate how much tonal gradient you’ve captured. The narrower, the better, but no need to get it super narrow.
- Increase contrast by bringing in the two end sliders to meet the ends of the peak, and you’ll really see what’s on the sensor. You’ll also see some darkening in the corners due to the normal light falloff in the lens.
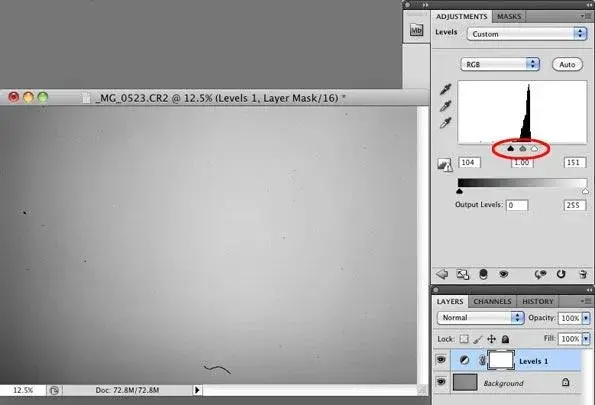
Here, you can see a piece of lint bottom-center and a spot on the left. There are many more spots that you can’t see in this small web image.
The image a lens projects onto the sensor is upside-down, and when the camera processes the image, it’s flipped right side up. So the image of the sensor you see is flipped, and the piece of lint is actually at the top of the sensor
Seeing something like this, you know you need to clean the sensor. Find the item in your camera menu that flips up the mirror and lets you access the sensor.
What to do before cleaning the sensor?
1. Make sure you have a fully charged battery
If the battery runs out while you’re working in the sensor chamber, the mirror will slap down and you’ll have to deal with a very expensive repair. The same goes for inadvertently nudging the card door enough to “open” it.
2. Clean your camera’s exterior body
It’s important that you clean the outside before you move on to what’s inside. If you fail to do so, dust particles could enter your sensor.
3. Observe cleanliness in the area
Make sure that the place where you’re going to clean your DSLR camera sensor is clean and dust-free. You don’t want more dust to add to the dirt that you’re trying to remove.
4. Gather all the necessary tools
You don’t want to start the sensor cleaning process and then realize later on that you don’t have a certain tool. If you don’t own a complete camera cleaning kit yet, make sure to gather all the needed sensor cleaning tools before you proceed.
Dry cleaning method for camera sensor:
Tools for dry cleaning your camera sensor:
- Manual air blower to eliminate bigger dust particles
- Sensor scope to check for uncleared spots
How to clean camera sensor using the dry method:
- Lay the camera down on a table instead of holding it. Don’t touch anything as you clean. When I see large dust pieces, I start the cleaning process by blowing on the sensor with an air bulb such as the Giottos rocket air blaster. (Doing so allows me to safely hold the camera and turn it upside down because the bulb tip doesn’t have to be inside the chamber).
Reminder: Never use canned air; the propellant can create a residue on the sensor that will probably need professional removal. Large pieces will often blow off and fall out of the chamber. - I’ll blow on the mirror before I put it up. And I’ll blow off the back of the lens, too. There’s so much dust everywhere; I might as well get rid of whatever I can. The sensor has an electrostatic charge when the camera is on in its normal mode (but not in sensor cleaning mode) and it will attract dust like a magnet.
- At this point, I find a sensor scope very handy. It’s a magnifying glass with a light shining on the sensor (I like the Delkin sensor scope). You’ll see sensor dust as tiny silver threads or spots.
- I’ll repeat the air bulb and sensor scope check until I’ve gotten what I can, and then shoot a piece of paper to see if I had any luck blowing off some of the smaller spots. Usually, the answer is no.
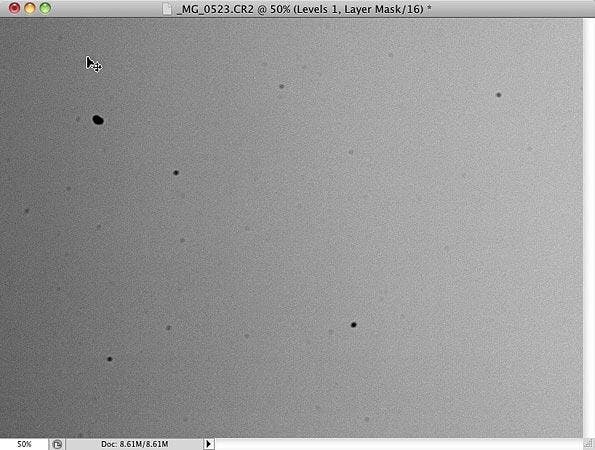
- I’ll go after the smaller spots that I can see only in the Photoshop image. They may look much less significant, but they’ll show up when you do many image manipulations. You’ll want to zoom in on the image to see these smaller spots.
Here’s a 50% zoom of the above sensor check image. This is not a good thing. The smallest and lightest spots aren’t of much significance, but the others are.
Wet cleaning method for camera sensor:
If that happens, the next step is to use a sensor cleaning brush. These are very special brushes whose bristles hold an electrostatic charge and attract particles off the sensor, rather than “sweeping” them off, so only a light touch is needed.
Reminder: you need to keep these brushes very clean. You charge them right before use by blowing on the bristles with a squeeze bulb or by spinning the bristles with the battery-powered Visible Dust Arctic Butterfly. (Do not spin it while it is in the sensor chamber).
Tools for wet cleaning your DSLR camera sensor:
I use sensor cleaning products from Visible Dust, but I can’t claim they’re better than any other:
How to clean camera sensor using the wet method:
There is information on the manufacturer’s website about sensor cleaning and proper use of its products. And the solvents (or at least some of them) are said to leave a coating on the sensor that helps repel dust and minimizes dust build-up.
Here are the steps to wet clean your sensor:
- Read the product directions very carefully.
- The swabs should be kept very clean and should be carefully moistened right on the edge, with two drops of solvent, each one placed one-fourth of the way in from the edge, to evenly wet the edge.
- Let the solvent soak in a minute or so before swabbing. You don’t want to squeeze out liquid on the sensor glass.
- Tilt the swab and drag it in one pass from one edge of the sensor to the other, and then turn it over and drag it back the other way, so the other side of the edge is being used. (Check the manufacturer’s website for video demos.) You’ll need some pressure with the swab, unlike the brush.
When to use the Smear Away and Sensor Clean solvent:
Brushing usually won’t remove all the spots, and you’ll need to resort to swabs and solvents. After brushing, you’ll need to repeat the shot of the sky or a piece of paper, and if you see an elongated smear, you’ve brushed through an oil spot thrown by the shutter.
In this case, you’ll need to clean the brush in its recommended manner before using it again, and you’ll need to use solvents to remove the oil.
- If I see an oil smear, I use the Smear Away solvent, which needs to be followed by the Sensor Clean solvent. The swabs may leave lint, so another loupe inspection is in order, followed by the blower and if, needed, the brush. (I have two, so if I brush through oil, I can continue cleaning.)
- If there is no oil smear, I just use Sensor Clean. Regardless of the solvent, it may take several passes, each with a clean swab, to get everything clean. And junk may be pulled in from the edges of the sensor, making things worse before they get better. But they’ll get better.
Finishing steps in cleaning a camera sensor:
At the stage when I can no longer see any dust or spots with the loupe, I repeat the sensor check by shooting a piece of plain paper again. It may take several repetitions to get things clean, but I think it’s worth the trouble.
Sometimes, you’ll see a much larger and dimmer spot on the sensor. Mine are always hexagonal, reflecting the aperture leaves in the lens. These are not on the sensor but are bits of dust or dirt on the lens, either the front or rear surfaces.
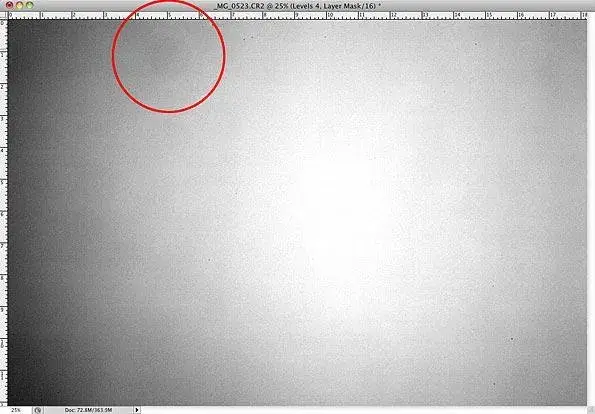
It’s very important to keep the rear element of the lens and the sensor loupe clean, as dust can jump or fall from them onto the sensor.
There are also products to clean the walls of the sensor chamber. Although there’s no easy way to assess their effectiveness, I’m in favor of keeping things as clean as I can.
Tips to keep your camera sensor clean:
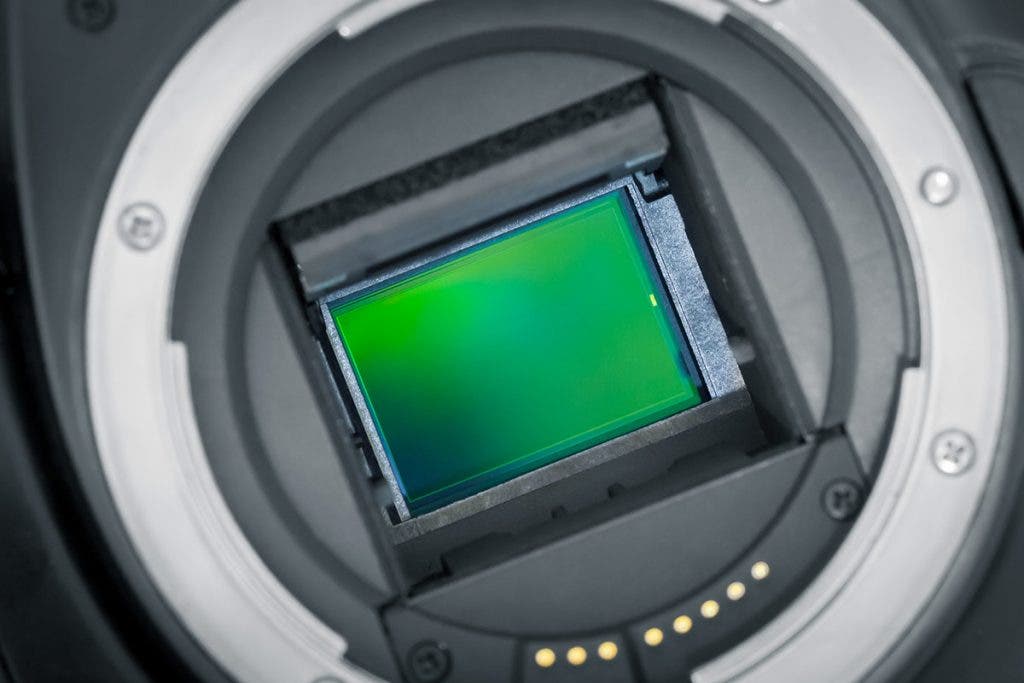
Prevention is the ultimate cure. If you don’t want to constantly worry about sensor dust, you need to take steps to prevent it from finding its way into your camera.
- When changing lenses, make sure it’s done in a clean place where there’s still air. Always point the camera toward the ground, so the dust particles (if there are any) won’t land on your DSLR’s sensor.
- Avoid unnecessary changing of lenses. Also, make sure that the lens cap is clean before covering up your lens optics.
- Make sure your camera’s bag is clean. Clean it once in awhile to avoid dirt and dust buildup.
The sensor cleaning process can be tedious. But how confident will you be that, if you send your camera out to be cleaned, it will be done with sufficient attention to detail? At least, now you have a means to check it after the fact.
Camera sensor cleaning: Frequently asked questions
Can I clean a sensor with alcohol?
It all depends on your definition of “alcohol”. The popular Eclipse brand of sensor cleaning solutions use either methanol or a combination of isopropyl alcohol, ethanol, and methanol. You should carefully read the contents of any alcohol solution you might want to use to clean your sensor. For example, the isopropyl alcohol you can pick up at the local pharmacy contains some glycerin which can leave a residue on our sensor. The residue may be difficult or impossible to remove with conventional methods.
My general advice is if you are unsure about the safety or efficacy of a solution, avoid using it on your expensive sensor.
Can I clean my cameras sensor with a cloth?
You should avoid cleaning the camera sensor with a piece of cloth or microfiber cloth. Sometimes the cloth itself can shed off small pieces which will leave more particulate matter on the sensor. This is the exact opposite effect you’re going for. Also, if any solid particle is trapped in the cloth, rubbing it on the delicate imaging sensor may damage it (eg, leave a scratch).
It’s always advisable to use dedicated sensor pads to clean the sensor. Before you rub the sensor with anything, be sure to use a blower to remove any large pieces of foreign bodies. These may also cause scratches as you apply light pressure with the pad.
What happens if you touch a camera sensor?
As a simplification, think of the camera sensor as the front element of your lens. If your touch your camera lens, you may create some smudging or leave behind some oily residue (fingerprints). Many modern-day cameras have a thin layer of IR and or anti-aliasing filter on top of the sensor. So, you might actually be touching one these filters rather than the sensor itself. This is a good thing, because it’s easier and less expensive to repair or replace one of these filters than the sensor.
The oily residue is more difficult to remove than simple dust particles. It may take several attempts with the sensor cleaning kit before all the imperfections are removed.
