Adobe Lightroom is one of the most — if not the most — popular photo editing software on the planet. Understanding this software for post-processing and editing is crucial to taking your images to the next level. However, like learning any new software, Lightroom can appear intimidating at first glance. It has hundreds of options to choose from without a clear road map of where to begin. Here are ten Lightroom photo editing basics — in a step-by-step format — that will help guide you through Lightroom and allow you to understand the fundamentals before diving into more advanced editing techniques.
Import and Organize Files
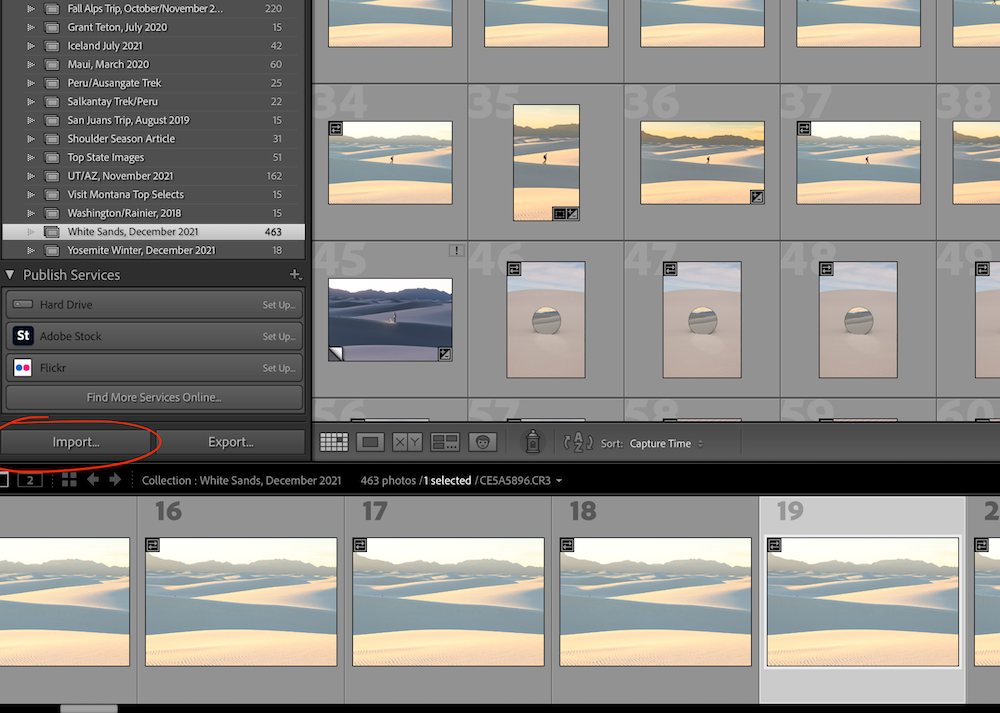
To start in Lightroom, the first thing you need to do is important files to begin editing. If you’re working on a dual monitor setup, you’ll be able to see everything across two screens. To import files, this takes place under the Library tab, with the important button on the bottom left hand corner. The process goes as follows:
Library > Import > Select Your “From” Source > Select Your Images > Select Your “To” Source > Add to Collection > Name New Collection > Import
Once your selected files are imported and organized in their specific collection, it’s time to start the fun part. Head over to the “Development” tab to begin editing!
Set the Best Lightroom Profile for Your Camera and Style
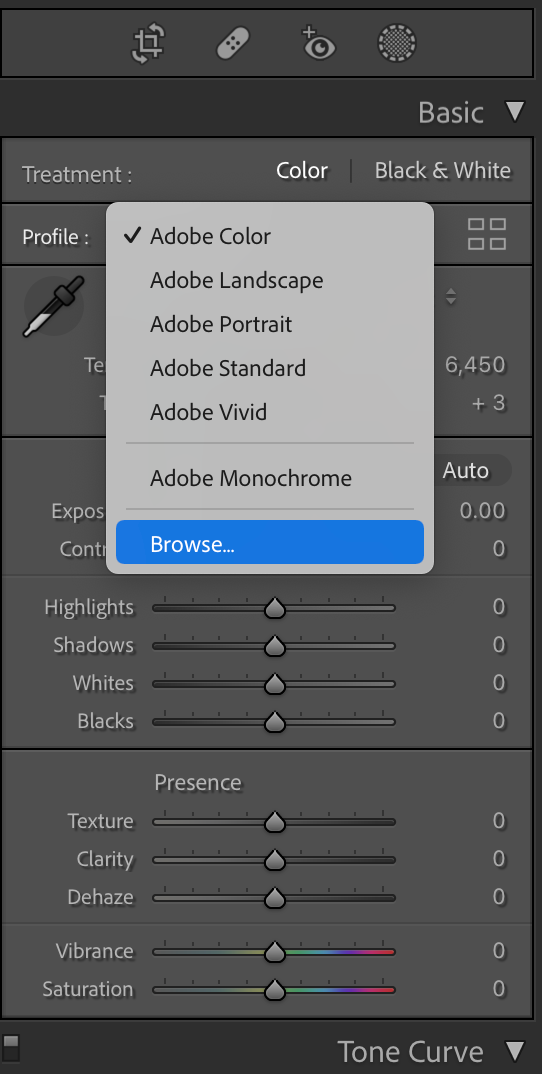
The very first thing you’ll need to do is select the best Lightroom profile for your camera or unique style. Lightroom profiles are similar to presets in that they are pre-calibrated settings that alter the look of your images.
However, unlike presets, which can be significantly adjusted on the front end, profile settings take place on the backend of Lightroom. They provide options to help maximize the colors, dynamic range, and contrast that mimics your camera’s profile. However, there are also Adobe profiles you can choose from based on the preferences, look, and style you’re looking for.
Whether you go for an imported profile that mirrors your camera’s style or one of Adobe’s profiles, it’s important to be familiar with profiles and set your preferred profile first. This will be the foundation for all your edits.
Edit Your “Basic” Settings
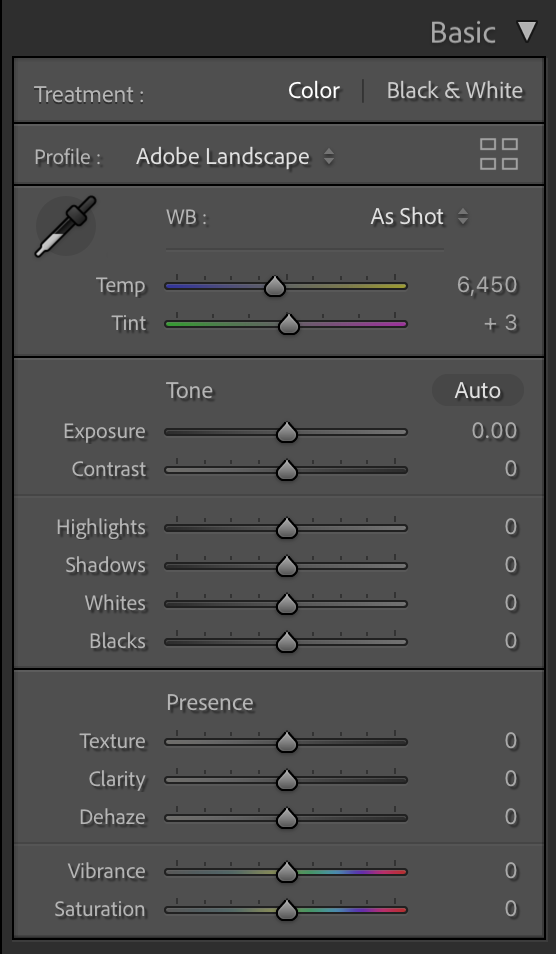
The basic settings panel is the first option in the development side menu. These are the fundamental settings you will work with. These basic settings contain three categories: White Balance, Tone, and Presence.
White Balance adjusts your camera’s kelvin settings. It allows for cool and warm adjustments while also providing green and magenta tint options.
Tone settings include options like exposure (darkness/brightness), contrast, highlights, shadows, whites, and blacks.
Presence allows for more stylized edits, with texture, clarity, dehaze, vibrance, and saturation settings.
It’s important to understand, learn, and master these basic settings first, before diving into color, details, effects, and more. They may be basic, but they’re the building blocks that help set the tone.
Edit Camera Calibration RGB Settings
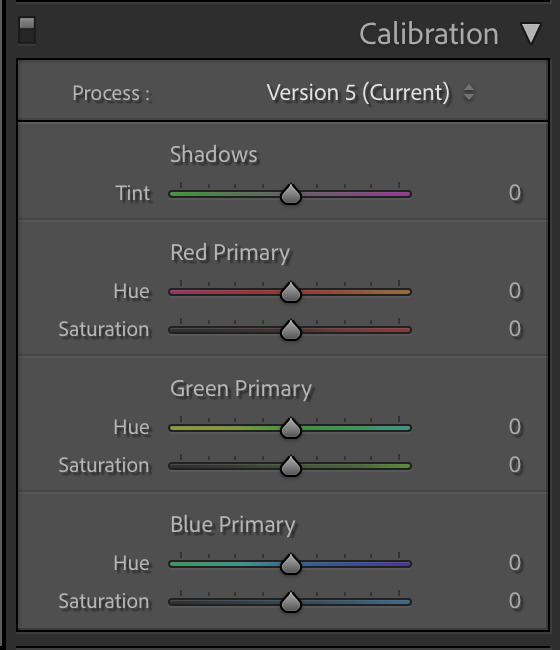
A common mistake is to start working with your Color/HSL settings before you set your camera calibration. Your camera calibration settings are crucial for determining the overall RGB color settings in your image.
Your calibration settings affect the entire RGB spectrum, while the Color/HSL settings affect individual colors under each color profile. You have the ability to set the red, green, and blue primary hue and saturation levels. You can also adjust the overall shadow tint, between green and magenta, which plays a huge role in the overall look and feel of your color editing.
Focus on setting your camera calibration first, then move into individual color editing in the Color/HSL settings panel.
Edit Color/HSL Settings
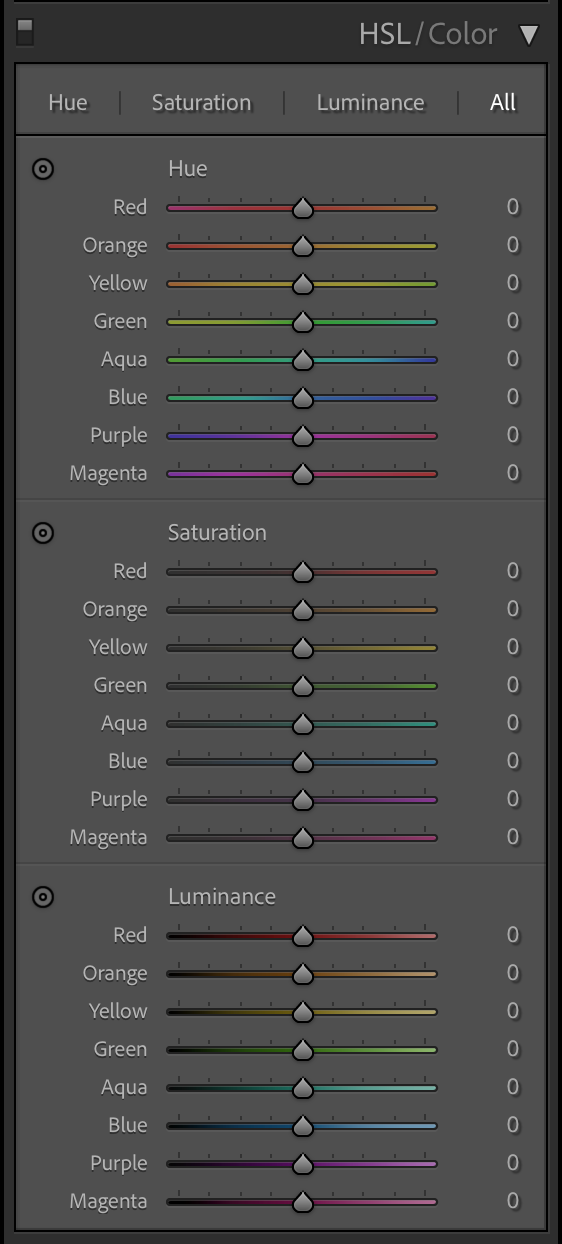
The Color/HSL panel is all about color control and color grading. It is one of the most enjoyable parts of editing.
HSL stands for hue, saturation, and luminance:
- Hue affects color shade
- Saturation affects the color intensity
- Luminance affects the amount of lightness (light to dark)
You can take your color control even further in the color grading panel, adjusting shadows, midtones, and highlights. Although, mastering the basics in the color/HSL panel is most important.
Edit Sharpness and Noise Reduction
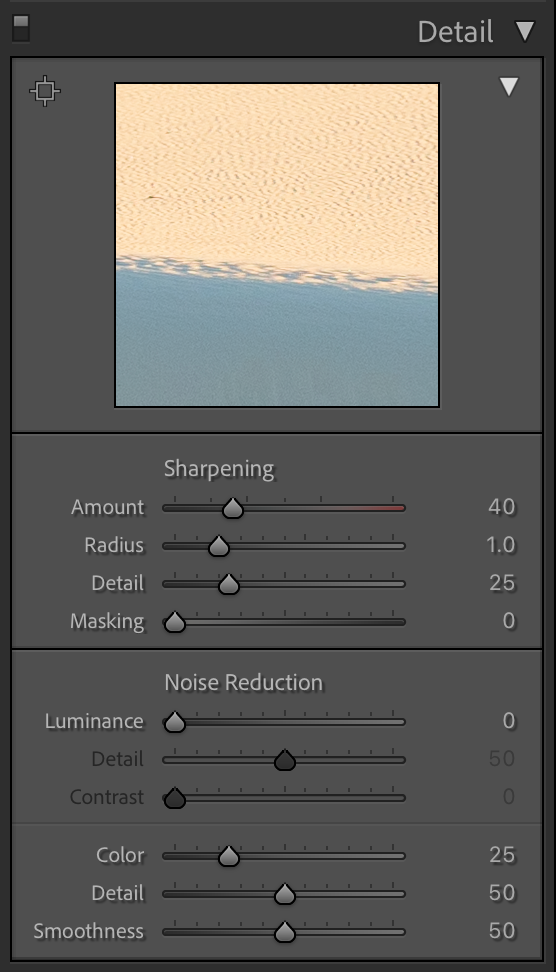
After color editing and grading, it’s time to move into the Details panel. The Details panel works with sharpness and noise reduction, and is especially important when you’re working with an image at high ISO settings.
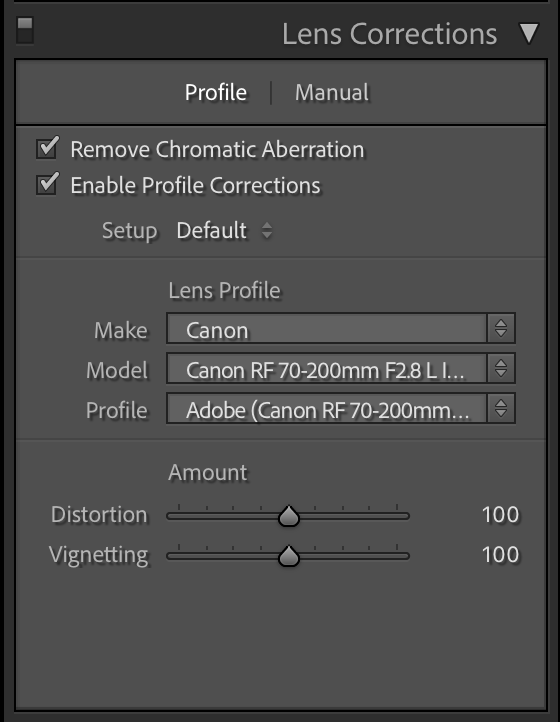
Add Lens Correction and Perspective Changes
At this point, you should be at a really good place when it comes to color, exposure, and the overall look and feel of your image. Now it’s time to adjust for any sizing, perspective, and lens corrections edits.
If there are any noticeable perspective issues or lens issues — like warping, vignetting, or chromatic aberrations — you can easily fix and adjust these in the Lens Correction panel. You can do this with automatic profile adjustments or more hands-on manual correction which offer better control of your image. This panel is especially useful when shooting with an ultra wide-angle lens, where warping and other lens issues can take place.
Once your lens corrections are complete, you can move to the Transform panel to adjust any final perspective settings. Finally, you’re ready for the final adjustments to your image.
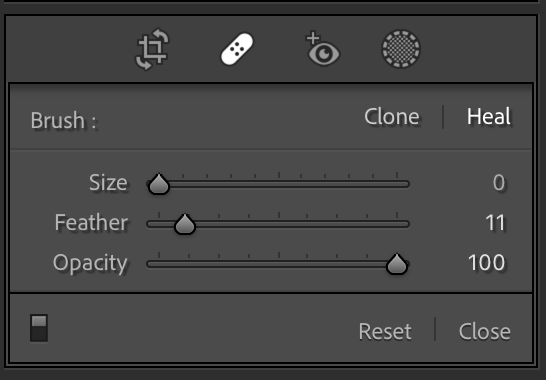
Use Masks and Spot Removal for Final Touches
The last adjustments you will make to your image will be found in the banner above the basic settings panel. There are four options, but the two you will want to focus on are the Mask and Spot Removal tools.
The Spot Removal tool is a great option for removing any small details in your frame that you want removed. It could be a bug in the frame, an airplane chem trail in the sky, or a bottle on the side of the road. Whatever those little details are, the Spot Removal tool can take care of them and use similar pixels in the frame to camouflage those spots.
Finally, we have the Mask tool. This might be one of the most intuitive, powerful tools in Lightroom. In the past, mask options like Brush, Linear Gradient, and Radial Gradient, have all provided amazing control over specific sections of your image. But recently, Adobe has added even more powerful, intelligent masks like Select Subject and Select Sky, which can accurately select these parts of your image for easy, targeted editing. Using Use Fine Adjustments, especially when using the brush mask, can add greater control over your mask so you don’t brush over edges or sections by accident.
Both Spot Removal and Mask provide effective editing control over your image without having to export into Photoshop.
Resize, Save, and Export
By now, you should have an image that is ready to be shared.
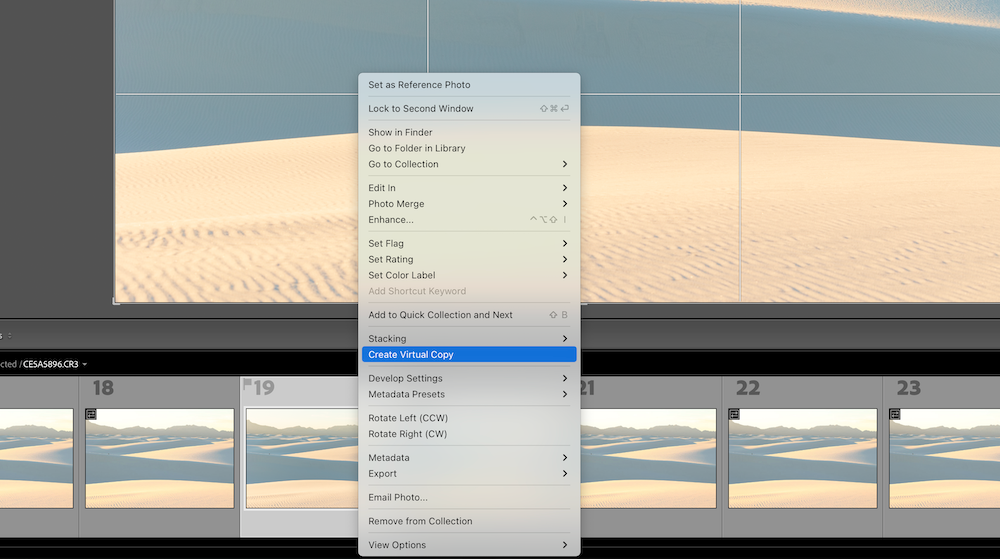
Depending on what platforms you plan to share it on, it’s easy to create copies of your final edit by right-clicking the image and selecting Create Virtual Copy. Then, head to the top banner where the Mask and Spot Removal buttons are. Select the Crop tool to size out every copy you have to the right specifications for export.
Next, be sure to save all of your work, then head to File > Export and export your image or images to the specified export folder in your export settings.
It’s important to take time to familiarize yourself with these export settings. They’re helpful in determining export location and file settings, which can be useful for sharing on social and digital mediums.
Save Custom Presets for Future Use
Finally, if you love the edit and want to save it for quick and easy use in the future, you can save it as a custom preset. This allows you to essentially copy and paste as much of the photo settings as you’d like onto future images. This provides a much better starting point and allows you to begin developing and building your own individual style.
Just go to the Develop button on the top left hand corner menu > New Preset > select all the image settings you want to include in the preset, and even customize the preset group name.
Then, to access the new preset and use it on a new image, go to Library > Quick Develop > Saved Preset > then scroll down until you find your preset group. Select it to paste those photo settings on that new image.
These ten Lightroom photo editing basics will help you navigate what may seem like an intimidating, complex photo editing software. There is much more to dive into but if you start to familiarize yourself with the ten basics shared above, it will make you a much more confident photo editor.Give Lightroom a go, and start your journey towards confident photo editing!
If you’re looking for more tips to improve your photo editing, check out these helpful articles.

