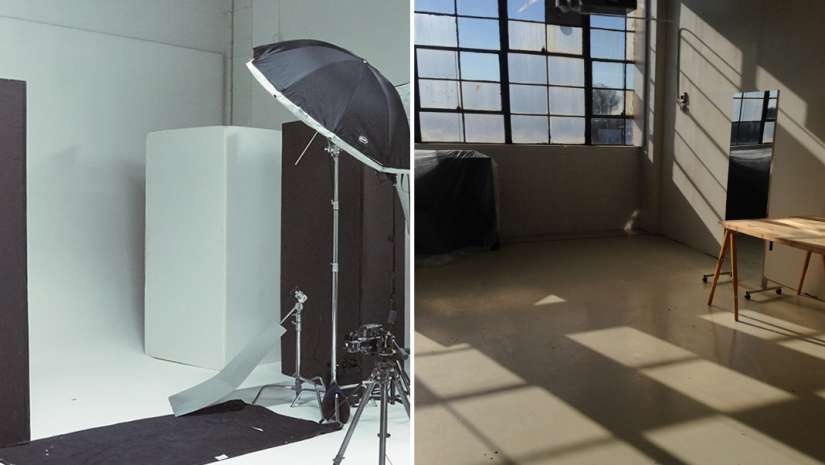
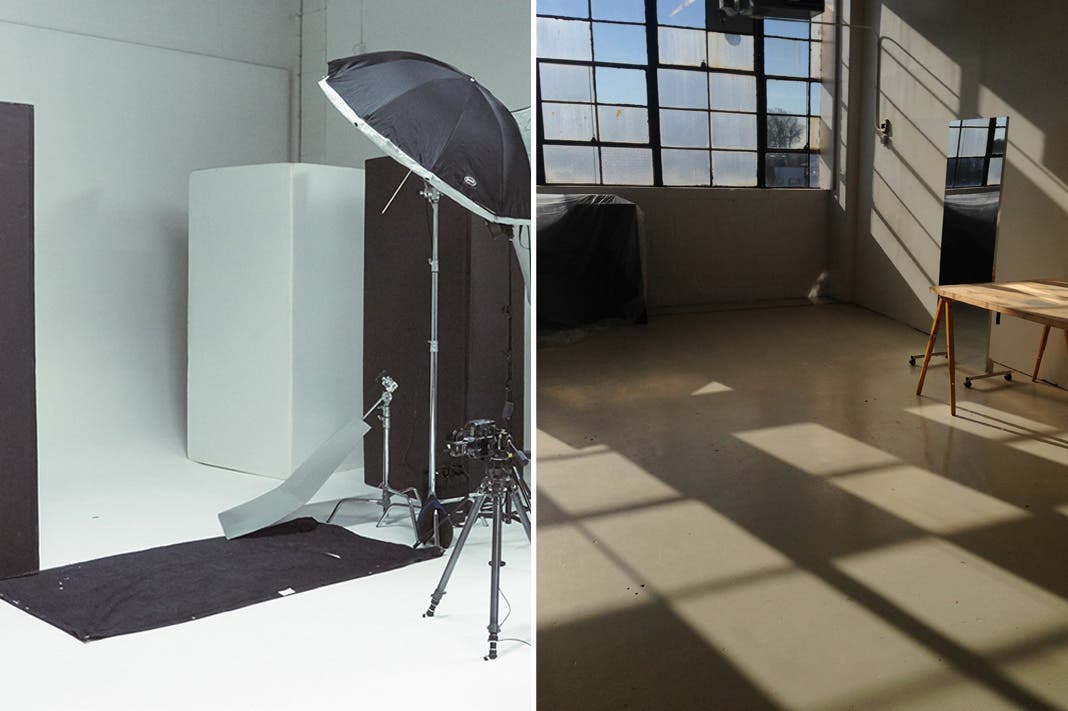
The first thing you’ll need from a studio is unobstructed space, the more the better — but it’s not necessary to have a massive space to create great work. The distances you’re concerned with are how far your subject will be from the background, and how far you, camera in hand, and your lighting setup, can be from the subject.
A good working rule of thumb for each of these is that you’re going to want the freedom to move your subject a minimum of 4 feet from the background, and have another 6 to 8 feet in front of the subject for you and your light. More space allows greater freedom and more refined control over isolating your subject from the background… but there are creative ways to work with a smaller space. Generally you want space between the subject and the background to move the shadows off-center, out of focus, or out of frame. With even greater room, you can light the background separately for even greater control, making the background appear consistent edge-to-edge, and also raise or lower its exposure independent of the subject. Often, however, you’ll see people creating work where they put their subject right on top of the background and let the shadows fall where they will — the combination of this and a wider lens (e.g. 35-50mm) allow for nice work in tight spaces, and the key light does double duty, lighting the background as well as the subject.
Picking a studio: Light matters
Your second consideration is whether you plan to work with natural light or strobe. Both are wonderful and offer separate benefits and compromises. At the very least, natural light requires timing for good weather, and windows facing the direction of sun exposure that will align with your shooting times — east for early morning, west for afternoon, and north or south for indirect, all day light. Many top photographers are famous for working exclusively with natural light and they arrange their work schedules around favorable weather. If you can time your shoot properly, natural light offers a simple way to make really stunning work with minimal setup time — it is the basis for everything done with studio lights because of its inherent beauty.
However, for this article series I’ll be focusing on lighting with strobes, and my goal is to give you a firm grasp on the fundamentals of working this way. Working with strobes allows you to decouple your shoot from timing, or create a mood that you can set your subject in and carry consistently throughout a long day, or recreate across several days (invaluable for high volume catalog fashion for instance.)
Choosing studio strobes: A liberating approach
After years of using a pack and head system as the backbone of my studio work, I have been working a lot lately with Adorama’s Flashpoint line of li-ion battery powered lights. In fact, ever since I happened upon the Streaklight (), the Flashpoint series of li-ion battery powered strobes are all I shoot with, having tuned my techniques and style to fuse with this battery powered system.
The Streaklights, and their siblings eVolv () and Xplor (), are a complete system that can pivot from location to studio work with ease, and — though not without compromises — they offer a huge degree of creative freedom at a cost previously unimagined.
Setting aside speedlights — such as the excellent R2 Li-Ion (), I will just be focusing on what I feel are the three key categories of Adorama’s Flashpoint R2 system strobes: Pocket studio, bare bulb, and monolight.
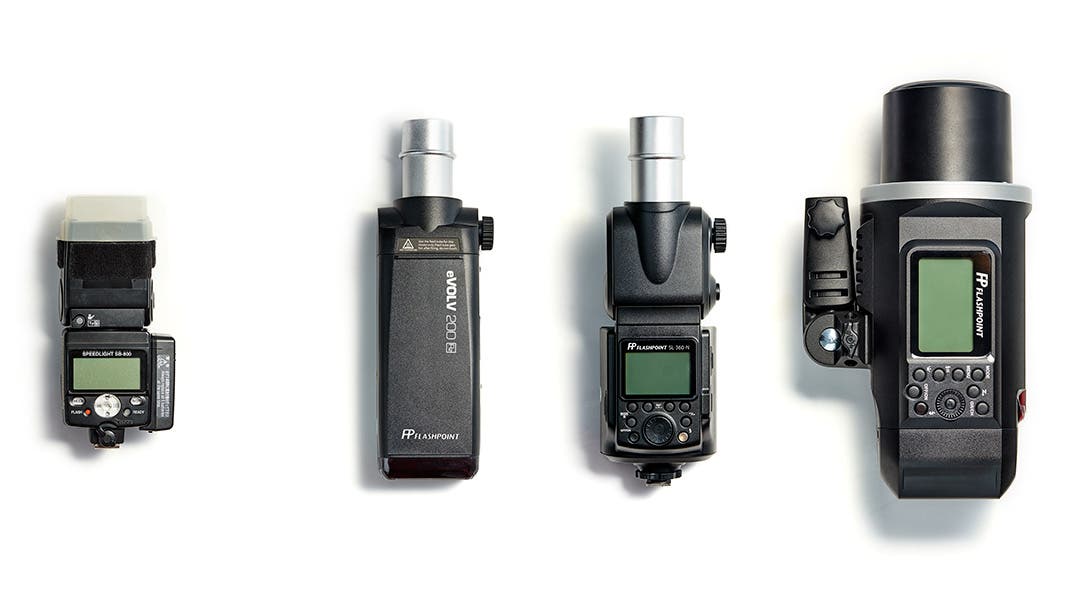
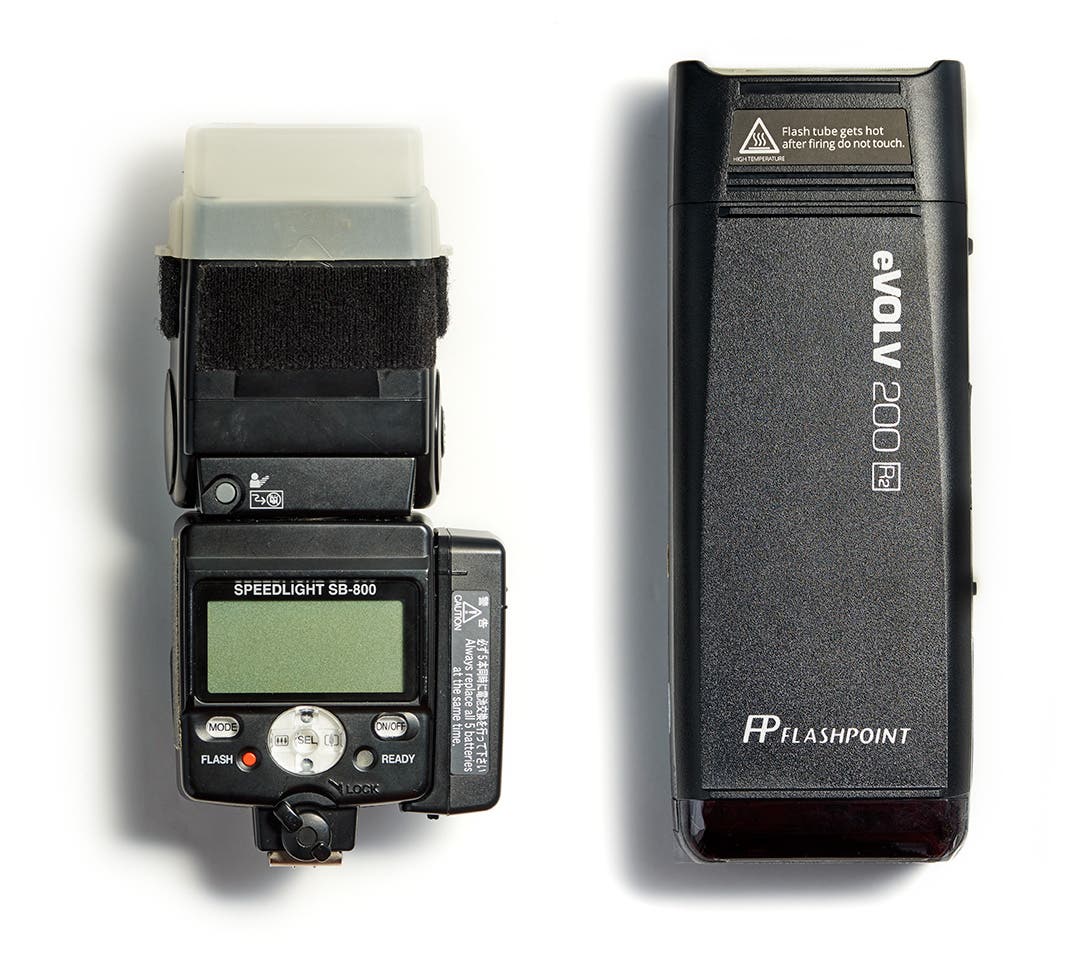
A simplified way of thinking of the three lighting categories would be:
• eVOLV 200 (pocket studio): The most portable, great for a small pop of light to assist ambient, or shoots with a smaller coverage area, such as headshots and portraits. At 200ws, paired with a Bowens S mount, this is truly the world’s smallest studio light.
• Streaklight 360 & Streaklight TTL (bare bulb): The best compromise between portability and higher output — competent all-rounders, capable of full length coverage at ISO400 with near instant recycle times, while also breaking down to a fairly small kit. The manual version of these lights often goes on sale and — at four times the output and about 1.5 times the weight of a single speedlight — are a fantastic entry into studio lighting.
• Xplor600 (monolight): The absolute highest output of the R2 lights — capable of providing coverage of the largest space; also allows the most freedom to shoot at lower ISOs, or maintain a moderate ISO while shooting at the quickest recycle rate; in the case of capturing motion, provides the combination of the greatest output at the shortest flash duration.
If you’re looking to get into studio lighting, I can’t recommend the R2 system enough. My general advice is to get two lights to work with, budget- and subject-depending, with a handful of accessories to make a complete and flexible setup. I’ll be going into this in greater detail in upcoming parts of this series.
If you want to get in with the least amount of initial cost, while still having a rich feature set to work from, the manual (non-TTL) Streaklights go on sale regularly and can be had for as little as $300, including the power pack. For an overview of the items I suggest purchasing that make up a complete Streaklight setup, see my previous article on Japan. These lights lack the bells and whistles of their TTL counterparts, but on a shoe string budget, their features outpace many supposed “premium” lights with a double to triple price tag.
Pre-shoot prep
Before leaving for the studio, check the basics:
- Have a battery in-camera, with at least one backup battery. Check and make sure both are fully charged.
- Sufficient media cards and backups that have been reformatted.
- If tethering, multiple copies of the cables you intend to use — they have a way of deteriorating over time.
- Make sure your camera has been reset to studio standards. Coming off a previous job or project, you don’t want to accidentally start your studio session at ISO2000, or worse, shooting JPEG.
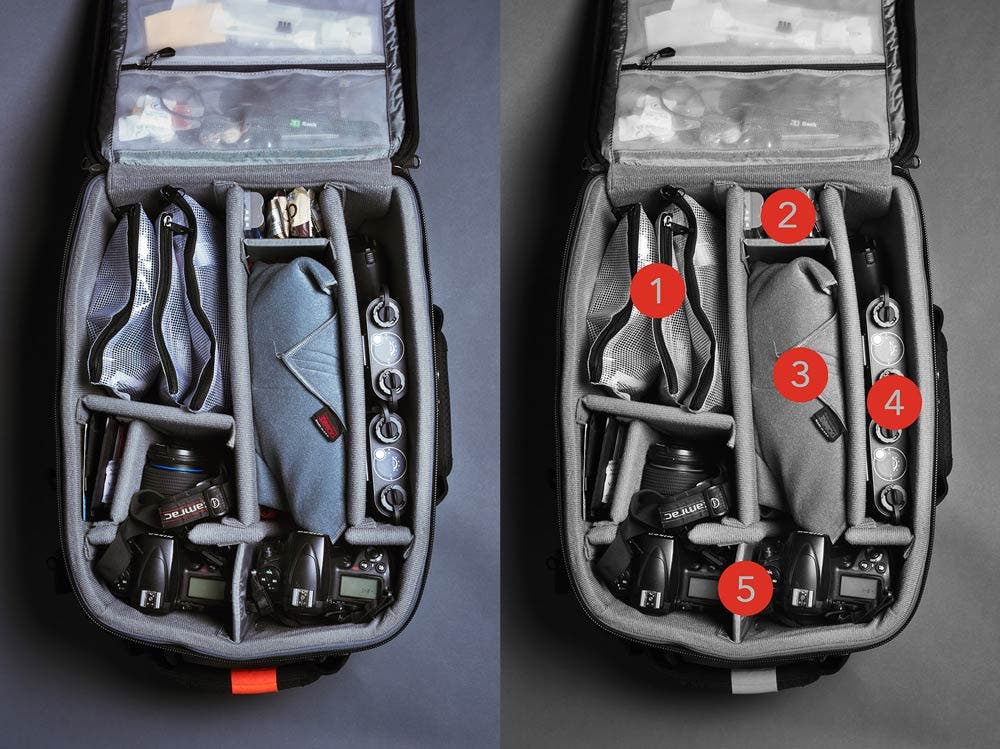
Pictured here are the contents of the Thinktank Airport (), which is the basis for much of my work, they are:
- Rugged nylon mesh pouches – for this gig they are separated with one for radio triggers, one for Streaklight cables and clamps, one for a card reader, and small hard drive.
- This area is reserved for recharging – both with spare batteries but also snacks for extra long gigs
- Two Streaklight TTL heads with metal caps wrapped in Domke lens wraps ()
- Two Streaklight power packs with a spare backup battery
- A main camera body and a backup – my main is a Nikon D810 (), with a D700 for backup.
I will often, the night before a shoot, setup my capture session and attach my camera and fire off some test frames to check for weak or broken components of my capture chain. I find it helpful to move through a process with the actual tools I will use and often — in this way I can come across hiccups before arriving on set.
Arriving in studio
Get there early, providing yourself with plenty of time to setup and consider what you’re about to do. If it will take me about 45 minutes to set myself up with lighting, I’ll try to get there an hour or 90 minutes ahead of my subject, and at least 30 minutes before my team, and I stagger call times on my call sheet to reflect this. This is all about putting myself in the most limber frame of mind for the creative process – if I’m rushed, or too caught up in making the gear work, it sets me at odds with the real work of making images happen.
(Optional): Setting up tethering
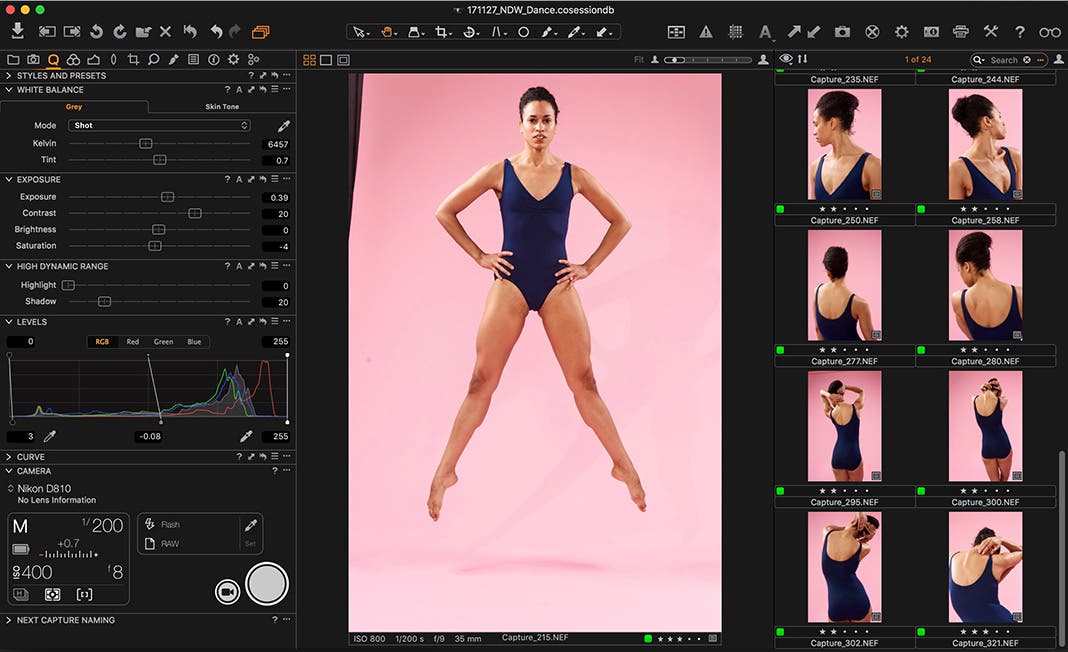
If you have a laptop with CaptureOne () installed, you can use a tethered workflow as a way of monitoring and refining your workflow instantly. I won’t be covering tethering in-depth here, for that you can head to Phase’s always excellent YouTube channel and often very active support forum, but I’ll give you some pointers gleaned from years in high demand production, based on a Mac workflow:
The two most frequent issues that occur with tethering are a weak port connection at the camera, and insufficient or varying power output from the laptop to the camera. My preliminary experience is that the latest wave of Macbook Pros with their USB-C ports relieves the power issue, but for anyone working from an early 2016 laptop or lower on location, USB3 power management can be a problem.
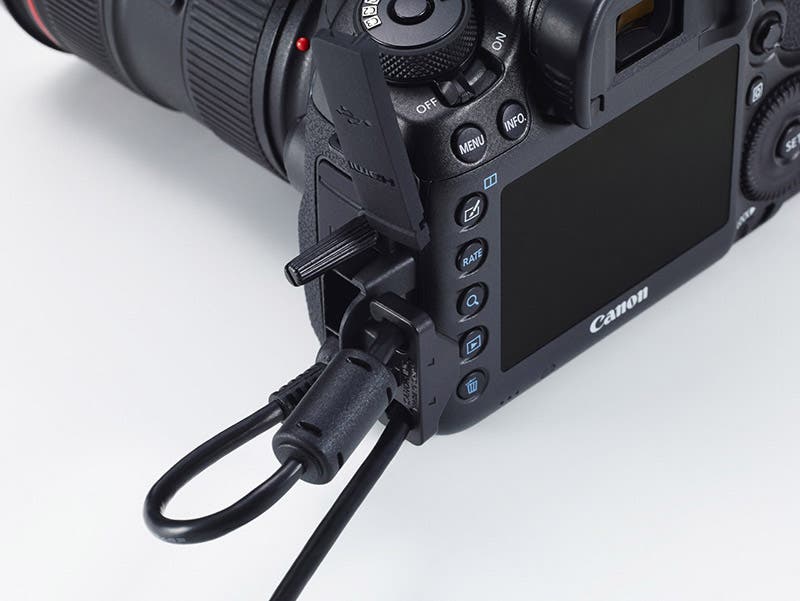
Solutions for these are:
-
- If not already included, purchase a port protector appropriate for your camera, an example shown here for Canon’s 5D series:
- In addition, you can purchase a Jerkstopper () or Tetherblock () (both can be used simultaneously).
- A tip I picked up from fashion photographer David Cohen de Lara: at the very least throw a long rubber band in your kit and attach the tether cable to your lens as shown here — in a pinch it can work just as well as the commercial solutions.
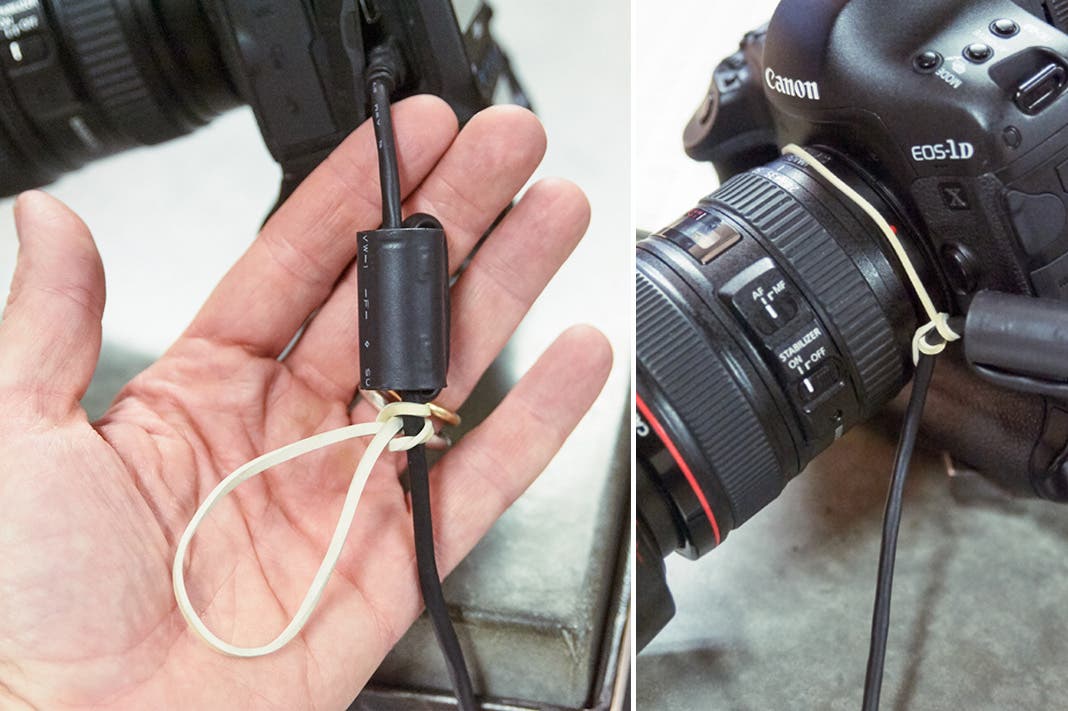
- Power management issues can be resolved by incorporating a powered hub — e.g. this OWC dock () —, as well as TetherTool’s TetherBoost Pro Core Controller ().
Assuming you have stayed current with C1P’s updates and marry it with a stable version of your operating system, the tips above should help to make tethering smooth and efficient.
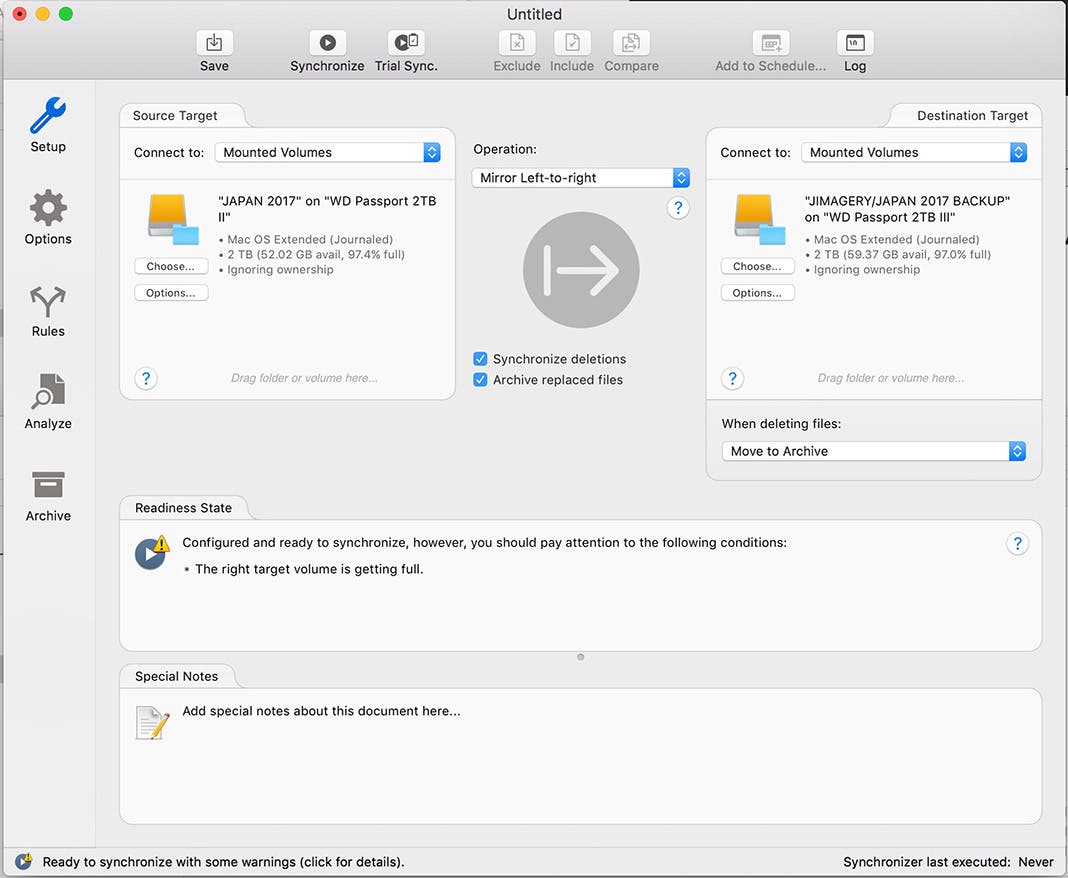
I also highly suggest that, as you shoot, you use an incremental backup system that you manually trigger when you have a moment, copying the files you’re writing to your laptop’s internal drive to an external backup drive. My software of choice for this is the excellent Chronosync. Chronosync offers a simple interface for dragging and dropping source folders or an entire drive, and separately dragging-and-dropping target folders/drives to receive updates as you work.
Tests, tweaks, color, and mood
Once you’ve set up your lighting and have your tether session in order, provided you’ve left yourself enough time to do so, you can enlist an assistant, friend, or someone from your team to stand in for the subject. This allows you to get a more accurate sense of the feel of the light and make adjustments before the subject steps on set. If nobody is available, I’ve even used an apple box on a stool as a stand-in to at least get a sense of my ratios, shadow density, direction, and placement — “roughing it in” so to speak, and then tweaking once the subject is on set.
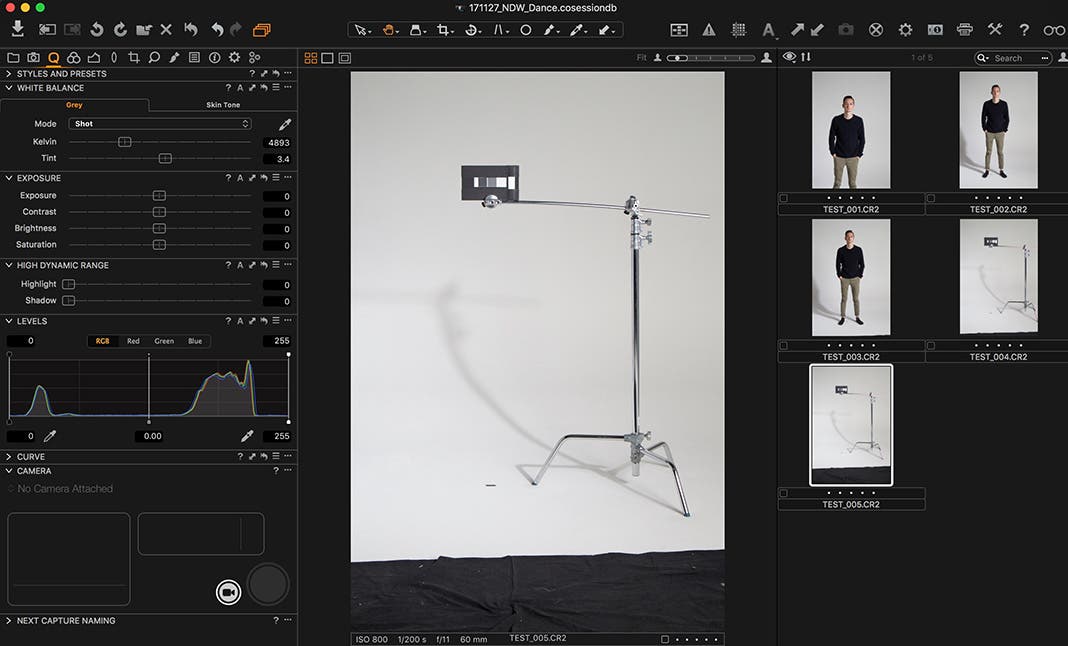
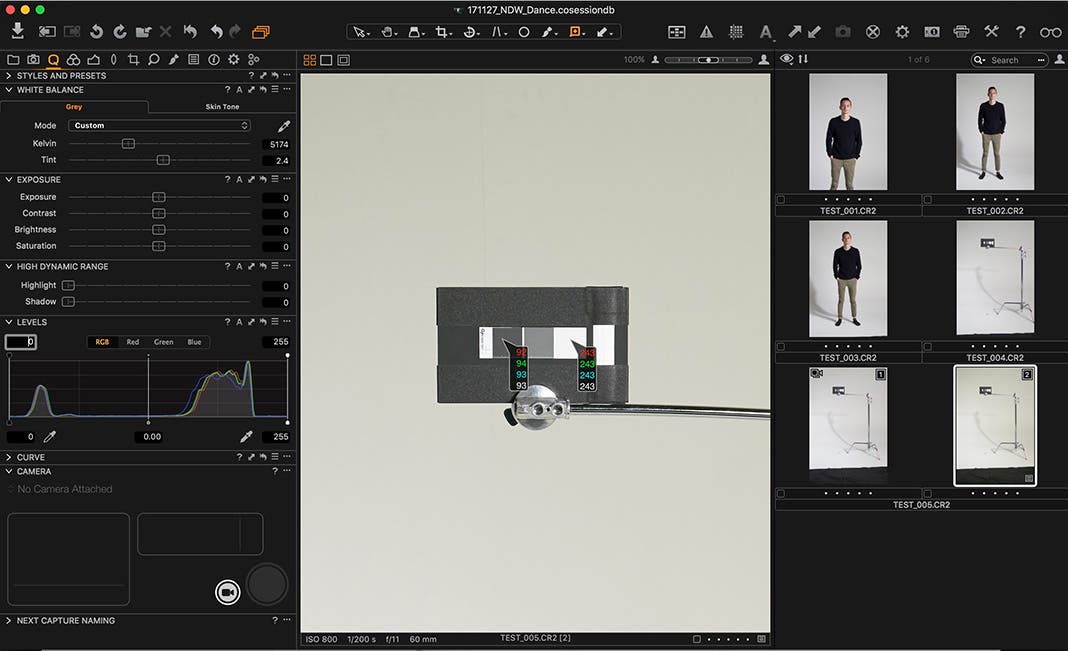
Pro-tip: the black and white chips of either color card can be helpful to offer reference points for exposure standards, in addition to simply balancing color. Use the white chip to set an exposure reference point — provided it stays below 250/250/250 in the aggregate RGB channel readouts in Capture One, your subject will not clip (assuming their distance to the light, the light’s power, and your camera settings stay constant).
Up next: In part 2 of this series, I’m going to cover the ground rules of a lighting approach that I find applicable to most shooting situations. Then in Part 3, we’ll see how the approach can be implemented for three different styles of photography.
