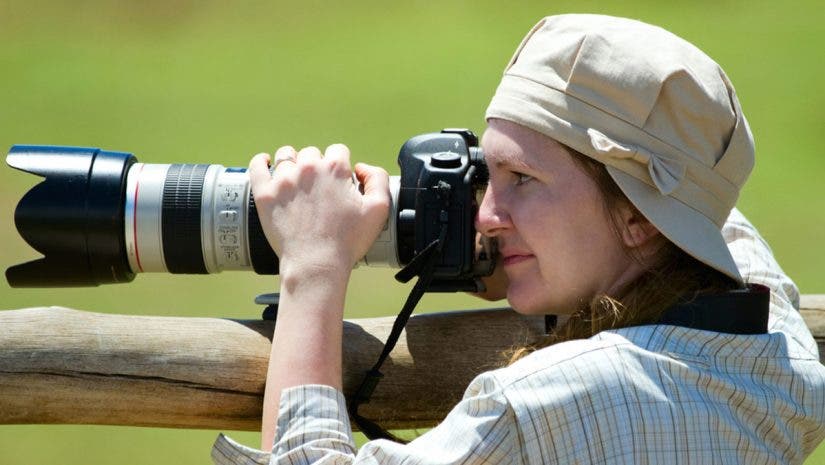
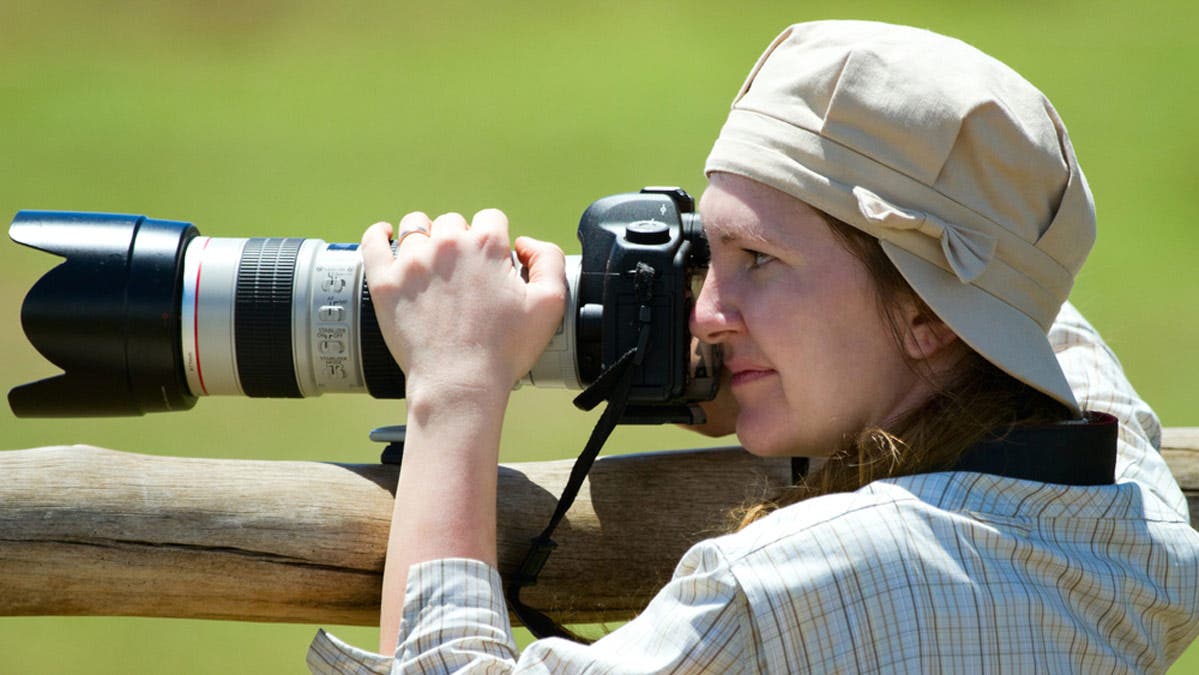
The stock in trade of the wildlife photographer is the telephoto lens. Most animals are small and get spooked when humans are near.
A high-magnification lens from a long distance (i.e. a telephoto lens) is often the tool of choice for both practical and ethical reasons. One of the prime concerns for the wildlife photographer should be to minimize any disturbance of the wildlife you are photographing and shooting from further away with a longer lens is one way to do this.
For photographers shooting 35mm film (or 35mm full frame digital), lenses in the 300-600mm range are most often employed. Single focal length (prime) lenses yield the highest quality, but unfortunately range in price from around $1,000 for a 300mm f/4 lens to over $7,000 for a 600mm f/4. There used to be several quite good 400mm f/5.6 and 300 f/4 lenses available at affordable prices from 3rd party lens makers, but in recent years they have all been discontinued and the only real choices below $1,000 are now telephoto zooms.While zooms are certainly more convenient, image quality at the long end of their range typically isn’t quite up to that of primes.

Zoom lenses suitable for wildlife photography start with 70/75-300mm zooms, usually f/5.6 at 300mm, which are available from most camera manufacturers as well as most third-party lens makers. They represent good value, but for wildlife work are often used at their longest focal length where their optical performance is weakest. Nevertheless they are often a good choice for someone just getting into wildlife photography on a limited budget. Prices range from a low of about $150 up to around $650. As in most things, the more you pay the better the quality!
There are also a number of longer zooms, such as the Sigma 50-500mm f/4-6.3, Tamron 200-500mm f/5-6.3 Di, Canon EF 100-400mm f/4.5-5.6L IS, and Nikon 80-400VR, ranging in price from around $800 to around $1600.
Mirror lenses are often seen as a low-cost alternative to the more common refractivelenses. A 500mm f8 mirror lens can be found for less than $100 for a used, third-party lens to around $500 for a new name-brand model. They are muchs maller and lighter than refractive lenses, but they have two disadvantages: First, at f/8 they are pretty slow and most of them are actually closer to f/9 or f/10 with regard to light transmission (“T-stop”). This can make them difficult to focus manually and the only AF mirror lens that I know of is the one that was made by Minolta. The second disadvantage is that out of focus highlights are rendered as donuts” due to the central obstruction of the lens. Even out of focus areas without highlights often take on a “mottled” appearance which most people regard as unattractive.
Of course, you can do wildlife photography with almost any lens as long as you’re not trying to get frame filling shots of a single bird or animal. With any lens you can take “environmental” shots which show the interaction of the subject with its environment (see the image below) and with a macro lens, or any lens with a close-up diopter and/or extension tubes you can do macro work with insects. You can also chose to work with animals under controlled conditions, such as in a zoo where a 200mm or 300mm lens is often long enough for closeups.

The Digital Advantage
The advent of digital SLRs has made life easier for the wildlife photographer in several ways.
First, sensors with an area smaller than that of 35mm have resulted in the so-called “Lens Multiplier” factor–cropping the image which would be recorded on 35mm film using the same lens. The resulting smaller angle of view is given an equivalent to the use of a lens with a longer focal length.
Let’s take the Canon EOS 60D as an example. Its “lens multiplier” factor is 1.6x, which means a 300mm lens used on them gives the same field of view (or magnification) as a 480mm lens would using 35mm film. Of course the “multiplier” is just the result of cropping, and you could crop 35mm film. However the fact is that the quality of an 8MP or more APS-DSLR image is better than that of a scanned 35mm negative of slide cropped to the same size.
Obviously, you can’t take this too far. If you used an even smaller sensor to give you, say, a 3x multiplier, to get 8MP or more the pixels would have to be much smaller (leading to higher noise levels) and other optical factors would come into play that would degrade image quality.

Before the days of APS-C DSLRs, a 300mm f/4 lens was regarded as a very good “starter” quality telephoto prime (in other words, a non-zoom lens), and a 500mm f/4 was the dream lens of many amateur nature shooters. With the 1.6x multiplier of cameras like the EOS 60D, that 300mm f/4 becomes very nearly the equal of that dream 500mm /f4 (480mm, to be precise) on a 35mm sensor camera.
For a wildlife photographer, though, no lens is ever really long enough, so most still lust after a 500mm f/4…which now works like an 800mm f/4 on a 35mm film camera–a lens which would have been so large, heavy and expensive that almost nobody could ever have afforded it or wanted to carry it around in the field. This is an obvious advantage for wildlife photography where getting close enough to your subject with a long enough lens is often the primary task.
The “digital multiplier” also means that 70-200mm lenses can be pressed into wildlife service since on a DSLR like a Canon EOS 60D they’re equivalent to a 112-320mm zoom.
Another advantage of digital cameras is that ISO can be changed at any time, and excellent quality is available at ISO 800, ISO 1600 and even higher on some advanced full-frame cameras. When I was actively shooting wildlife on film, I remember carrying multiple camera bodies loaded with ISO 50, ISO 100 and ISO 400 in order to cope with changing light.
With a DSLR you can just dial in a different ISO for every shot, enabling a photographer to cope with rapidly changing light or shoot from midday to after sunset with just one camera body. Many wildlife species are most active at dawn and dusk (when the light level is low) and the lighting is often at it’s best at those times, so high ISO capability can be very useful.
Image Stabilization
Image-stabilized lenses enable a photographer to shoot at shutter speeds up to about 3 stops slower than would normally be possible. They do this by sensing lens movement using gyroscopic sensors and using the signals to control a lens group which keeps the image at the same place on the film or sensor.
It’s an approximate rule of thumb that most photographers can handhold a 35mm camera and lens at a shutter speed equal of (1/focal length) seconds, so for a 100mm lens it would be 1/100 second and for a 500mm lens it would be1/500 second. APS-C format DSLRs require faster shutter speeds by the same factor as the lens multiplier, so a 100mm lens on a APS-C DSLR has the field of view a 160mm lens would have on a full frame 35mm SLR and requires a shutter speed of 1/160 second or faster.
Similarly, a 500mm lens on an APS-C DSLR would require a shutter speed of 1/800 second or faster for sharp hand-held shots. These numbers are approximate of course. Some photographers with steady hands might be OK with slower shutter speeds and those on their 10th cup of coffee of the day might require faster shutter speeds!
Some lenses have dual stabilization modes, one which stabilizes in both the horizontal and vertical axes for shooting static subjects and one which only stabilizes in the vertical axis which allows horizontal panning. The in flight shot of an Osprey shown below was taken using a hand-held Canon EF 70-300mm f/4-5.6 image stabilized lens at the 300mm focal length setting using the horizontal panning mode.

No tripod is perfect, and even with a very sturdy support a long lens may be buffeted and shaken by wind, so image stabilization of long telephoto lens can be valuable even though you’ll likely never try to hand hold them for a shot.
Canon has the largest lineup of image stabilized (IS) lenses, from a 600mm f/4L IS II USM Image Stabilized prime lens to a Canon EF 70-300mm f/4-5.6 IS USM zoom, but Nikon (VR – Vibration Reduction) and Sigma (OS – Optical Stabilization) also have optically stabilized lenses. Sony, and Pentax have DSLRs with an image stabilization system built into the camera, which accomplishes much the same thing but might be a little less effective with longer lenses.
Multipliers (Tele-converters)
Multipliers (also known as TCs or tele-converters) are commonly used to increase the focal length of a lens. They are available in versions which multiply the focal length by1.4x and 2x. The 1.4x version reduces the resulting lens aperture by one stop, so, forexample a 300mm f/4 lens would become a 420mm f/5.6 lens when a 1.4x multiplier is added. A2x multiplier results in a two-stop loss, so the same 300mm f/4 lens would become a 600mm f/8.
Besides the speed penalty, there is also a loss in optical quality. With really good prime lenses and a high quality 1.4x multiplier the loss in quality is often negligible. With a 2x multiplier quality loss is greater, but the image can still be good when the original lens and multiplier are excellent. Autofocus may also be affected and may not operate if the speed of the final lens combination drops below f/5.6 (f/8 for some cameras).

Though many beginners are tempted to add multipliers to zoom lenses, they tend not to work so well. So although your 75-300 zoom could be converted into a 150-600mm zoom by theaddition of a 2x multiplier, critical photographers would be unlikely to be happy with the results.
In some systems, such as the Canon EOS system, the manufacturer’s multipliers will only fit a small selection of lenses, usually telephoto primes and maybe telephoto zooms. They won’t even physically mount on consumer zooms. Third-party manufacturers do make multipliers which will fit on any lens but quality may be slightly lower and some can result in mild vignetting due to the use of smaller diameter optics.
Lens and Camera Support
The longer the lens and the higher the magnification it produces, the more stable the camera has to be to obtain sharp images. A sturdy tripod is essential. It would make little sense to spend $5,000 on a 500mm f/4 telephoto lens and then mount it on a wobbly tripod.
Sturdy tripods tend to be heavy, but today the use of exotic materials like carbon fiber can result in sturdy tripods which weigh considerably less than aluminum tripods. That they are typically at least twice as expensive, but it’s an investment many nature photographers are prepared to make. When you are carrying your lens and tripod a few miles through the woods, extra weight is the last thing you want. Gitzo, Manfrotto, Slik, and Velbon make good carbon fiber and aluminum tripods.
Most wildlife photographers use a ballhead on their tripod rather than a three-way pan/tilt/rotate head. With a ball head one control locks the whole assembly and when not locked the lens can be moved in any direction to track moving animals. A very popular head with serious wildlife photographers is the Arca-Swiss p0. Not cheap, but quality rarely is. Acratech also makes excellent ball heads at a slightly lower price and Manfrotto has a line of fairly inexpensive ball heads that are an excellent value.
Digiscoping
Digiscoping is a technique popular with birders. You use a small digital camera to shoot though the eyepiece of a spotting scope. It can give a very high degree of magnification for a relatively low cost, so birders don’t need tocarry both a spotting scope and a telephoto lens.
The disadvantage is that image quality isn’t as good as when using a DSLR telephoto lens and the system is often optically pretty slow which means the use of high ISO settings or low shutter speeds. High ISO settings mean higher digital noise levels and slow shutter speeds make the image susceptible to blurring to to camera shake.
Nevertheless, some photographers have achieved surprisingly good results when using high-quality spotting scopes such as those made by Leica, Swarovski and Nikon. Coupling the camera to the eyepiece can be done with special adapters. Web sized images can look great, but larger prints may reveal the limitations of the technique.
A few final comments
While you might think that a really long lens is the solution to all wildlife photography problems, there are several problems with longer lenses. The longer the lens, the more sturdy the support it needs in order to obtain sharp images. The longer the lens the larger it is, the heavier it is and the more expensive it is and although you can shoot from greater distances with longer lenses, the further away from your subject you are the more air you have to shoot through and the greater the degradation due to atmospheric effects.
Given the chance, it’s usually better to shoot from half the distance with a 300mm f/4 lens than from twice the distance with a 600mm f/4 lens. The 300mm lens will also be less than 25% of the weight and less than 20% of the cost of the 600mm.
Perhaps the most valuable tools in the nature photographer’s arsenal aren’t any of those described above. They are patience and a knowledge of natural history. Patience is required, because getting an image of an animal exhibiting natural behavior in its natura lhabitat may require just sitting in the right place for hours or even days. A knowledge of the natural history of the species you are trying to photograph is required to know where to sit!
