Now that you’ve got the gear you need, here’s how to set up and photograph the heavens.

Composing Your Target
Searching for the object you want to image requires some work on your part. Great resource can be found on the web from Astronomy magazine or Sky and Telescope magazine. Excellent printed publications are available, The Night Sky Observer’s Guide Volumes 1 & 2 from Willmann-Bell, Inc and the Pocket Sky Atlas, from Sky and Telescope. Astronomy software for the PC user The Sky X from Software Bisque is an excellent program plus there are hundreds of Apps for your cell phones or tablets that will help you choose and find your targets.
Mount Settings
Mounts with RA drive or tracking systems all need to be polar aligned, leveled and balanced to achieve pinpoint star images. Refer to your mounts manual on the correct procedures.

DLSR Camera Setting
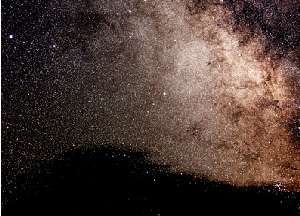
For my Canon T3i, 20DA and Fuji IS Pro I set them to the Manual Mode, for wide field Milky Way or deep sky shooting I set the shutter to bulb because I usually take exposures longer than 30 seconds and in some cases up to five minutes. The ISO setting depends on the noise level of your camera, earlier DSLRs had more noise compared the models available now. For instance, with my Canon T3i, I use settings from 800 to 3200 ISO depending on the sky darkness. For my 20DA and Fuji IS Pro (higher noise level) I use 400 to the max of 1600 ISO.

Lens Setting and Focus
Depending on what object you are imaging determines the lens you would be using. Wide field Milky Way images I use the Canon 18-55mm f/3.5-5.6 IS that came with my T3i. I also use Canon 55-250mm f/4-5.6 IS and a Nikon 180mm ED to zoom in. Remember: If you are not using a full frame sensor there is a 1.6x crop factor in your lenses. I turn off auto-focusing and image stabilization. I set the lens to the lowest f/ratio without having star issues at the edges. I turn on Live View and then manually focus the camera. If your camera does not have a live view you can just preview the image you shot, zoom in and check star focus repeat if necessary.

Light Frames? Dark Frames? What’s That About?
Acquisition of your images can be made by software (see section 5 for the listing) or a remote hand controller. I use both systems.
At home I use the Canon camera control software, this controls the camera exposure times, the amount of images you want to shoot, and the time delay between them. When on the road I use the Phottix TR-90 Multi-Function timer remote to control my camera because I do not need a computer. This multi-function controller lets me control the exposure time, the amount of images I am shooting, and the time delay between the images. I acquire around 30 to 60 light images per target and 10 to 15 Dark frames.
Dark Frames are images with the lens cover on and are shot for the same duration of the light images. Example a 2 minutes exposure for the light image you would need to do a 2 minute exposure for the dark frames. Dark Frames are an important part in astro-imaging, because we use them to reduce the noise of the final image.

Processing Your Data
When you complete the imaging session it now time to process your data. I use a freeware program called Deep Sky Stacker. This program will stack, combine and rate your light images. It will also subtract the dark frames you have taken to reduce the noise level in the image. The software does many other processes that I did not cover but you will find good tutorials on YouTube and the web. Once Deep Sky Stacker finishes it processing it will auto save the image as a tiff file. You can now import your image into one of the other image processing software and make corrections to your own liking.
With the advance technology of the modern DLSRs amateur astronomers can do real research and or produce images that would have been a marvel to the professional astronomer decades ago. The immense gratification one gets in the final results of an image and seeing it in print. Go out and join a local astronomy club, attend star parties, and meet people with the same passion for capturing the night sky as you.
Keep looking up and image that sky!


