What is The Second Shot?
Whenever Laura and I show up to shoot a wedding we have a few things in the forefront of our minds. The first is that we want to make sure we are capturing the client’s story in the most creative way we can. We do this by utilizing our surrounding and including whatever we can into the images. We are always thinking about how much time and energy our couple put into planning their wedding. We know they picked the venue, flowers, dress, etc. because they loved something about them. Knowing this, we go out of our way to shoot in a way that captures these things. We call these types of images “The Second Shot”.
Often times wedding photographers can get stuck doing the same shots at every wedding, i.e. groom adjusting bowtie, bride standing by window light. We consider these “The First Shot”. The First shots are very needed but we would encourage you not to stop there. If you got a great tight portrait of the groom adjusting his bowtie why not pull back and get a wider shot showing more of the story?
We started the concept of The Art of the Second Shot in order to help push wedding photographers to see beyond what is right in front of them. You can read more about this concept here. We would also like to invite you to join our Facebook group, The Art of the Second Shot, which consists of over 1700 photographers that are pushing themselves to be more creative.
How to Find the Second Shot
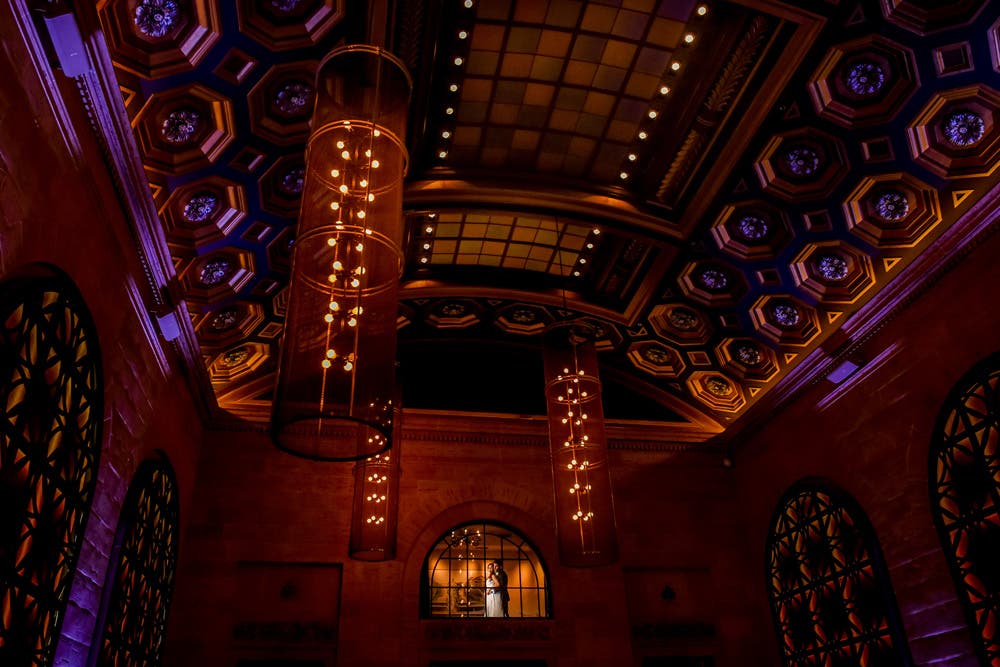
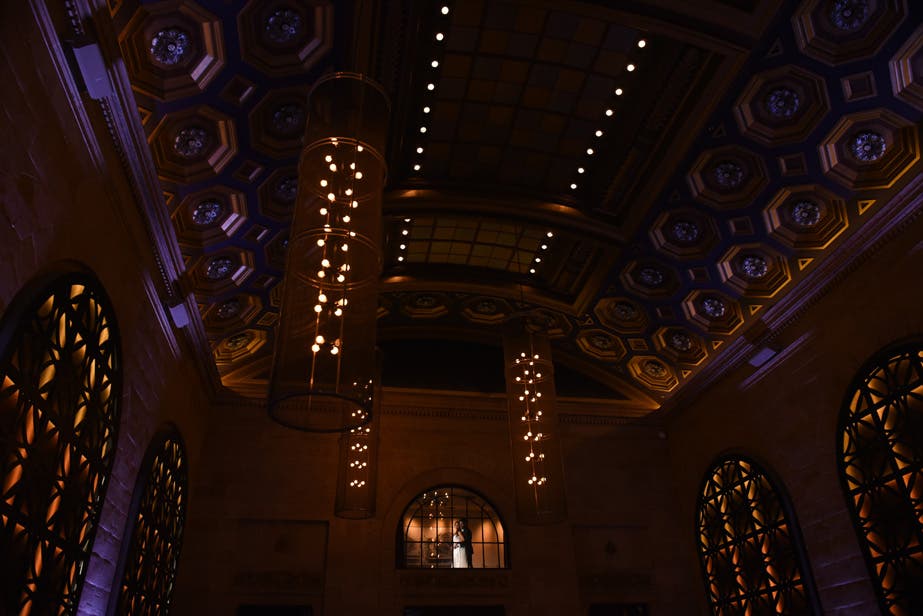
When we walked into Union Trust in Philadelphia we were in awe of the architecture. We knew we wanted to get at least a few images of the couple that featured their wedding venue. This way we could tell more of the story of their day. The image above is the view from the second story balcony and you are looking at the window of the bridal suite. As soon as we saw that window we knew we wanted to put our couple up there.
We knew that simply asking the couple to stand up there by the window wouldn’t produce a great shot. This is because the couple would get lost in the image due to the fact that there was no light on them separating them from the background. Knowing this, we asked our assistant to take a flash and a video light up into the room with the couple.
Execution
- Final Image EXIF
- Modifier: Mag Mod Grid
- Flash: Yongnuo 560 IV
- Camera: Nikon D750
- Lens: AF-S Nikkor 24-70mm 2.8 ED
- Focal Length: 24mm
- Aperture: f4
- Shutter Speed: 1/200th sec
- ISO: 1250
- Flash Power: 1/16th
We used a Yongnuo 560IV with a MagMad MagGrid on it to direct the light so it only hit the couple. We didn’t want the entire room being lit up by the flash. Using the grid allows us to control the light spill. The flash was then attached to a c10 Cheetah stand and placed just out of view of the window to camera left. The flash head was raised to be slightly higher than eye level of the Bride and pointed directly at our couple’s faces. See the diagram below for light placement.

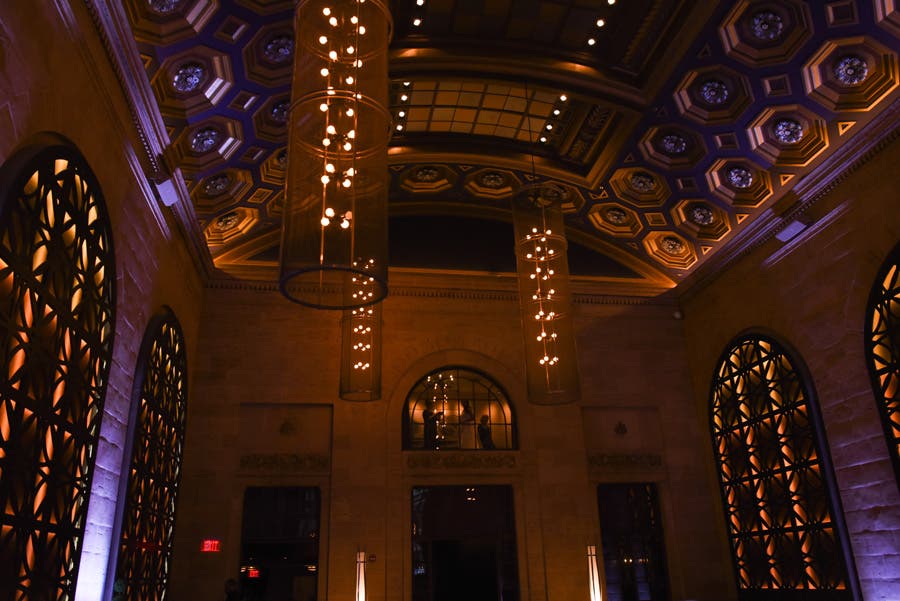
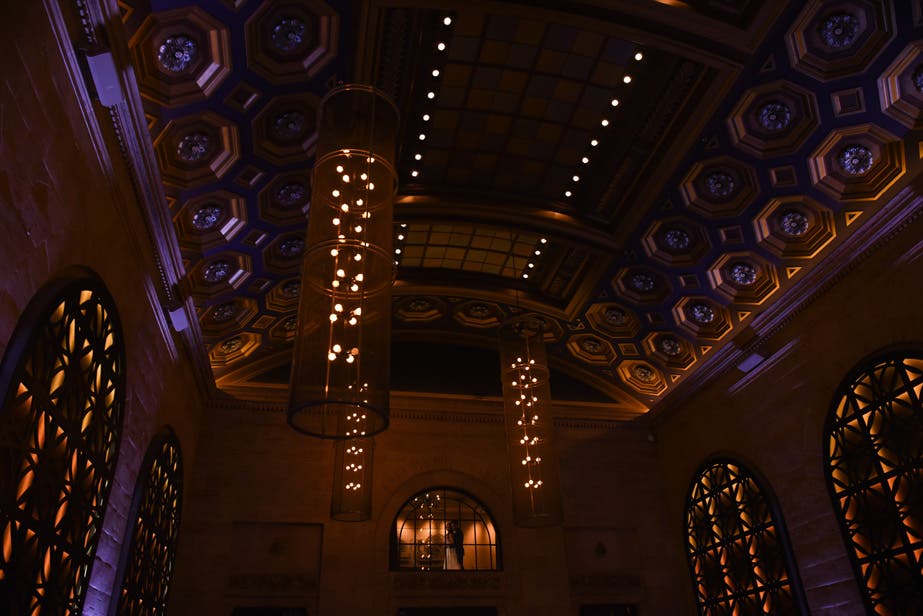
Once the light was set our assistant held up the Flapjack LED Wand to illuminate the couple so we could grab our focus. Without her doing so we didn’t have enough contrast to be able to focus on our subjects face. With the video light on our couple, we switch our Nikon d750 to “Live View” which then allows us to zoom in and lock focus on our subject. In the images below you can see a shot with the flash firing and another without. Both images are SOOC with a little exposure bump. You can really see the couple become the focal point of the image now that we lit them.
From here we didn’t have to do much post work. We simply imported the image into Lightroom and straightened and cropped it. After that, we applied our preset we built for all of our signature work. Lastly, we made some tweaks to exposure and color temp and finished it off with a little dodging and burning. That’s it!! Hope you enjoyed this article! Feel free to check out more of our work at www.lureyphotography.com
