Whether you’re a professional photographer or just starting out, adding video to your skill set can be simple and not too expensive if you follow this guide.
Video sharing sites abound with social media such as YouTube, Facebook, etc. Adding video capability to your photography business will expand your client base.
The differences between still photography and motion are many. If you are used to using a DSLR camera you can quickly learn the basics and start shooting quality motion in a very short period of time. A few carefully selected pieces of gear can have you up and shooting.
Creating motion relies on series of still frames captured in a continuous sequence. The video captures multiple frames in a second. This is also referred to as frame rate or frames per second(fps). The most common frame rates are 24, 25 and 30 fps.
For this tutorial, a base of 24 FPS is used. It is important to understand the relationship between camera settings in order to achieve your desired results in motion.
The relationship between shutter speed, f-stop and ISO for still photography should be familiar to you if you are experienced shooting still photos. With motion, the function of the shutter speed in relation to how it affects the picture can be confusing.

The easiest thing to understand is that the faster the shutter speed, the less motion blur in your image. To achieve a realistic and pleasing look for the human eye, we must create a little blur to make it appear realistic. Regardless of the shutter speed, the frame rate always remains constant. The rule of thumb for video is that the shutter speed should be roughly double the frame rate. To arrive at a proper shutter speed using 24 FPS, a shutter speed of 1/50 of a second is ideal. You can fluctuate the shutter speed between 1/20 and 1/100 of a second and still get great results. The F-stops function the same way in still photography and for video therefore controlling depth of field is simple.

How do you control the exposure if you are limited to a small range of shutter speed options? By varying your ISO. Shooting in low light or bright light can present technical challenges. Camera models vary. It is best to check your manual to see your particular model’s limitations. For example, the Nikon D610 shoots amazing video up until 1600ISO. After that, it degrades severely. Knowing the limitations of your gear is essential to getting the best quality footage. If you shoot in low light, you need to get a camera that supports high quality at the upper ranges of the ISO spectrum. If you are shooting in bright light and your camera’s ISO only goes down to 100, you can use neutral density filters to compensate and obtain desired results.

Record your footage at the highest resolution possible for the best image quality. Shoot at 1920×1080 if your camera supports that resolution. Some cameras may only have a 1280×720 option, which is still a decent quality level. Keep in mind, the higher the resolution the more storage it requires.

Most cinematographers focus the camera manually when they shoot. The auto focus features on most DSLR’s are not good for video. Follow focus options that rely on a series of gears to help you focus the camera with greater ease.
Shaky video looks bad and you need to keep the camera steady. Invest in a good video tripod with a nice set of sticks (legs). You may already own a camera tripod for still photography. There are major differences between still and video tripods. A video head is designed to do pans and tilts. A fluid head makes for smooth camera movements. Another piece of equipment that can help you achieve quality camera moves is a slider. A slider enables you to shoot lateral as well as forward and backward movements.

A nice all in one kit is the LibecALX S8 KIT Head, Tripod, and Slider Kit. It comes with a fluid head, legs and a 28” slider. The slider can work by itself or mounted on tripod legs. It is easy to use and at under $700 will get you up and running in no time flat.
A major component in achieving successful video projects is the ability to generate good quality audio. Unfortunately, the audio systems built into most DSLRs are not good. You must invest in an audio system. Various types of audio systems are available for purchase.

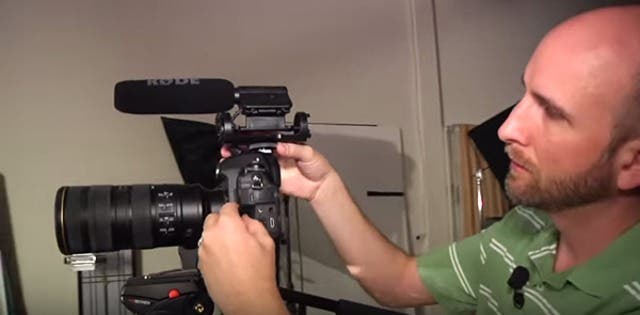
Nothing screams amateur more than bad audio. Recording sound, the best way to insure you get what you need, is to employ a two-part strategy. First, use a shotgun microphone. A great entry-level microphone is the Rode VideoMic Pro Compact Shotgun Microphone. It has hot shoe that mounts directly onto your camera and plugs into the microphone jack of the camera. It can also be plugged into an external recording source like Tascam DR-05 Portable Handheld Dig Audio Recorder With AT ATH-M30x Pro Headphone. The shotgun microphone concentrates the audio sound in a narrow directional path so make sure your subject is facing the microphonedirectly.

The second strategy is to use a lavalier microphone. The lavalier is a small directional microphone that is clipped onto the person body directly. The microphone also requires a recording device. If you don’t want to invest in a Tascam type recorder, an inexpensive solution is to use a smartphone and download the Rode Rec. app for $5.99. It really works great, and when you’re done you can send the audio via Dropbox or SoundCloud. When it comes to audio, redundancy is your greatest insurance policy, if one audio source fails the other will most likely record what you need.
Assuming you already have your DSLR, if you’re a still photographer looking to make the jump into video, you can quickly gear up for under $1,000 and start creating quality professional looking video projects.
Here is an example of a video created using equipment and techniques highlighted in this tutorial.

