Whew! Your actual photo shoot is over but your work is not complete just yet. You have your images but they’re not delivered to your client directly out of the camera. Post-production is in order so there’s a few more steps to completing your TFP model portfolio shoot.
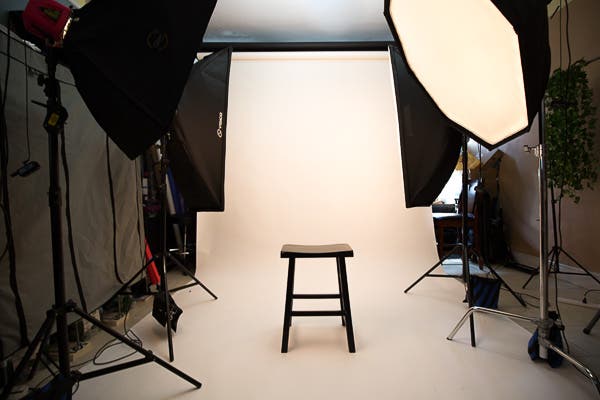
My studio.
Image courtesy of Subrahmanyam Chilakamarthi
In my first article, How to Plan a Model Portfolio Shoot, I shared my general checklist for preparing for a model portfolio shoot. In the my second and third articles Shooting the Model Portfolio: Part One and Part Two, I went over the things that I do the day of a shoot and gave you my checklist for the actual shoot itself. In this last installment, I’m going to share what I do after a shoot.
POST-PHOTO SHOOT
![]() Pack Up Your Studio and Set to Be Ready for Your Next Shoot. I always make it a point to clean up my studio directly after a photo shoot as it serves several purposes. First, it allows me to put everything back exactly how I want it so that I can easily access it for my next photo shoot; b) I’m more likely to let it sit until just before my next shoot if I don’t do it right after a shoot; c) it leaves my space clean in between shoots; and d), I have my assistant(s) there, so I have them help me break everything down and put everything away, otherwise, I’m on my own!
Pack Up Your Studio and Set to Be Ready for Your Next Shoot. I always make it a point to clean up my studio directly after a photo shoot as it serves several purposes. First, it allows me to put everything back exactly how I want it so that I can easily access it for my next photo shoot; b) I’m more likely to let it sit until just before my next shoot if I don’t do it right after a shoot; c) it leaves my space clean in between shoots; and d), I have my assistant(s) there, so I have them help me break everything down and put everything away, otherwise, I’m on my own!
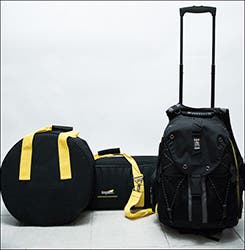
Gear packed up for shoot outdoors the next day.
![]() Backup Original Images. If you haven’t done so already, it’s a good idea to backup your images right away. Many photographers do this during a session. I typically back up to an external hard drive and to Dropbox. You can choose to do it during or after and using whatever system works for you, but definitely do it so you don’t lose your work.
Backup Original Images. If you haven’t done so already, it’s a good idea to backup your images right away. Many photographers do this during a session. I typically back up to an external hard drive and to Dropbox. You can choose to do it during or after and using whatever system works for you, but definitely do it so you don’t lose your work.
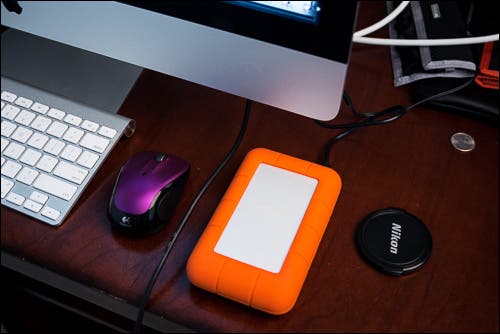
Backing up my images to my hard drive as I shoot.
![]() Import Images Into Adobe Lightroom. Import your images into Adobe Lightroom or any other software that allows you to rate, keyword and work on your images, if not already there. Your photos should already be imported into Lightroom or other software if you use it to tether during a photo shoot. Be sure to keyword your images so you can find their exact pinpoint location later, say for instance, if you are looking for all photos with a model that has blue eyes.
Import Images Into Adobe Lightroom. Import your images into Adobe Lightroom or any other software that allows you to rate, keyword and work on your images, if not already there. Your photos should already be imported into Lightroom or other software if you use it to tether during a photo shoot. Be sure to keyword your images so you can find their exact pinpoint location later, say for instance, if you are looking for all photos with a model that has blue eyes.
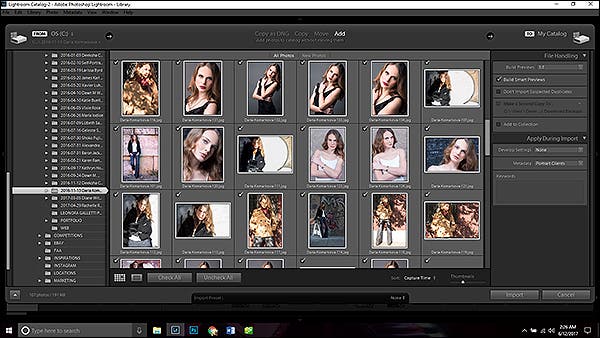
Importation of Images into Adobe Lightroom.
![]() Use Adobe Lightroom or Other Software to Rate and Select Images for Retouching. I obviously use Adobe Lightroom for my capture and some of my post-production work. You may use other software. I like Adobe Lightroom because you can import, keyword, rate, edit and showcase your images all in one program. It even automatically detects what your camera settings were for each photo (if shot in RAW) as well as the camera, lens and focal length too. I use the star system for rating my photos. Instead of assigning a star of quality to each photo, I first assign one star to every photo I like and that has potential to be a final image. I then take a break and go back a little later and do a second round of rating, going through all one-star photos and getting more selective. For those that seem to score in technical quality, I assign two stars. I take a break and do this again a few more times until I am left with 5-star rated images, which should weed the images down quite a bit.
Use Adobe Lightroom or Other Software to Rate and Select Images for Retouching. I obviously use Adobe Lightroom for my capture and some of my post-production work. You may use other software. I like Adobe Lightroom because you can import, keyword, rate, edit and showcase your images all in one program. It even automatically detects what your camera settings were for each photo (if shot in RAW) as well as the camera, lens and focal length too. I use the star system for rating my photos. Instead of assigning a star of quality to each photo, I first assign one star to every photo I like and that has potential to be a final image. I then take a break and go back a little later and do a second round of rating, going through all one-star photos and getting more selective. For those that seem to score in technical quality, I assign two stars. I take a break and do this again a few more times until I am left with 5-star rated images, which should weed the images down quite a bit.
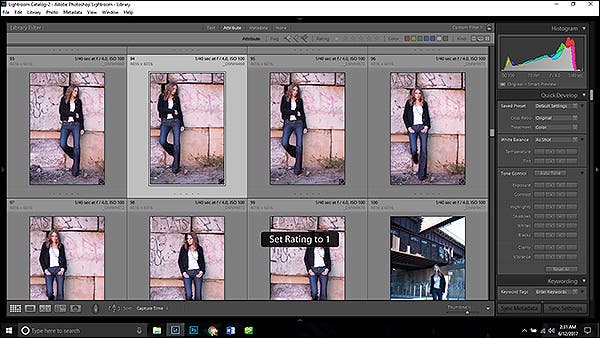
You can use colors, flags or stars to rate your images in Adobe Lightroom.
AND
![]() Retouch Images. Once you have your images selected, you can dive into editing these images. We have always taught our students to do as much as you can in Lightroom first before pushing your images into Adobe Photoshop. You’ll only save a lot of time. Adobe Lightroom has a wonderful feature that allows you to roundtrip your images into Adobe Photoshop and back into Lightroom (should you choose to watermark your images…)
Retouch Images. Once you have your images selected, you can dive into editing these images. We have always taught our students to do as much as you can in Lightroom first before pushing your images into Adobe Photoshop. You’ll only save a lot of time. Adobe Lightroom has a wonderful feature that allows you to roundtrip your images into Adobe Photoshop and back into Lightroom (should you choose to watermark your images…)
OR
![]() Review Images and Prepare Instructions for Retoucher on Revisions. Many photographers like to edit their own photos as they have a vision in mind and they don’t trust anyone else to get the results that they would get themselves. Other photographers, like myself, are really pressed for time and are very lucky to find a very good retoucher that understands the photographer’s vision. If this is your case, you’ll want to create a checklist for your retoucher to follow, which will aid them in creating the result you want. I have a general list that applies to every image and then I have a shorter list of fine revisions that are specific to each image.
Review Images and Prepare Instructions for Retoucher on Revisions. Many photographers like to edit their own photos as they have a vision in mind and they don’t trust anyone else to get the results that they would get themselves. Other photographers, like myself, are really pressed for time and are very lucky to find a very good retoucher that understands the photographer’s vision. If this is your case, you’ll want to create a checklist for your retoucher to follow, which will aid them in creating the result you want. I have a general list that applies to every image and then I have a shorter list of fine revisions that are specific to each image.
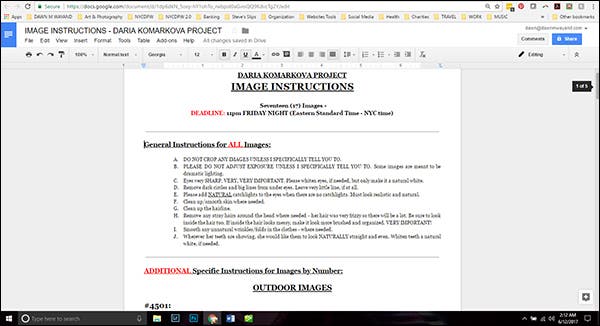
One of my retouching checklists.
![]() Set Up Dropbox Folders for Retouching. I then set up a few folders in my Dropbox under the client’s folder for the retoucher called Retouching and then two subfolders called: Originals and Retouched Images for Review. Then, I copy original images to be retouched into an Originals folder. I don’t just move these into that folder because if the retoucher accidently deletes an image – I need to have my originals safe. I then upload my instruction checklist into that same Retouching folder.
Set Up Dropbox Folders for Retouching. I then set up a few folders in my Dropbox under the client’s folder for the retoucher called Retouching and then two subfolders called: Originals and Retouched Images for Review. Then, I copy original images to be retouched into an Originals folder. I don’t just move these into that folder because if the retoucher accidently deletes an image – I need to have my originals safe. I then upload my instruction checklist into that same Retouching folder.
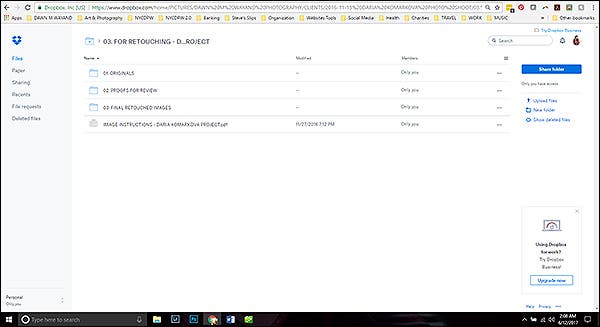
My Dropbox folder under a particular client.
![]() Working With Your Retoucher. I then contact my retoucher, give them a deadline and wait. If they have questions, I answer right away. It’s important to have good communication with your retoucher if you you want your images to turn out the way you envisioned. Before or around the deadline, my retoucher either contacts me to review the images or I follow up to see how they are coming along.
Working With Your Retoucher. I then contact my retoucher, give them a deadline and wait. If they have questions, I answer right away. It’s important to have good communication with your retoucher if you you want your images to turn out the way you envisioned. Before or around the deadline, my retoucher either contacts me to review the images or I follow up to see how they are coming along.
![]() Once Images Are Complete, Re-import Retouched Images Into Editing Software, If Sent Out to Retoucher. You might find that you could go back and forth all day with a retoucher over something that might be very subjective. I occasionally tell my retoucher to not crop my photos, that I prefer to do it as I know exactly how I want them cropped. That is just something that is hard to get exact in a description because you may also change your mind a few times after seeing a result!
Once Images Are Complete, Re-import Retouched Images Into Editing Software, If Sent Out to Retoucher. You might find that you could go back and forth all day with a retoucher over something that might be very subjective. I occasionally tell my retoucher to not crop my photos, that I prefer to do it as I know exactly how I want them cropped. That is just something that is hard to get exact in a description because you may also change your mind a few times after seeing a result!
![]() Complete Any Additional Personal Retouching. Again, push your images through your photo editing software and complete any additional retouching that results from a subjective decision.
Complete Any Additional Personal Retouching. Again, push your images through your photo editing software and complete any additional retouching that results from a subjective decision.
AND
![]() Watermark Images, If Desired. This is pretty self-explanatory, however, this also depends on the type of client. For TFP shoots, I watermark my images with my logo at the bottom right or left depending on where it is best placed. This helps my branding when the model shares the images. For paid clients or if I’m working with agency models, I do not do this.
Watermark Images, If Desired. This is pretty self-explanatory, however, this also depends on the type of client. For TFP shoots, I watermark my images with my logo at the bottom right or left depending on where it is best placed. This helps my branding when the model shares the images. For paid clients or if I’m working with agency models, I do not do this.
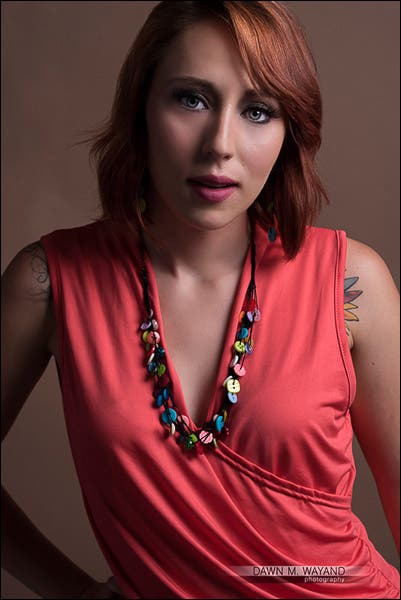
I watermark the bottom of my TFP model shoot images.
Model/Actress: Celeste Smith
![]() Export Images Into Folders in Dropbox for Client and/or Team. Once editing and any necessary watermarking is complete, I then create another folder in Dropbox for the final images to distribute to the client, his or her agency and my team. I like to share end results with my team for two reasons: 1) so they can see the fruit of their labor and 2) so they are excited for the next photo shoot!
Export Images Into Folders in Dropbox for Client and/or Team. Once editing and any necessary watermarking is complete, I then create another folder in Dropbox for the final images to distribute to the client, his or her agency and my team. I like to share end results with my team for two reasons: 1) so they can see the fruit of their labor and 2) so they are excited for the next photo shoot!
![]() Notify Recipients. While you can notify your client, the agency and your team through Dropbox that the images are ready, I tend to also like calling and/or sending an email as it’s a little more personal. I can add my logo at the top of an email and actually have formatting choices!
Notify Recipients. While you can notify your client, the agency and your team through Dropbox that the images are ready, I tend to also like calling and/or sending an email as it’s a little more personal. I can add my logo at the top of an email and actually have formatting choices!
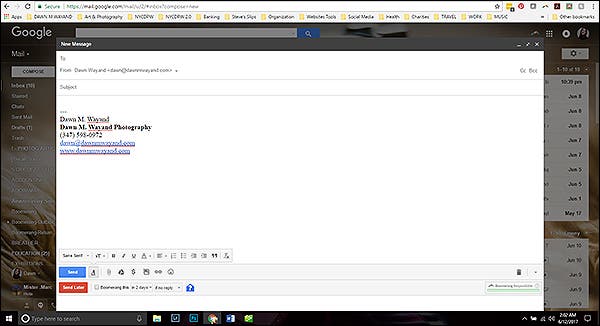
Notify your clients, their agency and your team.
ADDITIONAL STEPS
You may also be tasked with ordering composite cards for your model if shooting a paid model portfolio shoot. Here are two more steps for this process.
![]() Gather Model’s Complete Specs and Contact Details. You will need to gather the model’s complete specs, such as height, measurements and clothing and shoes sizes as these will things listed on their comp card.
Gather Model’s Complete Specs and Contact Details. You will need to gather the model’s complete specs, such as height, measurements and clothing and shoes sizes as these will things listed on their comp card.
![]() Contact Printing Company to Order. Last, you will want to call a reputable printing company that specializes in comp card printing and provide them with all of the information you gathered on the model as well as the chosen photos to include on the comp card. You will also want to advise them on specific placement and size, based on a conversation you’ve had with your client prior to calling the printing company.
Contact Printing Company to Order. Last, you will want to call a reputable printing company that specializes in comp card printing and provide them with all of the information you gathered on the model as well as the chosen photos to include on the comp card. You will also want to advise them on specific placement and size, based on a conversation you’ve had with your client prior to calling the printing company.
THAT’S A WRAP!
Model portfolio shoots can be a lot of work. It’s amazing that we occasionally do these for free! However, TFP model portfolio shoots are not only a great way to build your portfolio, but the portfolio of the model and your hair and makeup artist(s). They are also great practice for newer photographers to that area of specialty. Just remember to, at some point, start charging for your work too as there are many photographers out there trying to make a living off of shooting model portfolios as well as other areas of specialty, including, what someday, could be you.

