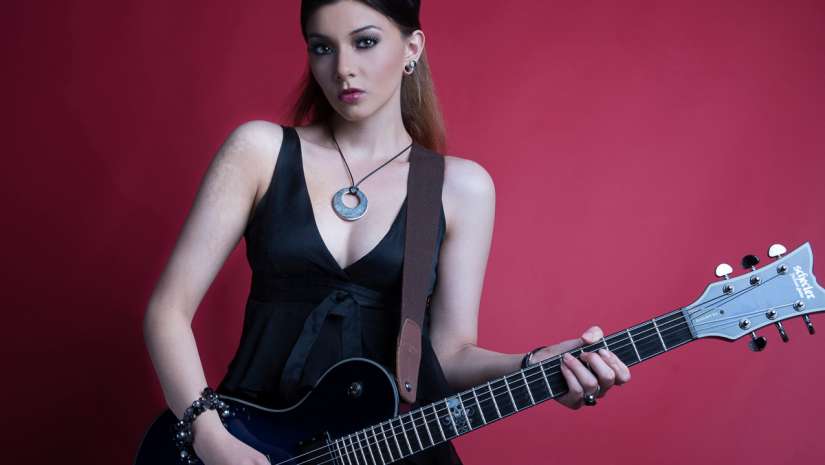
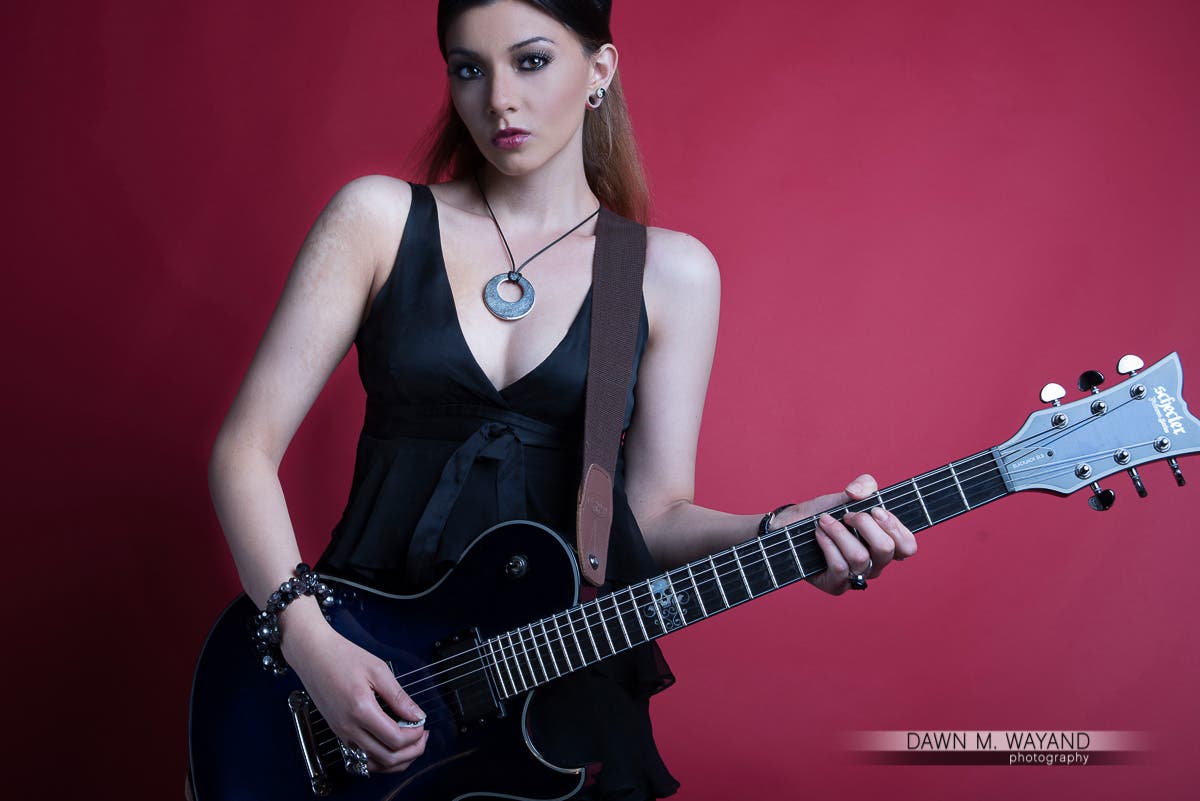
A portrait tells a story of someone’s essence – someone’s being. It takes great skill and technique to capture an accurate portrayal of someone. While skills and techniques necessary for shooting a portrait are a large part of successful portraiture, the are not all that is needed. You also will need good tools to make the grade.
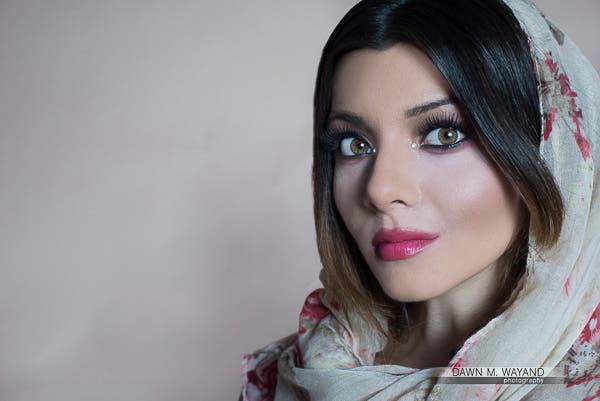
Capturing one’s essence.
Model: Maria Iodice
In the first part of this series, in my article entitled, The Art of Portraiture Part 1: Composition, Depth of Field and Background, I covered some of the basic necessities that contribute to a good portrait. In the second part, The Art of Portraiture Part 2: Light, I went over how light is an important element in a good portrait. In the third installment, The Art of Portraiture Part 3: Your Subject, we added in the most important element of your portrait, the person you are photographing and how to photograph him or her. In this last and final installment of this series, I will go some of the equipment that will help contribute to a successful portrait.
LENSES
The glass you put in front of your camera will determine the quality of the image the camera will help to produce. There is no camera made that will produce a stunning image if a bad quality lens is attached. While you most likely have a budget in mind for your new camera system, factor in the cost investment of a at least one exceptional lens before you buy that high-end camera body with half the features that you will never use.
Prime Lenses
Autofocus Prime Lenses. Autofocus prime lenses are great for shooting moving subjects such as when shooting fashion in the studio as you may have your subject continuously moving. Typically great focal lengths for shooting people in general are 85mm or a 100mm/105mm if you have the room. These come in several aperture ranges with the F/1.4 and F/1.8 being the most popular. The Nikon 50mm F/1.4 at $334, is a great compact lens that packs a lot of punch for its size. You can read more about this lens in my review here.
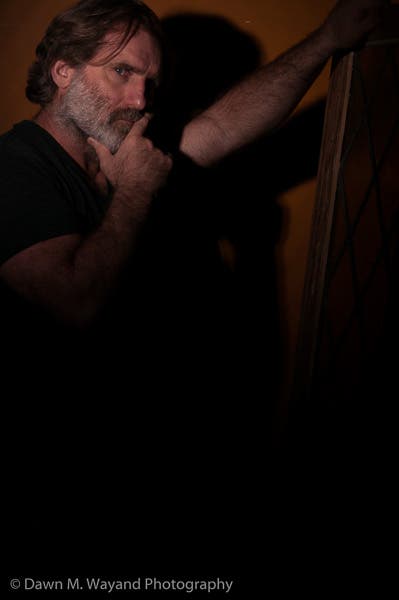
Shot with a 50mm F/1.4 lens.
Actor: Patrick Walsh
Manual Prime Lenses. Manual Prime lenses can cost a pretty penny and really work best only if your subject is stationary. These lenses are optimal for portraits and headshots. I found the Zeiss line to be exceptional with the more budget-friendly option of Rokinon right behind it. You can read some of my reviews on the Adorama Learning Center for the Zeiss 50mm F/1.4, Zeiss 85mm F/1.4, Zeiss 100mm F/2.0, Rokinon 50mm F/1.4 and the Rokinon 135mm F/2.0 lenses to determine which might work best for your needs.

Shot with a Zeiss 100mm F2.0 Makro ZF.2.
Model/Actress: Valery Lessard
Zoom Lenses
Zoom lenses can be a great option for shooting portraits as there is a tremendous variety in focal length and they allow for a versatile creative use of shooting while zooming in or out, among other uses. I’ve had the pleasure of using several Nikon zoom lenses in my studio work, most recently the Nikon 24-70mm F/2.8, retailing at Adorama at $1,796.95. While no longer manufactured, but still available used, I currently a Nikon 28-105mm in my space as well as client’s small spaces and have produced some very high-quality images.
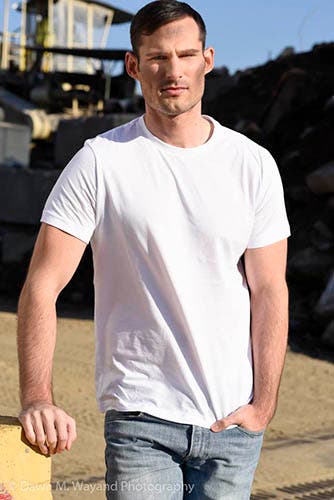
Shot with my Nikon 28-105mm F/3.5-4.5D IF lens.
Model: Andy Mizerek
For either a close-up option or for shooting subjects from afar, I have found my Nikon 70-200mm F/4G ED AF-S to be the perfect option for producing a high quality photo, which I also use for headshots. Be sure to look for lenses that have have vibration reduction should your camera system itself not have an equivalent function.
LIGHT SOURCES
Daylight and Reflector. The easiest and most inexpensive way to light an image is through the use of bouncing natural daylight off of a portable collapsible reflector back onto your subject.
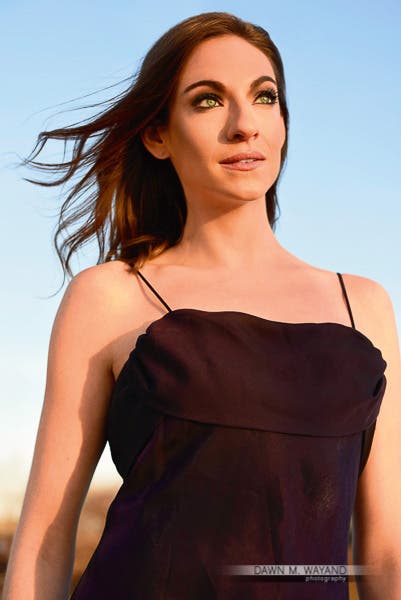
Using a portable collapsible reflector with natural daylight at sunset.
Model: Katie Buell
Speedlights. Another terrific portable and inexpensive lighting tool is a speedlight. Speedlights can be used indoors or outdoors and are typically used in conjunction with a portable collapsible reflector and/or bounced off of a wall or ceiling.
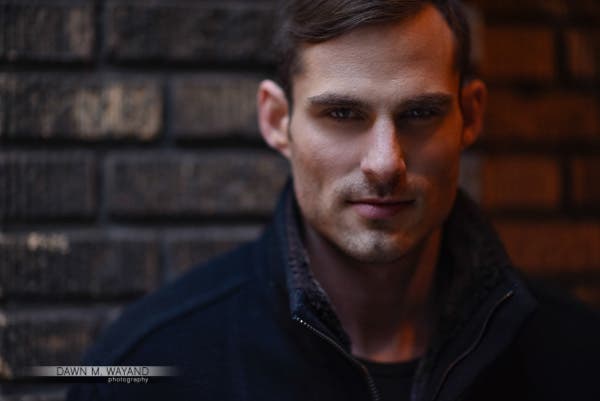
Using A speedlight in conjunction with natural daylight and a tungsten light.
Model: Andy Mizerek
Continuous Lights. These types of lights are perfect to use when shooting babies or capturing portraits of people who have trouble with blinking because there’s no disturbing flash.
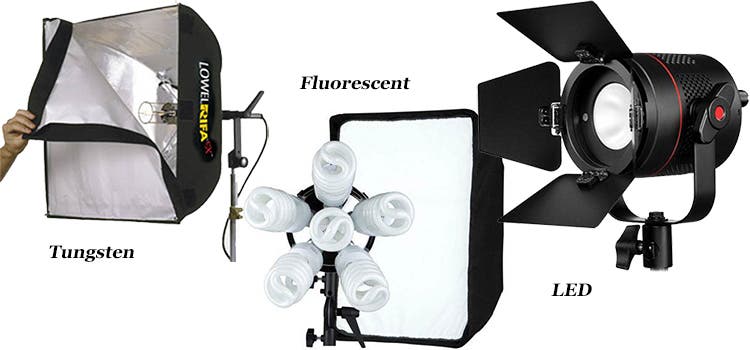
Left to right: Lowel LC88EX1 Rifa
1000 Watt Light, Westcott TD6 Spiderlite, and the Fiilex P180E 40-Watt LED Light
Individual images courtesy of Adorama
Strobe/Monolight. Most photographers use strobes or monolights when shooting in a studio as the instant flash lends to capturing a sharper image and the numerous modifiers available for use allows the photographer to get more creative with their lighting.
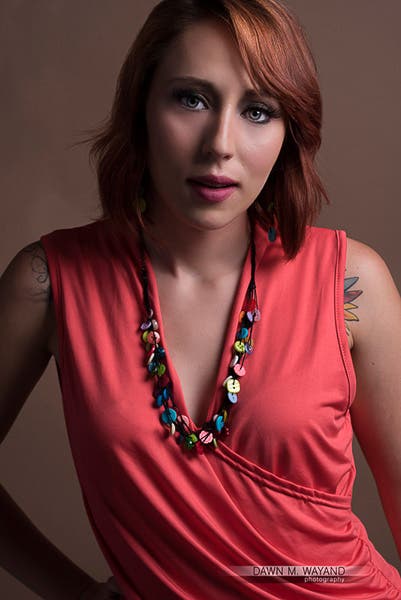
Portrait shot using monolights.
Model/Actress: Celeste Smith
I have found the Flashpoint Rapid 600 HSS Monolight with Built-In R2 2.4GHz Radio Remote System to be a great budget monolight for shooting portraits or any other type of subject in a studio environment. For more information on this terrific option, you can read my review on it here. I’ve also had the privilege of using the delicious Profoto B-1 500 Air TTL Battery-Powered 2-Light Location Kit. No matter where you are shooting, these battery-powered lights are lightweight and store conveniently in a backpack.
LIGHTING NECESSITIES
Light Meter
Cameras see differently than we do. While we have the ability to see everything in color, the camera’s meter sees and measures only how light or dark a scene is. It sees only tonality: black, white and a bunch of shades of gray in between. The shade in the middle of the gray scale is what is called middle gray. Middle gray is achieved when it reflects only 18% of the light that falls on it.
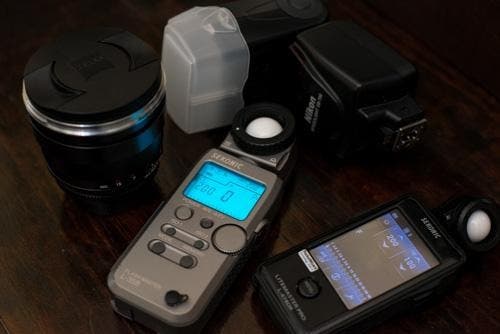
My Sekonic Flash Master L-358 with its younger sister, the Sekonic LiteMaster Pro L-478DR.
The largest goal in photography is to capture your images with accurate exposure or in better terms: for the camera to record your scene or subject as you see it. How can this be achieved if your camera or handheld meter only measures in tonality and brightness? In the same lighting scenario, every shade or color reflects a different amount of light and this is where a light meter can come in handy. Sekonic pretty much rocks the market on light meters.

A light meter positioned for use.
If you shoot video, a color temperature meter like the Sekonic C-700 SpectroMaster Spectrometer would be an ideal tool for you. If you are looking for the percentages of where your exposure is coming from (ambient, LED, fluorescent and/or tungsten continuous lighting vs. flash or strobe lighting), Sekonic meters are known to possess this feature. My current light meter, the Sekonic L-358 Flash Master, along with the Sekonic Litemaster Pro L-478DR has this feature. Those folks that work in studios may find the need for a meter to be able to fire their strobe – “wirelessly” being a bonus. Some Sekonics such as the Sekonic L-758DR Digital Master have this feature.
Tripod
Obtaining a stable support system for your camera is one of the most important things you should do right after you buy any camera and lens. I’m always amazed at the number of students I’ve seen in the past who spend hundreds or thousands of dollars between a camera and lens (and maybe a flash too) along with other necessary and unnecessary equipment, but they were unwilling to spend enough on the support mechanism for their major investment.
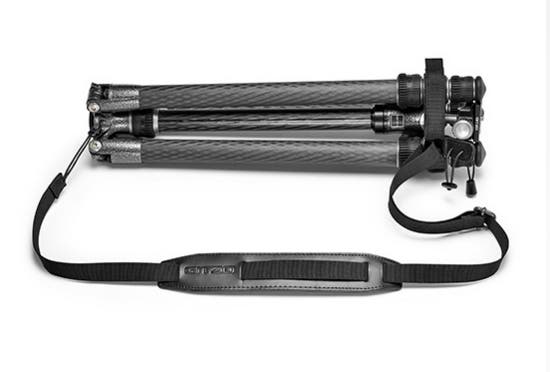
Gitzo GK1545T-82QD Series 1 Traveler Tripod-4 Section- with GH1382QD Ball Head
This is almost like being too cheap and unwilling to put a good UV filter on your lens, which can help protect the front element from breaking if dropped. Not obtaining a proper tripod to support your camera and lens unit can result in the unit falling and getting damaged – sometimes beyond repair. How much did you spend on that camera and lens again? For more on tripods, check out my article, Tripods: Choosing the Right Support for Your Investment.
Lightstands
As you begin to add expensive pieces of equipment like lights to your home studio, you’ll want to make sure you buy proper light stands to support those lights. Regardless of the type of lighting you may use now or in the future, light stands are a piece of equipment that you will want to think a little more long-term about as there are so many types, sizes and options available.
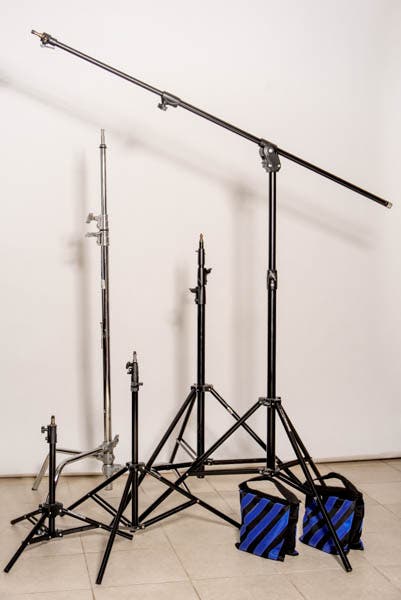
Just a few of the light stands in my studio.
For more on considerations for choosing the right light stands, check out my article, Building the Home Studio Part 2: Continuous Lights and Light Stands.
LIGHTING ACCESSORIES
Collapsible Reflector
While not everyone has an easy time folding them back up, most of us know what a collapsible reflector is and many folks have actually successfully used one. They should really be your first light modifier, even before you buy your first monolight or strobe because they are useful outdoors as well.
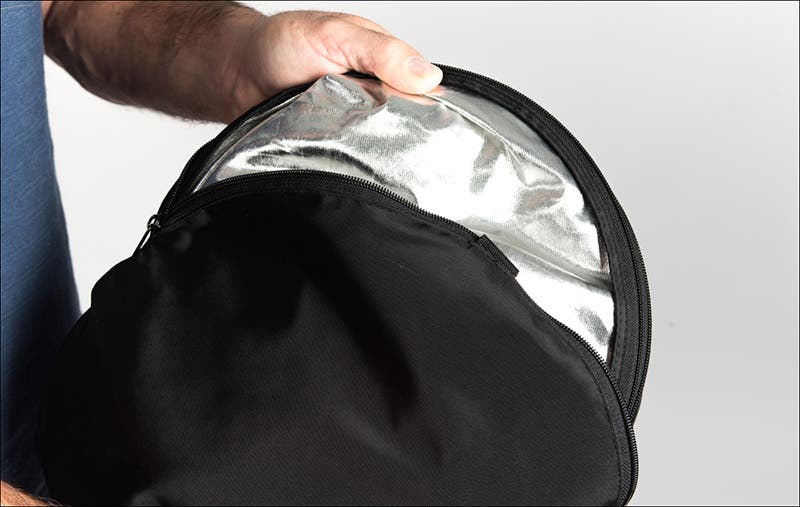
A good collapsible reflector is a “must” in portrait work.
Reflectors do exactly what their name might imply: they reflect light. They are used to bounce light from a light source back onto a subject. Photographing a person outdoors in the sun? We generally put the sun behind our subject to avoid him or her squinting, but then our subject becomes too dark because the light behind him or her is so bright. A reflector can be used to bounce light from the sun behind the subject back onto your subject so that he or she is also lit. This works the same way in a studio. You can learn more about collapsible reflectors colors and what the different shapes and sizes do in my article: Building the Home Studio Part 04 – Essential Studio Tools, Props and Odds & Ends.
Umbrellas
Umbrellas are probably one of the first studio modifiers purchased by photographers as they are cheap, portable and come in a variety of sizes and colors.
White shoot-through, or translucent, umbrellas are one of the more common umbrellas used in photography because the shaft of the umbrella is pointed away from a subject when lighting, which means a light source can be moved in as close as desired without poking out your subject’s eye! The downside to a shoot through umbrellas is that the light is hard to control because the umbrella is translucent and the light spills everywhere. However, they guarantee your subject to be well lit.
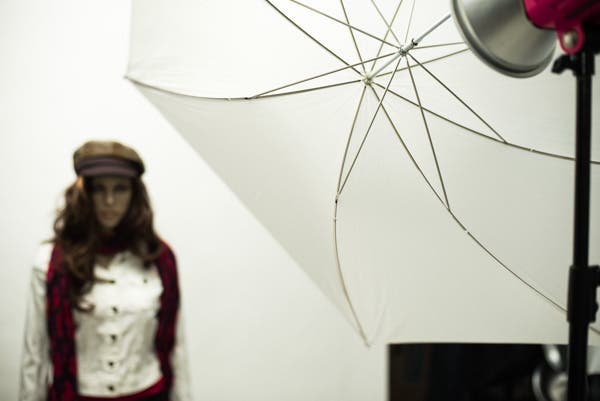
A shoot-through umbrella in use.
Black/white umbrellas are a great choice for when you need to fill in shadows without it affecting the color, quality or quantity of light.
A reflective umbrella such as a silver umbrella (with a black covering), can be used when you want to bounce in specular highlights without affecting the color of the light. The light will be subtly harsher than a shoot through, depending on your umbrella’s distance from your lightsource and from your subject as well as the size of the umbrella.
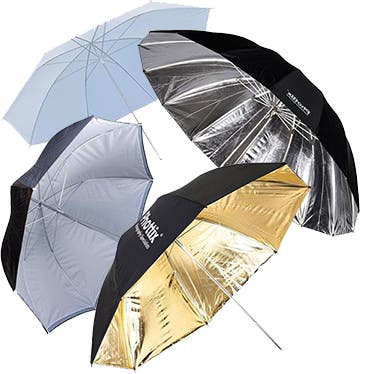
Clockwise from the top: White (shoot-through), silver reflective, gold reflective and black/white umbrellas.
Single images courtesy of Adorama
A gold umbrella with black backing can be used to warm the color of an image and your subject. This umbrella color works well when photographing someone in a bathing suit or photographing someone with a very fair skin tone, where a healthy warm glow might be desired.
Softboxes
Whether using continuous lighting, speedlights or strobes, softboxes prove to be one of the best light shaping tools for any professional photographer’s to have in their toolbox.
Round softboxes, called octaboxes or octabanks, make for wonderful key lights. Their round shape is similar to the sun and the catchlights produced by round softboxes can be much more pleasing to some as they cast a more natural round catchlight into a subject’s eyes to match the roundness of the pupils.
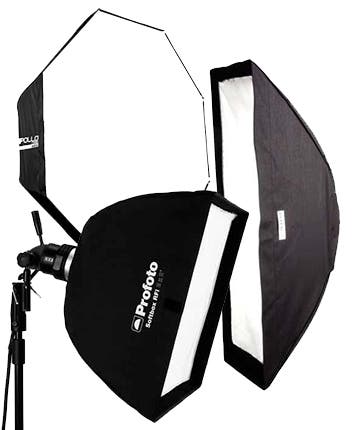
Variety of softbox shapes.
Single images courtesy of Adorama
An octabox also tends to wrap light around its subject. I find a larger octabox placed close to my subjects face serves close to what a beauty dish would do for me when placed straight in front of my subject. When placed anywhere else, shadows can vary from subtle to harsh depending on its proximity to the subject. I’m personally a huge fan of the 43” Westcott Apollo Orb because it’s easy to set up and break down – much like an umbrella!
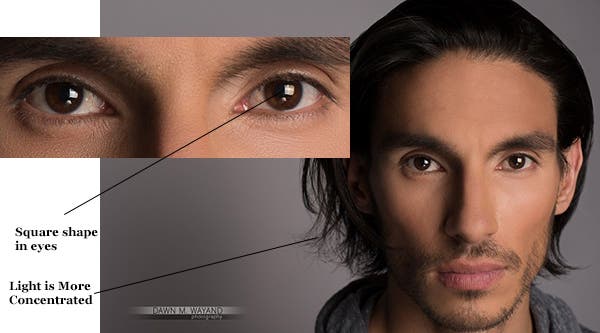
Use of a square softbox with a triangular collapsible reflector.
Model: Xavier Lujan
Squares and rectangles work well as main light sources as well as a fill lights. Depending on their size, they tend to throw out a more defined light complete with a nice and soft transitioning of shadows. Contrary to some preferences, I find squares to make interesting and dynamic catchlights in the eyes when used in conjunction with a circular or triangular reflector as shown above. In this image, I used a Glow 24” x 24” Square Softbox which has a large variety of speed ring adapters available, sold separately.
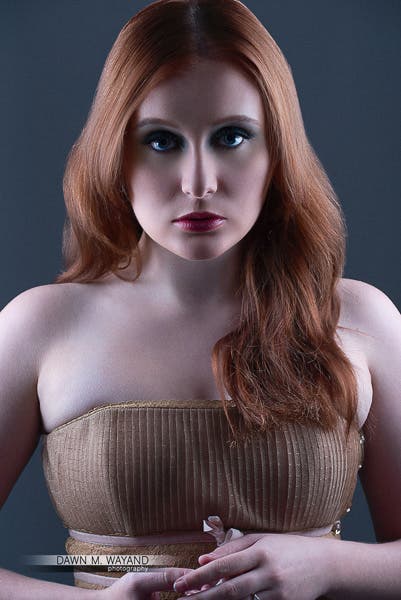
Use of strip softboxes behind the subject.
Model: Kathryn Hopkins
Strip softboxes are great for lighting the full body when placed parallel with a subject. They also work well as hair lights. Depending on the distance from the subject, strip softboxes can create a very subtle or a very harsh transitioning in shadows. You can read more on softboxes in my article, Softboxes: Containing, Directing and Diffusing the Light.
Beauty Dish
If you are into portrait or beauty photography, a beauty dish is a “must”. A beauty dish is a circular reflector or bowl with an opening in the center that attaches to a monolight or strobe. The bulb or flash is hidden by a raised plate in the center that forces light to disburse into bowl and onto a subject rather than the light source directly hitting the subject.
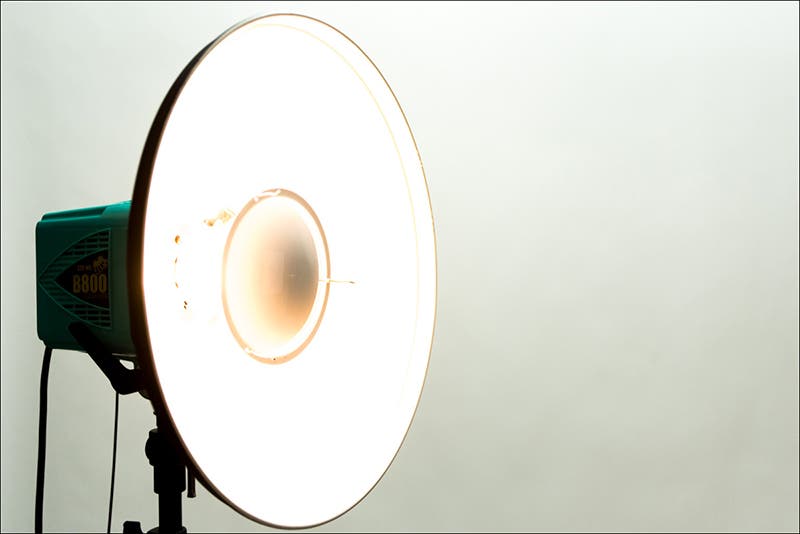
My 16” beauty dish, bare.
Beauty dishes come as white or silver coated on the inside. White coated dishes make for a softer light whereas silver coated dishes make for slightly more contrast. Beauty dishes have two different companion modifiers that can be used along with them: a diffuser, sometimes called a “sock”, and a grid. I’ve always had a regret of buying such a small beauty dish – at 16 inches. If you can swing it, get something at least 22 inches in diameter or more. Which beauty dish you should get will depend on the monolight or strobe that you have. Brands like Glow make a variety of mount options to work for more than one single brand.
Grid
If you need the direction of light from your light source to be more concise, a grid is your best bet. Grids are useful when you want to light something specific with little to no spill, such as when you want to light your subject but you want to keep the background dark.

My beauty dish grid.
Image courtesy of Yann Bizeul
Grids are generally made to work with beauty dishes and softboxes, but I’ve also found them as companion modifiers for barndoors and snoots as well. They come in variety sizes, the hole width determining the width of the light beam emitted. Grids come in a variety of types, brands, sizes and hole widths and which you get will depend on the type and brand of main modifier you use it with.
Barndoors
Barndoors are one of the most versatile and inexpensive lighting modifiers one could own. This modifier is basically four doors that attach to a base which can be attached to a monolight or strobe.
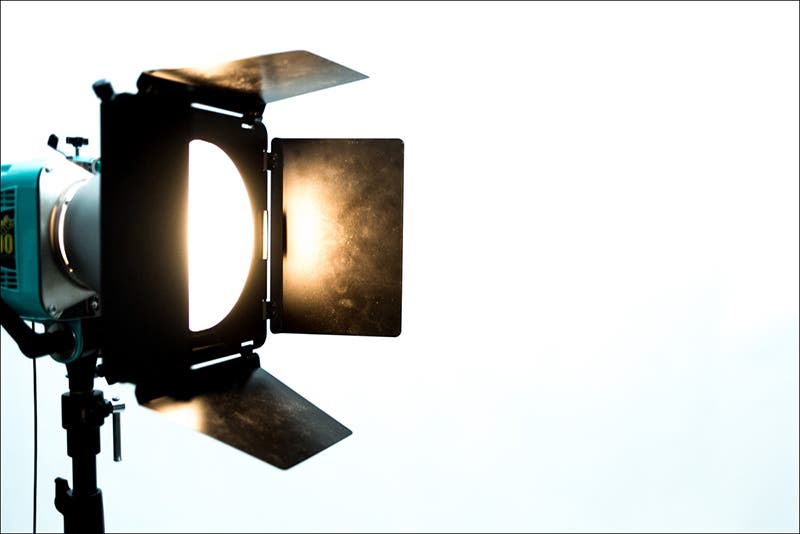
My barndoor setup.
What’s versatile about this modifier is that each of these 4 doors can be opened as little or as much as desired allowing for numerous lighting results. Many barn doors are sold as kits that also include companion modifiers of four gels and a grid, such as Flashpoint’s Universal Barn Door Kit.
Snoot
Snoots allow you to focus in specifically on one small thing on a subject, such as just the face, just the hands or for baby photography, just the feet. They serve kind of like a spotlight on a choice subject.
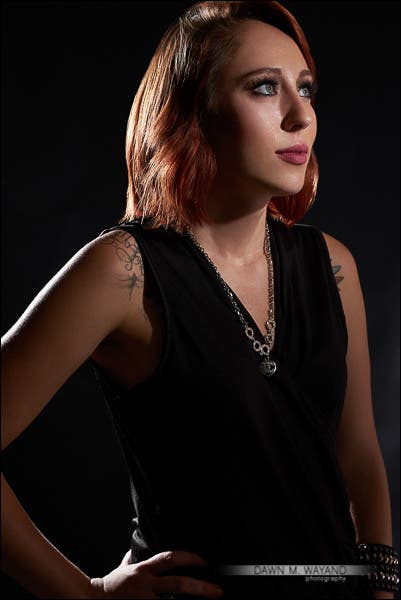
Snoot used on my model’s face only.
Model/Actress: Celeste Smith
Snoots also a great tool for lighting particular things for an interior shoot or even products because the light is so concentrated and direct. Snoots can also have complimentary modifiers of attachable gels and grids.
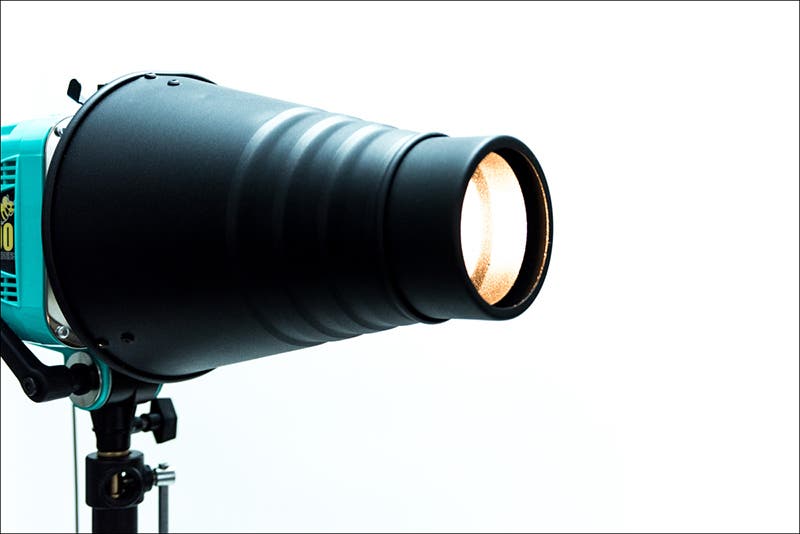
My snoot setup.
Snoots are generally brand specific or universal as long as they have the specific speed ring adapter that matches the brand of monolight or strobe you are using.
Gels
Gels are not only a practical tool but they are also a fun, creative modifier to use for lighting a subject. In situations where white balance is an issue (such as incandescent bulbs adding a warm orange cast to an image and fluorescent bulbs typically generating a green cast, gels can be used to match the light’s color in order produce an image with light color closer to white.
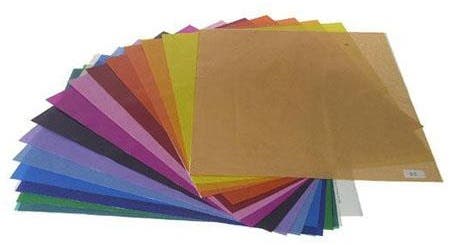
Rosco 20”x24” Color Effect Kit
Image courtesy of Adorama
For a more creative touch, gels can also be used to color backgrounds or to color the light hitting a subject. In the image below, I used a Rosco 20”x24” Color Effect Kit which contains 15 different color gel sheets and is sold at Adorama for around $97.65 for the whole kit. These gels can be bent or folded and are still reusable. This particular kit contains the larger-sized sheets, which also allows me enough available to be able to also cut swatches of the gels for use too.
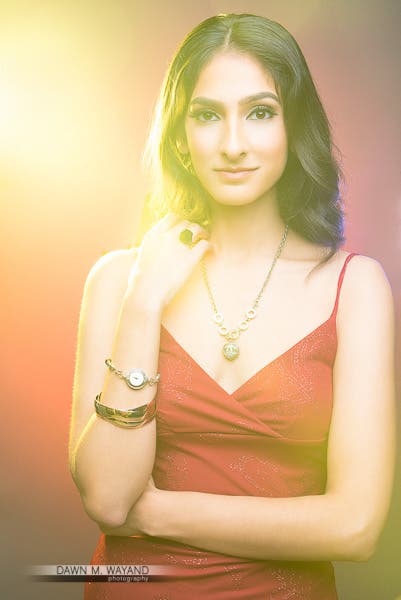
A red gel was used for background and blue and yellow gels were used to color the light.
Model: Deeksha Chawla
I used a red gel on a background light aimed at a Savage Smoke Gray Seamless background. I also used a yellow and blue gel on two separate lights on each side behind my model aimed back toward the camera to give her an interesting rim light color on her skin and hair. As a bonus, because I used a fog machine for special effect, the gels colored the smoke as well.
WHEN YOU’VE CAPTURED THE ESSENCE OF BEING
When you’ve captured a true portrait of someone, you have captured the very essence of their being. As you can see, there is much involved to achieve this and many techniques available to do this successfully. This is what makes capturing a portrait – an art.
