PictBridge’s formal name is “Standard of Camera & Imaging Products Association CIPA DC-001 – 2003 Digital Solutions for Imaging Devices.
 What all this means is that PictBridge is an open industry standard developed by the Camera & Imaging Products Association that allows photographs to be printed directly from digital cameras without being connected to a computer.
In the past, some manufacturers marketed systems that allowed certain digicams to be directly connected to certain printers, but PictBridge was created for direct printing from digital cameras to printers regardless of who made them.
PictBridge will let you print images from a digital camera without a computer and includes a wide range of built-in tasks, but some functions depend on the individual devices. Nevertheless, PictBridge-enabled products are capable of performing the following minimum functions:
- You can connect a PictBridge digicam to a PictBridge printer with a USB cable and establish direct connection–regardless of brand–without having to install any software.
- Controls allow you to immediately print an image displayed on the digital camera’s LCD preview screen.
- If an error occurs while printing, an error message appears on the printer or digital camera’s LCD screen.
Other functions can provided such as printing multiple images, number of copies, trimmed images, specifying print size, or displaying print status but are only available if supported by the connected devices. If the digital camera doesn’t support these options, PictBridge uses the printer’s default settings for media size, media type, or print quality. If a printer requires settings for media type, size, and print quality that the digital camera doesn’t support, the printer uses its default settings.
How’s it Work?
PictBridge is compatible with all kinds of cameras, from point-and-shoot models on up to digital SLRs (such as the Pentax K100D that’s used as an example here), but it only works with JPEG files. Images captured in RAW format cannot be printed. So what products are compatible? For a complete list of currently available cameras, printers, and other devices go to the bottom of this article or look at the list on the right. If your camera isn’t listed, it might have been discontinued; try CIPA’s PictBridge Certified Model Listing page.”
Before printing, you must first set the camera’s transfer mode to PictBridge. The K100D’s Transfer Mode menu offers three choices: PC, PictBridge, or PC-F. The settings for your digicam will vary, so read that part of the User’s Guide for specific instructions.
 The Pentax K100D offers three choices for data transfer (shown here): PC, PictBridge, or PC-F. Use PC when connecting the camera to the USB 2.0 port on your computer. The PC-F option is provided for use with older computers that may not have a USB 2.0 port. This setting locks the camera into USB 1.1 mode for transfers to computers that cannot handle data at the faster transfer rate.
K100D series cameras (including the K110D) let you print images directly from the camera using PictBridge; Pentax includes a USB cable in the box for connection to the printer. After the printer has started up, turn on the camera. The PictBridge menu appears on the camera’s LCD screen, providing three choices:
- Print One
- Print All
- DPOF AUTOPRINT (See the Adorama Academy story on DPOF for details on how DPOF works)
 Immediately after connecting the Pentax K100D to a printer (a Canon Pixma MP830, in this case) the following image appears on the printer’s LCD screen.
 When connected to the Canon Pixma MP830, the K100D’s LCD preview screen gives you a choice of printing one or all images files. If you have taken the time to apply DPOF (Digital Print Order Format) settings to the images, that option is available as well. For more information on DPOF, see >link<.
To print a single image, use the K100D’s four-way controller to choose an image for printing and decide how many copies (up to 99) you want. Press the camera’s Fn button to chose whether (or not) to insert the date. (That choice might work for “CSI: Des Moines,” but the rest of us just want to see the picture.) Pressing the OK button brings up a confirmation screen. To make changes in paper size, type, quality or the kind of borders, pres the Fn then use the four-way controller to make changes. When you’re finished, press the OK button twice to make the prints.
 You can use the camera to change print settings to match the kind of paper and image quality you want, as well as to decide if you want borders or borderless printing.
 You get to see the image on the screen before printing so there is no mistake about which image you are going to print. This screen lets you choose how many copies (up to 99) and whether or not to insert the date.
If you can handle it, printing ALL the images is a piece of cake. Just select Print All from the PictBridge menu then follow the exact same steps as before’Äîexcept you’ve already selected which images to print. You can press the MENU button to cancel printing. Tip: To save battery life, it’s a good idea to use the camera’s AC adapter when printing via PictBridge and don’t disconnect the USB cable during transfer.

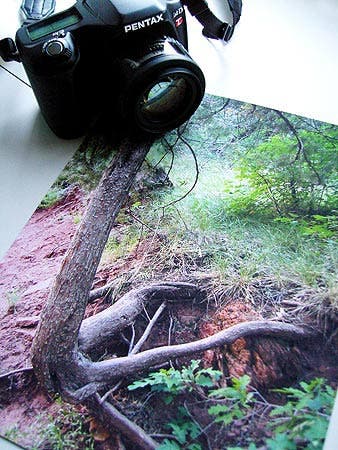
This is an example of an actual letter-sized print made with a Pentax K100D connected to a Canon Pixma MP830 printer.
© 2006 Adorama

