Los Angeles toy photographer Brian McCarty offers a hands-on look at photographing toy artwork on location in relatively tight quarters. See how Brian was able to create studio-quality results in less than studio-space conditions.
Guest Author: Brian McCarty

What’s in the bag?
• Photoflex LiteDisc®: 12 inch white/silver reflector
• RockSteady Bag
• StarLite®: dual medium digital kit
• StarLite®: small digital kit
Setting up at the Switcheroo Workshop
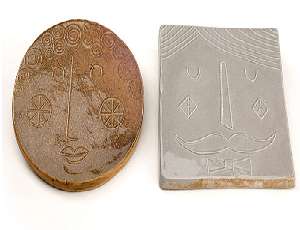
Fellow Los Angeles artists Michelle Valigura and Amanda Visell are the creative geniuses behind Switcheroo Workshop, a studio offering toy and ceramic pieces based upon original artwork. The characters they create are often ironic and always fun, featuring stylized personalities such as hobos, elephants, cowboys, and Indians.
When Michelle and Amanda asked me to come in and do a catalog shoot of some of their new pieces, I thought it’d make a good opportunity to demonstrate a 4-light, general-purpose setup that was good for reflective and non-reflective objects alike. The following lighting setup is designed to allow very fast shooting of a large volume of objects.

I invaded the Switcheroo studio with the following lighting gear:
1 – StarLite®: dual medium digital kit (two light setup)
2 – StarLite®: small kits
2 – RockSteady® Bags
1 – Roll of white seamless background paper
I also brought four Photoflex® 500watt tungsten bulbs for all four StarLite® lamp heads.

Wedging myself between Amanda and Michelle’s workspaces, I took over a table and pushed it near a side of the studio. With Michelle’s help and a little bit of gaffers tape, we secured the top edge of the 4-foot roll of white seamless paper high on the wall and unrolled enough for the roll to meet the other end of the table.

I cut the paper and folded the front edge as neatly as possible, securing the seamless to the table with two A-clamps. From there, it was just a matter of pulling the table away from the wall enough to get the curve of the paper how I wanted it.

The Lighting Strategy
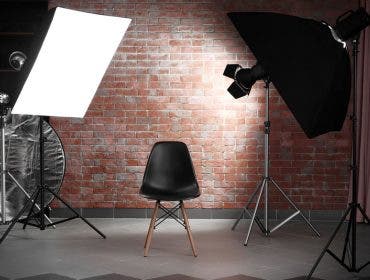
Next, it was time to set up the StarLite® lamp heads and SoftBoxes. When shooting reflective objects, the key is to place light sources in such a way that they help you sculpt highlights and shadows. With continuous lights, this task can be quick and efficient since it’s easier to see what you’re doing as you’re doing it.

For the purposes of this shoot, I first opted to place the two small SilverDome® SoftBoxes on either side to primarily light the background. Because of the angle I set them at, they also spilled enough into the subject area to provide a slight edge light. Next, I positioned a medium SilverDome® almost directly overhead. It not only acted as a soft key light, but also as the main source for reflected highlights on the ceramic pieces.

I then positioned the final medium SilverDome® at a 3/4 angle to the right of the set to provide soft, directional light. It would also help to create reflective highlights. [figure 6]
Camera Settings
At this point, I was ready to start shooting. I mounted my Canon® 5D with a EF50mm f/1.4 USM lens to a tripod and dialed in the following settings:
• Exposure Mode: Manual
• Aperture: f/8
• Shutter Speed: 1/25th of a second
• ISO: 100
• White Balance: Tungsten (3200° K)
• Focal length: 50mm

Controlling Contrast
I left the left side of the set open intentionally to create a relatively darker area in the objects I was shooting. This area, void of light, would essentially help to create a good level of contrast. Had I added another medium softbox to the left, it would have flattened everything out.
But for some pieces, like the two-headed sheep below I used a 12 inch LiteDisc® reflector (above) to lessen the contrast somewhat.


The Breakdown of Lights

This same lighting setup worked well for flat objects also. To get a sense of what each light was doing, I took a few shots, each with individual lights on. This result was taken with just the front medium SilverDome® on.
Below, you can see the result with just the top medium softbox on, and then with this light off and the others on.


And here’s the result with all of the lights turned on.

Minimizing Reflections
For a few flat objects, the overhead light reflected too much of a highlight:


To control this, I used a piece of black plastic to selectively cover areas of the softbox and control the reflection. Commercial photographers would refer to this object as a “gobo” (“go-between”), but either way it does the job.

As you can see, the gobo really helped to minimize the reflection and render the overall textures better.
Once you have a basic lighting setup like this in place, you can shoot a lot of pieces very quickly and it’s easy to make minor modifications to suit a particular piece.
Additional Shots
Here are some other results from this shoot:


Hopefully I have demonstrated a really simple lighting setup that can give great results, even when there is a high volume of products to shoot. What is so awesome about using a constant light source like the StarLite® is that you can see exactly what the result is going to look like before you shoot. This is especially helpful when you are trying to reduce the glare from reflective surfaces or objects.
But, by no means is this the only way! Though shooting products may be work in the sense that it is a job, the fun is experimenting with new lighting setups and situations. Don’t be afraid to experiment, play with your light, and above all, have fun!
Working with toys for over 15 years, Brian McCarty’s unique and innovative vision has attracted a huge international following. After working in-house for companies such as Mattel, McCarty founded his own studio and made it a focal point for artistic and commercial collaboration with others from the Art-Toy world. His commercial photography roster has grown to include pop-culture clients such as Rockstar Games, MTV, and Cartoon Network.
Written and photographed by Brian McCarty. To see more of Brian’s work, visit: www.mccartyphotoworks.com
Special thanks to Michelle Valigura (www.michellevaligura.com), Amanda Visell (www.amandavisell.com) and the Switcheroo Workshop (www.myswitcheroo.com)


