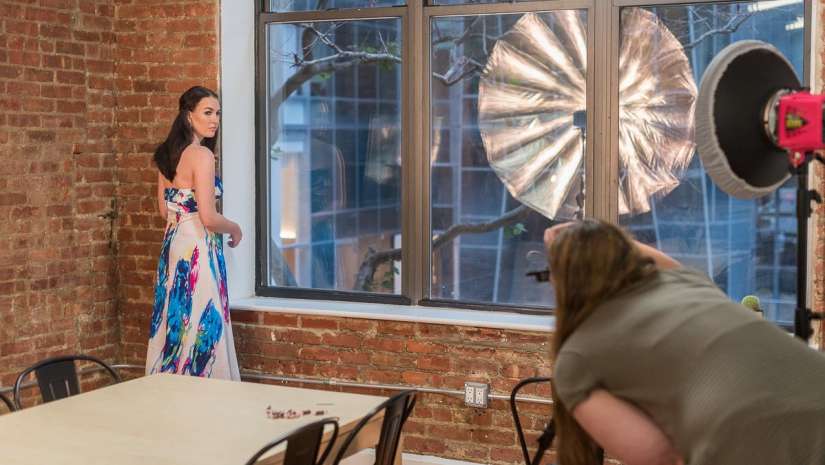
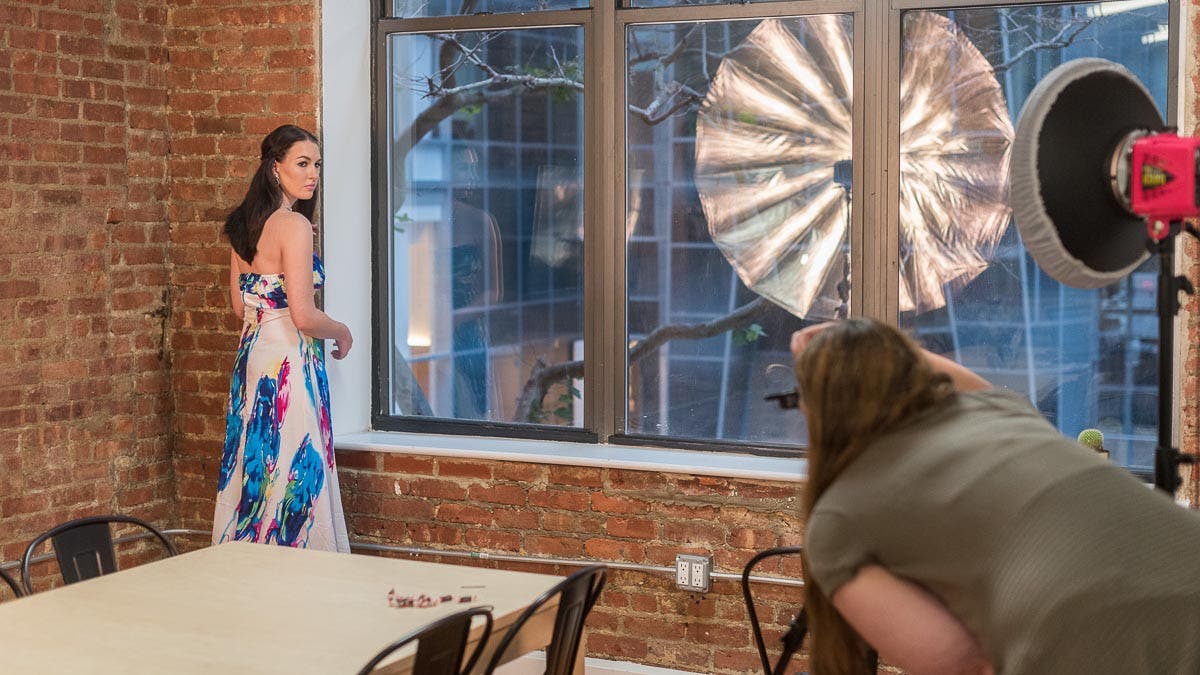
Not everyone works in a studio, or even within four walls. While I work a lot in my home studio, I oftentimes also have to work on location, so portability is important to me. For those photographers that might work out of their car, or even using public transportation as a means to get to location shoots (like I do), there are many useful tools out there that can make the journey much less of a hassle, allowing you to you to shoot in a much more positive frame of mind from start to finish.
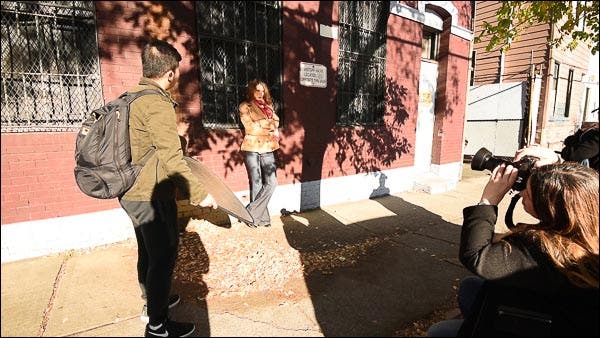
One of my location shoots in The Bronx.
Model: Daria Komarkova
Image courtesy of Yann Bizeul
Tripods
A stable support system for your camera is one of the most important things you should consider purchasing right after you buy any camera and lens if you shoot still objects – and there is no shame in using a tripod for your portraits. I actually love occasionally mounting my camera to a tripod, check the frame and then use a remote to shoot – that way I can freely move around anywhere to engage more with my client or help adjust wardrobe or to demonstrate a pose.
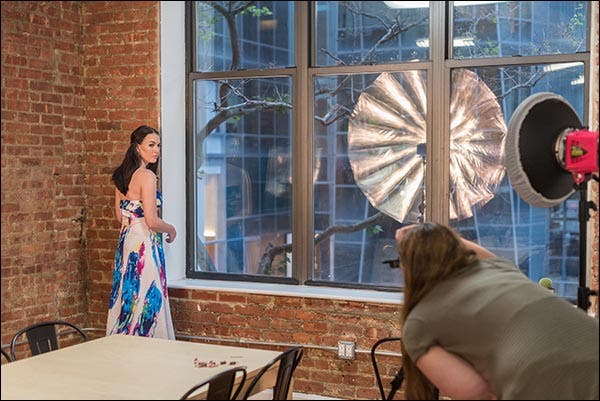
Tripod in use on location in Midtown.
Image courtesy of Yann Bizeul
Model: Vixie Rose
Tripods usually get left behind because they are too cumbersome due to their weight, too awkward to carry due to length or take too long to set up. They can also get a little pricey, however, they are supporting the weight of your $500+ camera and lens combination. Not obtaining a proper tripod to support your camera and lens unit can result in the unit falling and becoming damaged – sometimes beyond repair. How much did you spend on that camera and lens again?
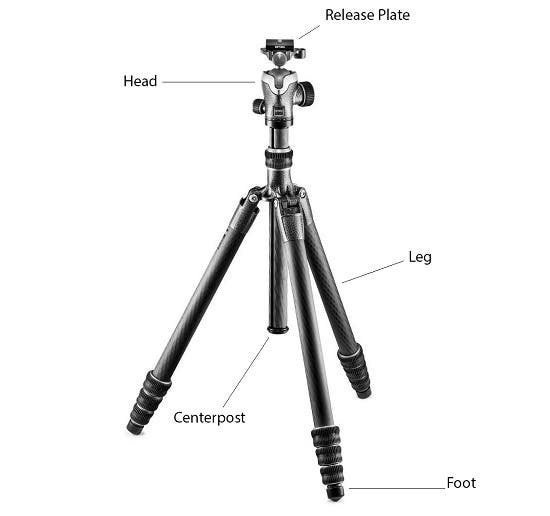
Diagram of a tripod and its features.
Tripod Legs
Weight for the traveling photographer is a huge factor when deciding on a tripod. Aluminum legs can be heavy. If you spend the little bit of extra money, upgrade to carbon fiber legs. Carbon fiber is very lightweight material that is also very durable. All I can really say about the differences here is to walk into Adorama and ask to see and lift up one of each type of tripod legs: you will see what I mean!
If you must get fancy or want the top of the line, the Gitzo GT0545T Series 0 4- Section Traveler Tripod pictured below is a good choice as it weighs only two pounds and closes to just over a foot.
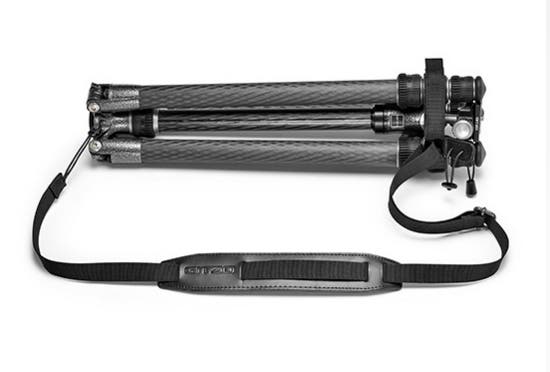
Gitzo Traveler Tripod Legs.
Image courtesy of Adorama
The Manfrotto MT055CXPRO3 Carbon Fiber 3 Sections Tripod with Horizontal Column is a more affordable choice that has a horizontal column, however, it weighs close to 4.5 pounds. I’m actually looking to upgrade my tripod legs to the Manfrotto MT190CXPRO4 Carbon Fiber 4-Section Tripod with Horizontal Column as it has a useful 90 degree column (hey, maybe I want to shoot someone laying down? Sure, but it nice to have options when you like to shoot more than people…) These legs are a great option as they are lightweight due to the carbon fiber construction weighing in at only 3.6 pounds.
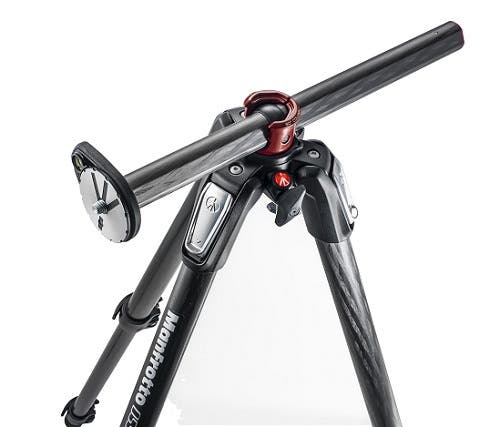
Manfrotto 190 4-Section Aluminum Tripod
Tripod Heads
Tripod heads, well, good tripod heads make up the bulk of a tripod’s weight. There are several types of tripod heads and really, it all comes down to preference, I personally like the flexibility of a ball head. You do not have to get a large ball head, but do make sure it does have a little weight and feels solid (not that cheap plastic feel…) as it will last a bit longer.

Various type of tripod heads.
Collage created by Dawn M. Wayand – Individual images courtesy of Adorama
You can learn more about tripods: why you need them, why they get a bad rap, considerations when purchasing a tripod, components of a tripod and more of my recommendations for tripods and heads in my article, Tripods: Choosing the Right Support for Your Investment.
Light Stands
Just like your tripod, light stands are known to sometimes hold monolights or strobes worth thousands of dollars, so you want to pick a reliable light stand to support your investment. I’m a big fan of the Manfrotto 1052BAC 93″ Air Cushioned Aluminum Compact Stand. This light stand weighs only 2-3 pounds, holds 10-11 pounds and folds up to 33-34 inches. Note that this is an air-cushioned light stand. This is really important as if you have a heavy light on top of your light stand and you lose your grip while lowering the light, the air cushioning will take the sting out of the light’s plummet as it drops to the next level of the stand – which could result in damage without this feature.
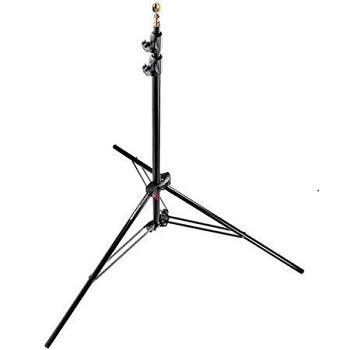
Manfrotto 1052BAC 93″ Air Cushioned Aluminum Compact Stand
Image courtesy of Adorama
Maybe you are only using speedlights. A great portable option for a speedlight stand would be the CheetahStand C8 Light Stand. It expands to 96 inches, can carry 6-7 pounds, collapses to 28.5 inches and weighs 6 pounds. This is a free sliding light stand, so you will need to be careful with what you put on top of it when you lower it from any height.
Sometimes you might need a short light stand to light feet or to light a background behind a subject, and while they are aluminium, I have have found the Interfit Compact Light Stands to be very convenient to have on hand.
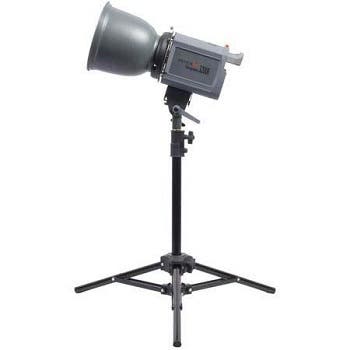
Interfit Compact Light Stand.
Image courtesy of Adorama
For those of you who may be working strictly in a studio and do not need to worry about weight and size or you work both in a studio and on the road, I have written a good read with more recommendations on light stands in my home studio series: Building the Home Studio Part 2: Continuous Lights and Light Stands.
Sandbags
BTW – don’t forget to use sandbags on those light stands! Yes, this can be tricky with weight and traveling, but would you rather your light stand with a $1,000 light go toppling to the floor because you had nothing weighted holding the light stand down?
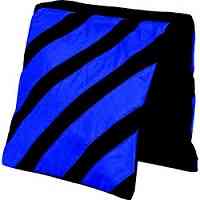
Flashpoint Weight Sand Bags
Image courtesy of the Adorama website.
An inexpensive option for sandbags, which I actually own are the Flashpoint Weight Sand Bags which you can find for $12.95 each at Adorama.
Speedlights
Speedlights can work really well on the road. Due to their size, speedlights can be a much more portable and convenient solution for lighting a scene than a strobe. I dive deeper into the actual advantages, disadvantages and functions of using a speedlight in my article: Quickstart Guide to Speedlights.
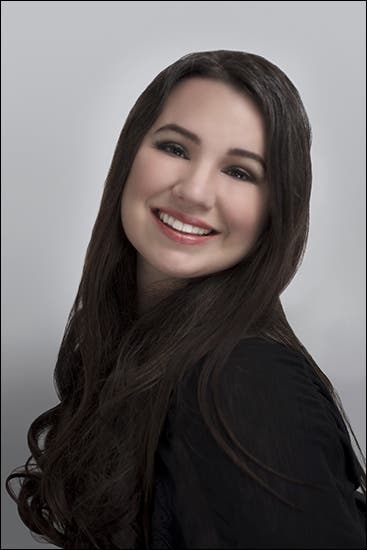
Self-Portrait taken using a Nikon SB-700 Speedlight and a White Shoot-Through Umbrella.
NIKON
I am primarily a Nikon shooter, and while I currently work with the Nikon SB-700 (an older, but “still kicking” Nikon model), like most upgrades, the latest Nikon SB-910 is a nice upgrade from the SB-700 in that it provides a longer flash duration, a quicker recycling time and greater lens coverage.
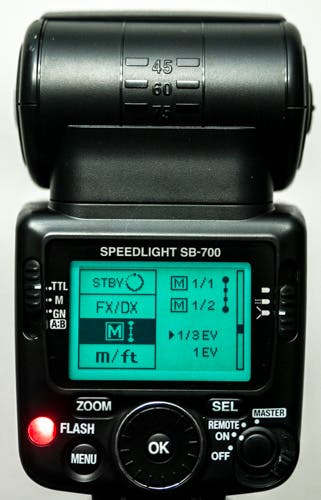
My Nikon SB-700 Speedlight.
CANON
The industry standard speedlite for Canon shooters is now the Canon Speedlite 600EX-RT at a $469.00 price tag. Unfortunately, and unlike the wireless Nikon speedlight, the Canon speedlite requires the Canon Speedlite Transmitter ST-E3-RT at an additional $280.00 to fire the speedlite – physically – off-camera.
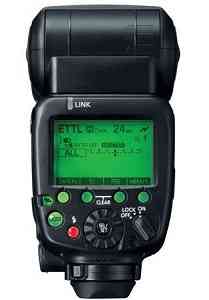
Image courtesy of Adorama.
NISSIN
A current third party model that has comparable features to both Canon and Nikon flashes, but has radio capabilities at a fraction of the cost that I am a bit impressed with at the moment is the Nissin Di 700 Air Flash Kit at $299.00 which comes with the Commander and is made in Nikon, Canon and Sony versions.
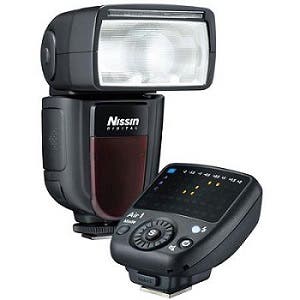
Image courtesy of Adorama.
There are a lot of great accessories and modifiers that work well with speedlights that I go into more detail on in my article, Building the Home Studio Part 3: Flashes, Light Meters and Backgrounds.
Monolights & Strobes
Monolights
I recently had the pleasure of using a Flashpoint Rapid 600 HSS Monolight and was really impressed with the quality of lighting produced for the price. It is a very lightweight light, perfect for the traveling photographer.
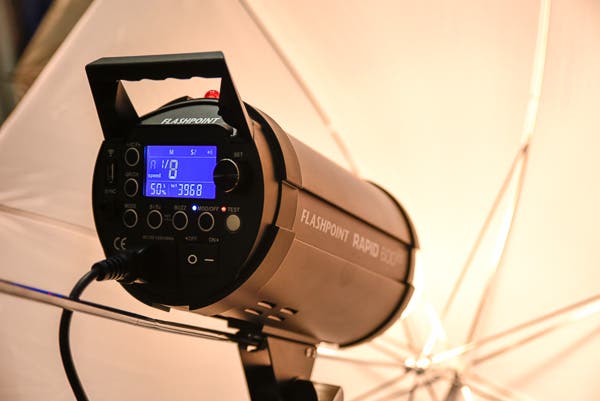
Flashpoint Rapid 600 HSS Monolight in use with an umbrella.
Due to the receivers being built into the monolight and flash, this particular monolight is also compatible with the Flashpoint R2 Zoom Flash for Nikon, Canon or Sony when using the respective Flashpoint R2 i-TTL Wireless 2.4 G Transmitter Remote. Below is a portrait my assistant took of me using this monolight as a key light along with the Flashpoint R2 Zoom Flash as a fill light.
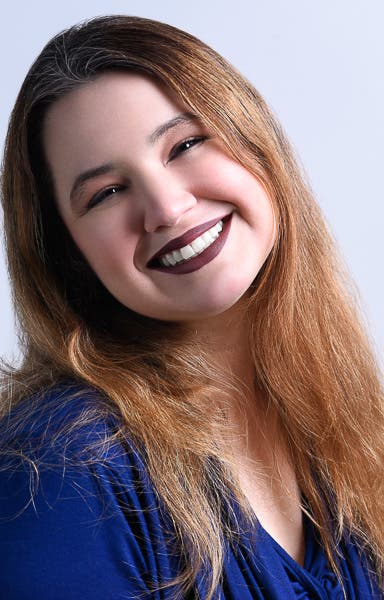
Using the Flashpoint Rapid 600 HSS Monolight a a keylight and the R2 Zoom Flash as a fill.
Image courtesy of Yann Bizeul
You can check out my review of this monolight, Hands-On Review: The Flashpoint Rapid 600 HSS Monolight for more information on this light.
Strobes
I’ve had the opportunity to use the Profoto B1 500 Air TTL Battery-Powered 2-Light Location Kit a few times through Adorama Rental, and it was a dream. This kit is very easy to use with is fully-integrated with your Nikon or Canon digital camera via the optional Air Remote TTL-C or TTL-N. It’s battery powered and cordless so it can go with you anywhere. One of the great features of this kit is the exclusive custom backpack that the equipment travels in, which keeps everything safe and secure.
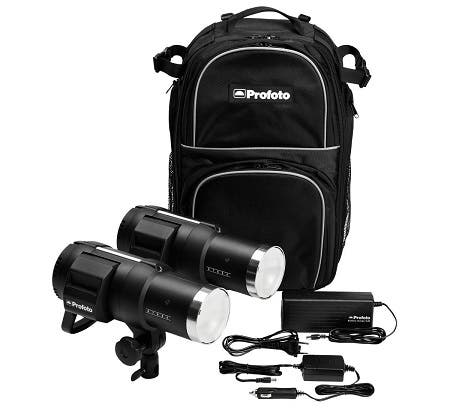
Profoto B1 500 Air TTL Battery-Powered 2-Light Location Kit.
Image courtesy of Adorama
LEDs
If you use LEDs, an interesting choice for versatile, compact LED lights is the Westcott Ice Light 2 at $499.99 each, which I recently had the opportunity to try out and was blown away with the light quality. This is a great handheld, wraparound, daylight and portable light with an output of 1740 lumen and a CRI rating of 96. It can mount to a lightstand or tripod or be used handheld at any angle you want.
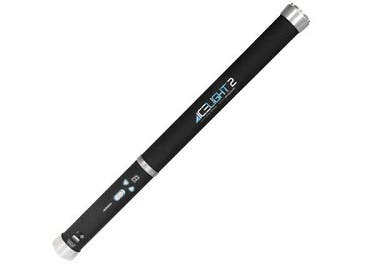
The Westcott Ice Light 2.
Image courtesy of Adorama
You can even shoot and hold or have you model hold the light(s) at the same time should you not have an assistant available. The Westcott Ice Light 2 lasts about an hour on a full charge.
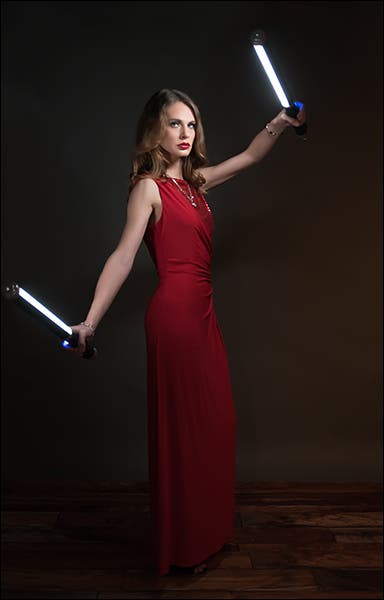
Testing out the Westcott Ice Light 2.
Model: Daria Komarkova
Modifiers
For portability purposes, there’s a few types of modifiers that fit the bill and work very conveniently for location shoots: reflectors, umbrellas, certain softboxes, a beauty dish, barndoors and/or gels. There are also a few speedlight modifiers that work well too and I’ll get to those in a moment.
Portable Reflectors
A portable reflector is probably the first modifier you will ever own, especially if you shoot people. They are an inexpensive, portable and convenient fill light source. Whether you use the sun or a flash, monolight or strobe, portable reflectors are an excellent tool to help fill in unwanted shadows.
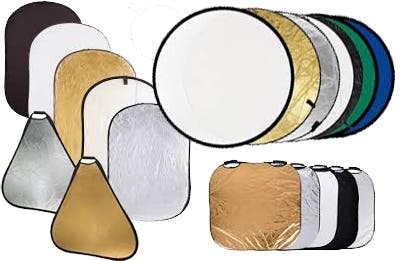
Large oval reflectors, circular reflectors, square reflectors and triangular reflectors.
I go into great detail about reflectors in my article, Building the Home Studio Part 04: Essential Studio Tools, Props and Odds & Ends.
Umbrellas
Umbrellas are convenient portable tools that serve to diffuse or bounce light back onto your subject when shooting in a studio or on location. No matter your level or budget, umbrellas are your great tool for getting professional results in your portrait work. I go into great detail on umbrellas in my article: Umbrellas: Good for More Than Just a Rainy Day.
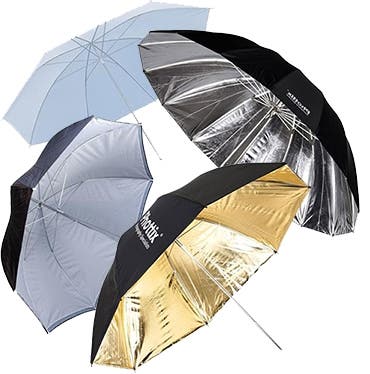
Shoot through, white, silver and gold umbrellas.
Individual images courtesy of Adorama
Softboxes
Umbrellas softboxes, like umbrellas, are convenient and portable as they fold up like umbrellas and take up less room than conventional softboxes. I’m a big fan of the Westcott Apollo Orb which is now on sale at Adorama.
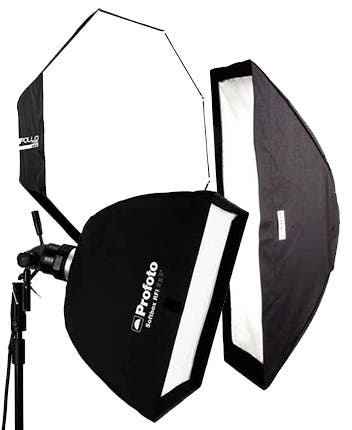
Octabank, strip and square softboxes.
Individual images courtesy of Adorama
There are a few softboxes with speed rings that are easy to set up too. I’ve had the opportunity to try out the Profoto 2’x2’ RFi Softbox which were are a dream to put together. I actually own two Glow 24 x 24″ Softboxes, which didn’t cost much and are easy to put together (speedrings are separate and custom to your light’s brand). Glow also has strips and many other shapes and sizes available.
Beauty Dishes
If you are into portrait or beauty photography, a beauty dish is a “must”. Beauty dishes come as white or silver coated on the inside. White coated dishes make for a softer light whereas silver coated dishes make for slightly more contrast. Beauty dishes have two different companion modifiers that can be used along with them: a diffuser, sometimes called a “sock”, and a grid.
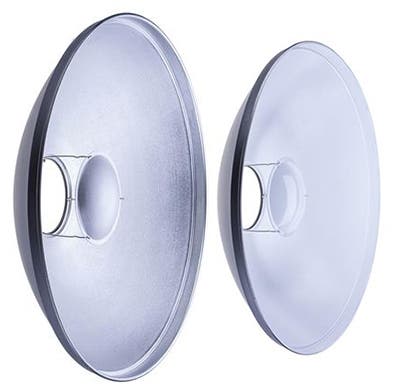
Silver beauty dish (left) and white beauty dish (right).
Image courtesy of Adorama
If you can swing it, get something at least 22 inches in diameter or more. Which beauty dish you should get will depend on the monolight or strobe that you have. Brands like Glow make a variety of mount options to work for more than one single brand. Don’t forget to get a beauty dish bag to carry it on location. This will help keep it circular instead of battered and mis-shaped.
Barndoors
Barndoors are one of the most versatile and inexpensive lighting modifiers one could own. This modifier is basically four doors that attach to a base which can be attached to a monolight or strobe.
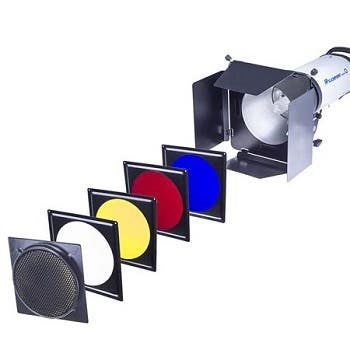
Flashpoint Universal Barn Door Kit
Image courtesy of Adorama
What’s versatile about this modifier is that these 4 doors can be opened as much as desired allowing for numerous lighting results. Many barn doors are sold as kits that also include companion modifiers of four gels and a grid, such as Flashpoint’s Universal Barn Door Kit featured above.
Gels
Gels are not only a practical tool for color correction, but they are also a fun, creative modifier to use for lighting a subject too.
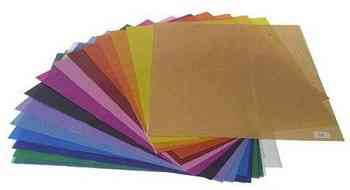
Rosco 20”x24” Color Effects Kit
In the image below, I used a Rosco 20”x24” Color Effects Kit which contains 15 different color gel sheets. These flat-like-paper gels can be bent or folded and are still reuseable. This particular kit contains the larger-sized sheets, which also allows me enough available to be able to also cut swatches of the gels for use too.
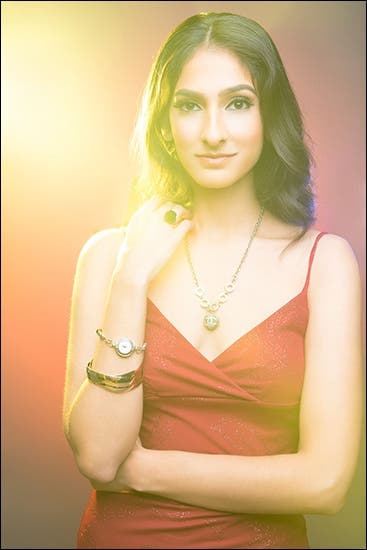
Example of use of gels with monolights (okay, maybe a fog machine too!)
Model: Deeksha Chawla
Additional Speedlight Modifiers
Using a speedlight and not a monolight of strobe? Some of the same modifiers can be used for speedlights as well, but if you’re using a speedlight, you can get even more portable than that. Expoimaging makes a great kit that has many of these tools called the ExpoImaging Rogue FlashBender 2 Portable Full Lighting Kit for $199.95 at Adorama.
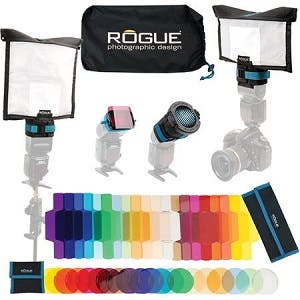
ExpoImaging Rogue FlashBender 2 Portable Full Lighting Kit
Laptops, Tethering & Storage
Computers & Laptops
Shooting anything on location where you can bring a laptop and/or where more serious situations might include a laptop with monitor and a monitor hood. This doesn’t just apply to people and products, but it can also apply to landscape shoots too.
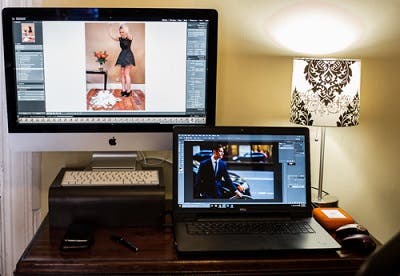
My Apple 27-inch iMac for studio use and my Dell laptop for location use.
Tethering Equipment
I love, love, LOVE tethering to a computer (my 27-inch iMac when in the studio) or my laptop(when on location) whenever I am shooting people so that I can see my results immediately and on something larger than my 3-inch LCD screen. Then I can make any necessary adjustments that I might’ve missed if only viewed on a smaller screen. Tether Tools makes a huge assortment of products for your tethering needs.
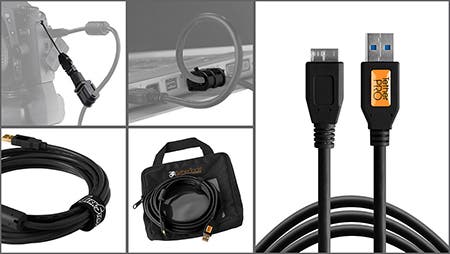
The Tether Tools Starter Kit.
Image courtesy of Adorama
I invested in a Tether Tools Starter Kit which consists of one direct 15-foot TetherPro Cable that plugs from computer to my specific camera model, a Jerkstopper Cable Management System consisting of a piece for your camera (to prevent the cable from being pulled out of the camera should you step on the cable), and a piece for your computer/laptop (to prevent the same from happening from your computer/laptop), 10 Jerkstopper ProTab Cable Ties and a small carrying case for all of it to keep you organized. If you shoot tethered, I cannot emphasize how much this kit will help you with an otherwise shoddy, unreliable connection.
Portable Hard Drive
It’s a good idea to use a portable hard drive when on location as you can set yourself up to immediately back up your images as you are shooting, which is safer than relying on your memory card to not fail you. I back up to a LaCie 4TB Rugged RAID Portable Hard Drive whether I am in the studio or on location to ensure my images are safe.
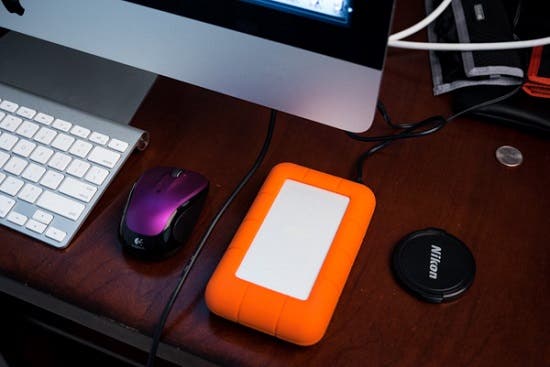
LaCie 4TB Rugged RAID Portable Hard Drive
Bags and Cases
Of course as a photographer working on location, you need bags and whatnot to carry your gear, equipment and odds & ends. I go into greater detail on selecting what you need to carry these things in my article, Bags, Cases & Pouches: Picking A Means For Carrying and Storing Your Gear.
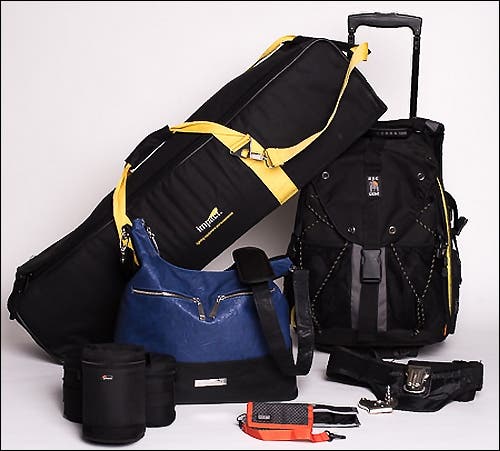
Some of my typical location bags and pouches.
Camera Bags
Camera bags really come down to preference. You may want a backpack or you might prefer a shoulder bag or crossbody bag more. Others might like a roller bag. If I’m on a light location shoot where I do not need to take a lot of lenses, I might go with my fashionable Kelly Moore Brownlee Bag< (pictured above in Indigo).
If my shoot is a little more involved, I take my Ape Case Pro Backpack. I love this versatile backpack because you also have the option of rolling it (yes, it has wheels too). This backpack has numerous compartments for your camera and many lenses, plus it has plenty of room for a small laptop and tethering cords too.
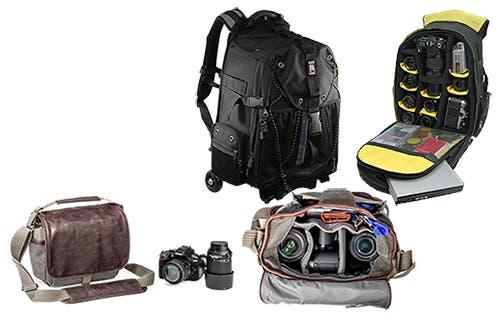
The Ape Case Pro Backpack and the ThinkTank Retrospective 5 Shoulder Bag/Messenger Bag.
Gentlemen, you might find the fashionable ThinkTank Retrospective 5 Shoulder Bag/Messenger Bag to be a good option if you prefer a shoulder bag for on the go. Again, there are numerous options and my previously mentioned article explains what to look for in a bag along with some great examples.
Pouches & Wallets
Camera battery and AA battery pouches and memory card wallets are great for keeping these tiny necessities all in one place instead of them rolling around your bag. The memory card wallets even have clips to clip to a part of your bag to ensure they do not get lost.
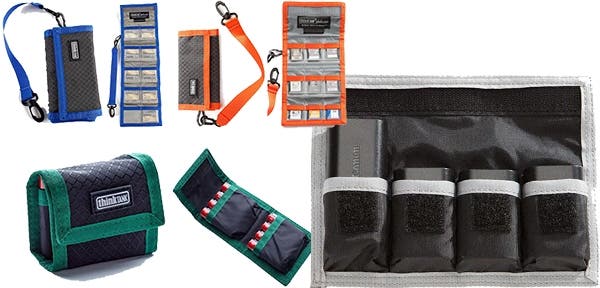
ThinkTank corners the market on exceptionally made battery pouches and memory card wallets.
Monolight/Strobe Cases
Many monolight and strobe manufacturers create custom bags that are included with your light. I love the Profoto B1 Kit backpack as it makes carrying that expensive investment much easier and safer. I’d definitely want those attached to me!
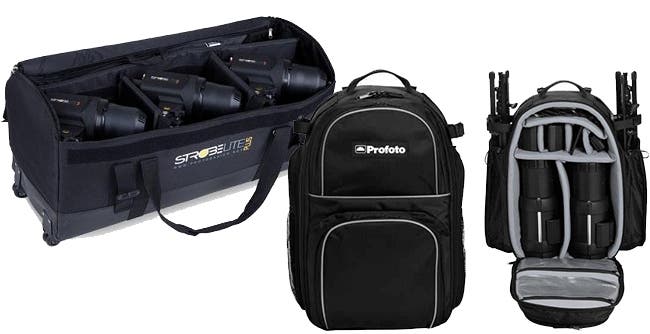
Westcott Deluxe Strobe Bag and the Profoto B1 Kit backpack.
Individual images courtesy of Adorama
I also like the Westcott Deluxe Strobe Bag if I already have on a backpack (like a camera backpack…) because it’s on wheels. It means less weight on my body, plus the wheels feature both make it easier to move around.
Light Stand/Tripod Bags
Light stand bags with wheels are very convenient for the traveling photographer as are tripod bags with shoulder straps. For the light stands, I like the Hensel HD Bag for Stands and Umbrellas. It doesn’t have wheels on it’s own but if you pair it with the Hensel HD Trolley for Strobes, then you have a solution for both stands, some modifiers and strobes.
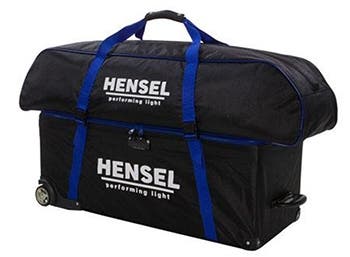
Hensel HD Bag for Stands pictured with Hensel HD Trolley for strobes.
Image courtesy of Adorama
For tripods, I find the Hakuba Tripod Case to be a good investment as your tripod most likely cost you several hundred dollars. You want to make sure it’s protected plus it has a strap that can easily be worn over the shoulder.
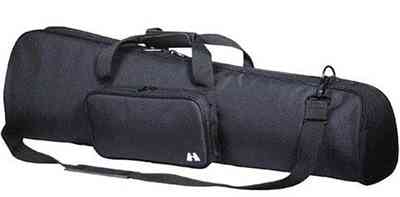
Hakuba Tripod Case
Image courtesy of Adorama
Odds and Ends
Gaffer’s Tape
Gaffer’s Tape is a great tool for taping down electrical wires or seamless. It’s also useful for taping a flag to your speedlight or lens, taping equipment to clamps, tripods, light stands and taping wardrobe in the back when it’s too big, etc.
A-Clamps
A- clamps can be similar to gaffer’s tape in that it has many uses such as clamping wardrobe when it’s too big, clamping a muslin background to a background support system or clamping a seamless roll so that it does not roll out farther than you want it to. I like the Tether Tools 2″ Rock Solid “A” Spring Clamp in solid black.
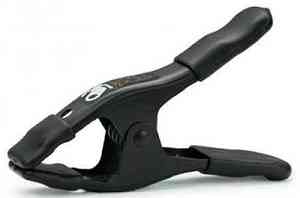
Tether Tools 2″ Rock Solid “A” Spring Clamp
Image courtesy of Adorama
Batteries
Batteries are needed for many things on location such as your transmitters, receivers, speedlights and your camera. Always have a large stash of backups (Depending on how long my shoot will be, I usually try to have 2 sets of batteries for each piece of gear that requires it as backups…) It can get expensive replacing batteries all the time so I use Eneloop Rechargeable Batteries which are a good solution to save money and to help save the environment.
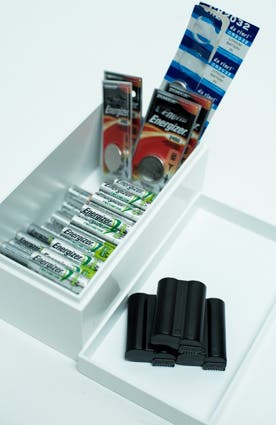
My battery stash at home. Remember those pouches above?
Great for storing some of these for the road.
Extra Bulbs
It’s really important once you own and start using strobes that you have backup bulbs. These can get really expensive, but if you are on an assignment and one or more of your bulbs blow, you could be screwed. Having additional bulbs can save the situation. I tend to keep one backup bulb for each strobe I own…
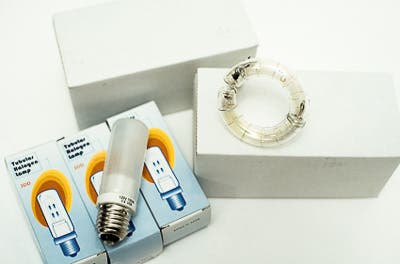
Additional bulbs.
There are many odds and ends that you might find useful depending on what you are doing with your location photo shoot. You can find more of my tool ideas in my article Building the Home Studio Part 4: Essential Studio Tools, Props and Odds & Ends.
Some Final Thoughts…
Yes. I did go over a lot of gear and equipment here for a location shoot, but it doesn’t mean you need all of it every time. Depending on many factors and your personal preferences, you may need only a few things from what I listed or sometimes maybe more than just a few things. The greatest challenge is packing as light as possible to avoid additional strain on you. Many of the items I mentioned here are lightweight whereas things like your DSLR camera and lenses, you may not have much of a choice if you care too much about how your client assesses the relationship between your equipment and being a professional. Organization is also key, so good bags will help do the trick. I hope you found this list helpful. Feel free to leave some comments here and let us know what you have found useful for shooting on location.
