I think it’s a fair statement to make that many photographers tend to be creatures of habit when it comes to workflows. I must admit that I sometimes fall very firmly into this category. There are certain things I do in my work paths simply because I’ve been doing them for so long that it sometimes doesn’t even occur to me that there might be a better–or even just different–way to go about accomplishing a task. But a project this week involving time lapse shots from two different cameras and close to 6,000 images that needed to be resized for animation made me look to Adobe Lightroom 3 for tasks I once would have done via Photoshop’s actions, or, more recently, through Adobe Camera Raw. And I’ve got to say, there’s a whole lot to like about doing a lot of things the Lightroom way.
I’ve been working in Adobe Photoshop on a daily basis since version 4. I learned things back then that were simply “how it was done” back in the day. Take for example little things like manually making folders through my computer’s OS and drag-dropping shots from the card to computer that can now be accomplished much more easily via photo downloader or importer programs. This was one transition that came very easily for me. But many others took some time.

Way back when, we’d have to manually drag-and-drop all the images in these subfolders from my Canon EOS 20D into a new folder on my drive to import them. Then Photoshop Actions would open, resize and save each file.


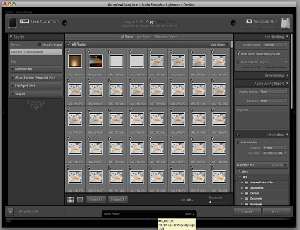
But now, either via Lightroom (top) or Adobe Bridge (bottom), it’s much quicker and easier to import and append information to digital files and then resize and export.
Way back when, Photoshop actions were pretty much the only way to go about a repetitive task such as resizing and renaming gazillions of files. And if you wanted to save as JPEGs and not have the action hang up, the workaround for the JPEG precision screen was to tape a rock to the Enter key! Now many of these tasks can be automated much more easily via Bridge/ACR or Lightroom.
And being the creature of habit that I am, I eventually was able to migrate many of my image editing tasks to ACR and Bridge. As for Lightroom–it’s not that I didn’t recognize a lot of advantages to the the cool new interface and program architecture, but again, there’s that creature of habit thing again.
It was a big leap to transition a lot of my work on images (RAWs, JPEGs and TIFFs) to ACR via Bridge. But Lightroom, despite the virtually identical toolset to ACR, still felt different, and still required me to relearn and unlearn certain work paths I’d travelled for a long time.
But the other day, a conspiracy of situations showed me the Light(room), as it were.
I’d accidentally unmounted my external Photoshop CS5 scratch disk while working on far too many massive files inside Photoshop and really clunked up my system performance while simultaneously attempting to download and rename the roughly 3000 medium-sized JPEGs shot with one of two cameras during a Time Lapse shoot. Bridge was having a hard time with it, because, well, I’d kind of completely filled up all the free disk space on my boot disk quite accidentally and was sitting there watching the beachballs spin for a while before giving up.
I force-crashed a number of programs, and decided to reboot my computer, just for good measure.
Evidently when I’d recently installed Lightroom 3, I must’ve checked (or not-actively-unchecked, maybe) settings to both make LR3 launch at startup, and also to automatically start the image import process.
And in the middle of all of this, I saw that LR3 had automatically sorted all my images by creation time, and not filename–which was a hurdle I haven’t even had time to mention yet!
You see, the Time lapse sequence shot on my Canon EOS 20D wrapped around the four-digit 9999 reset point. So sorting by filename had my time lapse frames starting at a middle point with file IMG_0001.jpg. (Since these shots are meant for video animation, these were shot in sRGB space, hence the “IMG” and not the “_MG” to indicate Adobe RGB space.) This all seemed to me the time was right to give Lightroom a shot at tackling tasks I’d normally take on in Bridge and ACR. It then only took a couple of clicks here and there to set LR3 up to import the 2800+ shots, and export them as sequentially numbered images at a size suitable for stringing together as HD time lapse frames. A little while later, I had my all my frames ready to be converted to Time Lapse animation inside Photoshop CS5 Extended.
Going forward, I am now definitely going to be using Lightroom 3 for processing my time lapse source frames, as it just seems to work more smoothly than ACR/Bridge when there are thousands upon thousands of frames involved. Lightroom 3 will never fully replace all of my Bridge and ACR-based workflows because LR3 doesn’t fully support 32-bit filetypes associated with High Dynamic Range Imaging as I explain here.
But for many non-HDRI shoots involving massive amounts of images, I think this old dog is going to try to learn more new Lightroom tricks.
Got any great time-saving tips with Photoshop, Bridge, or Lightroom? Let us know!


