 So get this. I’m talking about digital photography with a friend. He’s telling me about a conversation he had with a well-known photo dealer about digital photography. The person with whom he was speaking liked digital photography for snapshots – but not for serious pictures!
I almost jumped out of my chair. You see, I’ve been shooting digital almost exclusively for three years – since I took a trip to Cuba during which I used the Canon EOS D30. I got sharp and colorful shots back then which were published in American Photo and in my latest book. Today, with my EOS 1Ds (an 11.1 megapixel, high-end, pro camera), I get shots that I feel look as good as film shots – perhaps even better, because they are “cleaner.”
So, in this column, I thought I’d share some of my favorite digital SLR outdoor pictures. I selected the topic of outdoor photography because in the great outdoors, detail and color are important – and I feel my EOS 1Ds captures outdoor scenes beautifully. That’s why I shoot digitally exclusively when I’m out and about trekkin’.
To begin, here are some basic tips that I apply to all my digital landscape and nature pictures.
 Set the Quality and ISO.
For the sharpest shots, use the lowest called for ISO setting on your digital camera. Note that as the ISO setting increases, so does “digital noise” (the equivalent of grain in film).
Also, set your camera to either the highest JPEG setting or to the RAW (or TIFF) setting. Personally, I shoot at the RAW setting because I want to capture as much detail as possible in a scene. That said, for most of your photography, I think you’ll be pleased with pictures taken at the HIGH/JPEG setting. Just remember that as soon as you open a JPEG file, also save it as a TIFF file – so you don’t lose image quality as you open, enhance, close and save your pictures.

 Think wide.
I used a 16-35mm lens set at 16mm for this shot of Lower Antelope Canyon, Page Arizona
I recommend using a wide-angle lens or the wide-angle setting on your zoom lens, say between 16mm and 28mm for most of your wide shots. Wide-angle settings on zoom lenses and wide-angle lenses produce greater depth-of-field and help in getting as much of the scene in focus as possible. If you don’t have at least a 28mm equivalent setting on your ZLR digital camera, consider getting a wide-angle adapter lens
 For this picture of Grosvenor Arch, photographed in Escalante National Monument in Utah (not far from Kodachrome Basic State Park), I set my 16-35mm zoom lens at 16mm and used an aperture of f/11 for good depth-of-field.
Telephoto lenses, on the other hand, have shallower depth-of -field, but they, too, can be useful in landscape photography, especially when you want to isolate a subject from its surroundings.

 Set your lens.
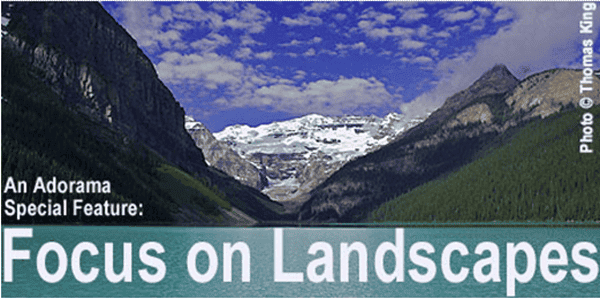
To get everything in the scene in focus (as it looks to our eyes), use the smallest f-stop possible. That’s usually f/11, f/16 or even f/22 if your lens has that aperture. I set my 16-35mm lens at 16mm and f/11 for this landscape photograph, taken in Glacier National Park, Montana.


Set your shutter speed.
This pair of pictures, taken in the rain at a small waterfall near my home in Croton-on-Hudson, NY, illustrates how using a tripod and setting the shutter speed can greatly improve a picture. They also show the difference between a snapshot and a more creative photograph.
In the first photo, I set my camera on the Program mode and shot without using a tripod. Several things are wrong with this image:
- a fast shutter speed (1/1500th of a second) “froze” the moving water for an unrealistic effect;
- the focus is shallow, caused by a wide aperture (f/3.5);
- the focus point (illustrated with a gray square in the image) is almost dead center, which does not help the depth-of-field, as would focusing a third of the way into the scene.
If all you want is a photo like that, just set your camera on Program and point and shoot.
Now look what happens when a few basic adjustment are made:
- I set my camera on a tripod;
- I used a very slow shutter speed of 3 seconds to blur the water. (When photographing flowing water, it’s important to experiment with different slow shutter speeds, perhaps from 1 second to several seconds. Each shutter speed will blur the water to a different degree);
- I set my aperture to f/11 for good depth-of-field;
- I set my focus one third of the way into the scene for maximum depth-of-field;
- I had my son, Marco, hold an umbrella over me to protect my camera from the rain while I was taking the picture.
So, take your time when taking landscape pictures. Think about how you can use your camera controls (and accessories such as a tripod) to turn a snapshot into a great shot!


| Pack a tripod. Small f-stops often require the use of slow shutter speeds, and slow shutter speeds often mean that you need a tripod to steady your camera. That’s good news in landscape photography for other reasons as well. A tripod helps avoid blurry pictures caused by camera shake, but it also slows you down and gives you a chance to think about making a picture, rather than just snapping the shutter. |
Even when using a tripod, it’s a good idea to also use a cable release or a self-timer if your exposure is going to be longer than 1/15th of a second. Manually pressing the shutter release button during a long exposure may cause camera shake. than 1/15th of a second. Manually pressing the shutter release button during a long exposure may cause camera shake.

 Pack a polarizing filter.
Always pack a polarizing filter. Sure, you can add some filter effects in the digital darkroom using Photoshop-compatible plug-ins, but why not start with the best possible image.


Keep it level.
In wide landscape shots, make sure that the horizon line is level in your frame. To help do this, small levels that slip into a camera’s hot shoe are available from Adorama. Tripods and tripod heads that have built-in levels will also help keep you keep the horizon line straight.

 Always look up, down and back.
As we walk around in the great outdoors, most of us look only straight ahead. As simple as it sounds, if you also look up, down and back, you will see lots more picture opportunities.
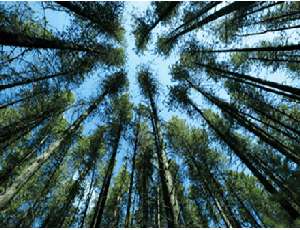
As I looked up in a forest in Glacier National Park, I envisioned this picture, the kind I’ve seen in magazines countless times.
Had I not looked up, I would have missed a very good picture.
And there you have some of my tips and suggestions for digitally shooting landscape and nature pictures. I hope they’re helpful
As to any discussion of whether digital pictures are of a higher quality than film pictures, there are experts on both side of the issue. As for me, my digital pictures give me every bit of the high quality I need for all of the varied types of pictures I take in my personal and professional photographic activity.
 P.S. For those of you who were curious…
yes, there is a Kodachrome Basin State Park.
(Photo by Susan Sammon)


