I often add camera filters to my fashion photoshoots for another layer of creativity and visual interest. Not only can they create a unique atmosphere, but filters are also “on trend” and, therefore, in demand by many of my clients. Although there are dozens of camera filters to choose from, in this article, I’m going to cover the three filters that I use the most.
Comparing the Camera Filters
I wanted to be able to do a side-by-side comparison of the filters’ results. For that reason, I set up a natural light fashion shoot beneath the highway overpass near my studio. If I want the results of these filters to be most dramatic, there are a couple important ingredients for styling and lighting to consider.
First, the filters are showcased best with a point source of light in the frame, or bright specular highlights. This can be achieved through specular reflections off of sequins, jewelry, or rhinestones. It can also be demonstrated by including a light source (like a lamp, fairy lights or strobes) in the composition.
Next, it is very useful to use a hard light source on the subject to create these specular highlights. For this setup, I stylized my subject in a sequin jacket and then placed her in the direct light of the warm evening sun. In the studio, I could have used a bare bulb, Westcott Optical Spot, or Magnum reflector to create hard light. Although, the sunlight is an easy (and free) way to create extremely hard light.
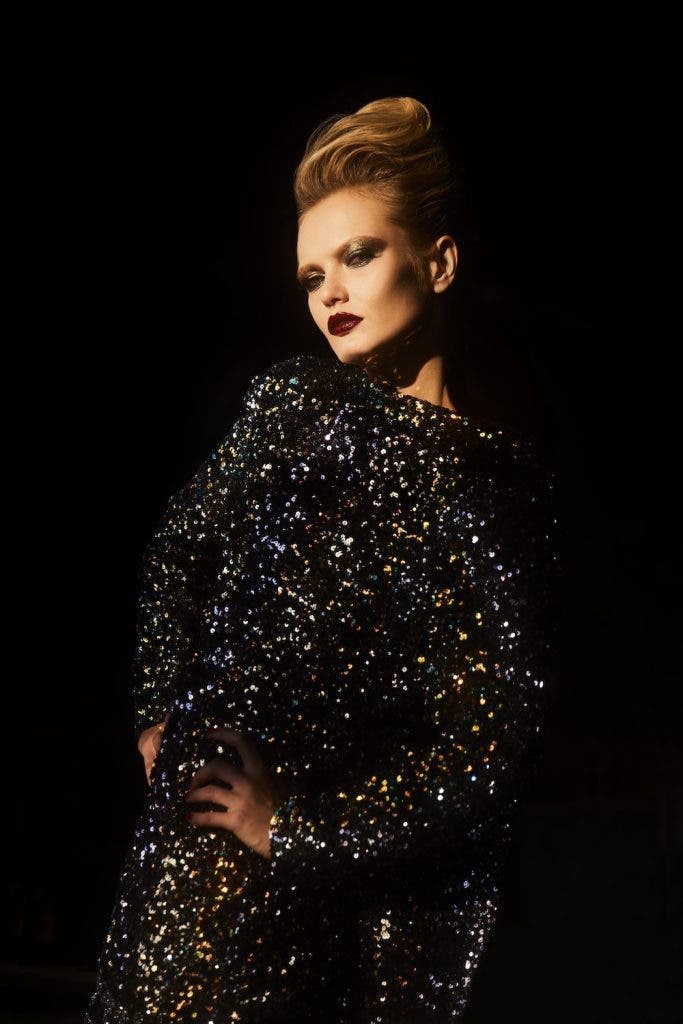
While the low angle of the sun created beautiful results, the background of the overpass was very distracting, filled with graffiti and garbage. To help simplify my scene and create dramatic contrast, I moved my subject so that she was in the sun while the background behind her was in complete shadow and, therefore, would appear completely black. Let’s begin by taking a “control” image with no filter. You can see the dramatic contrast created by the light and the background.
For these shots, I chose the following camera and lens:
Canon EOS R5 Mirrorless Digital Camera Body
Canon RF 24-105mm f/4 L IS USM Lens
This combination is my go-to for fashion photography. Some filters (like the diopter) are more effective at a longer focal length or wider aperture. You may want to experiment with these variables yourself during your own shoots. Now, let’s add some filters to the mix.
Three Camera Filter Options
Tiffen Black Pro Mist (1 Stop)
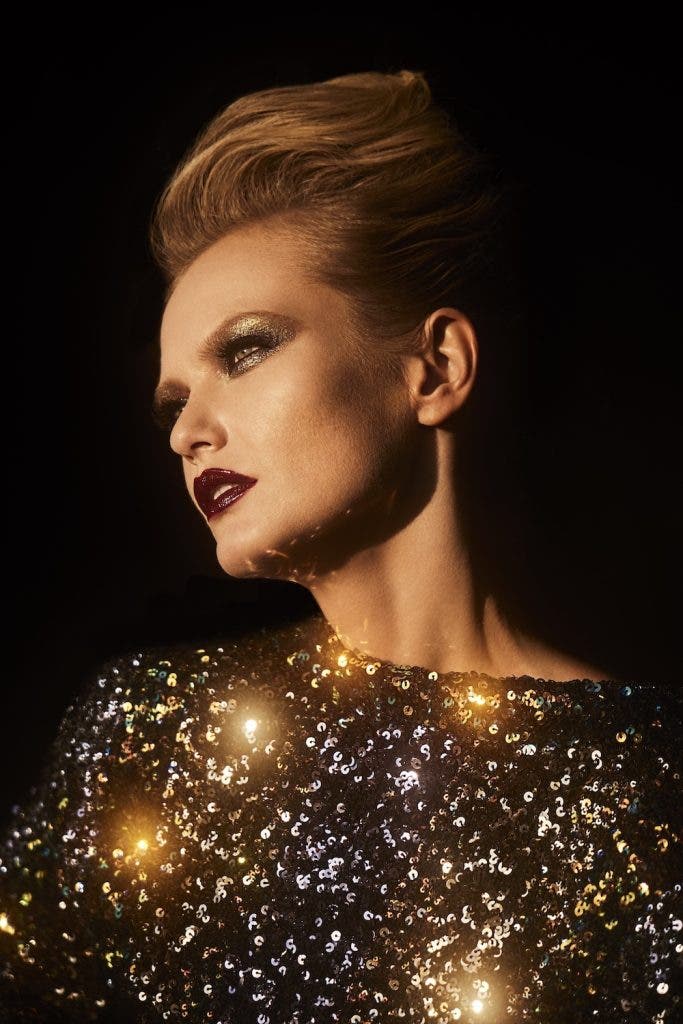
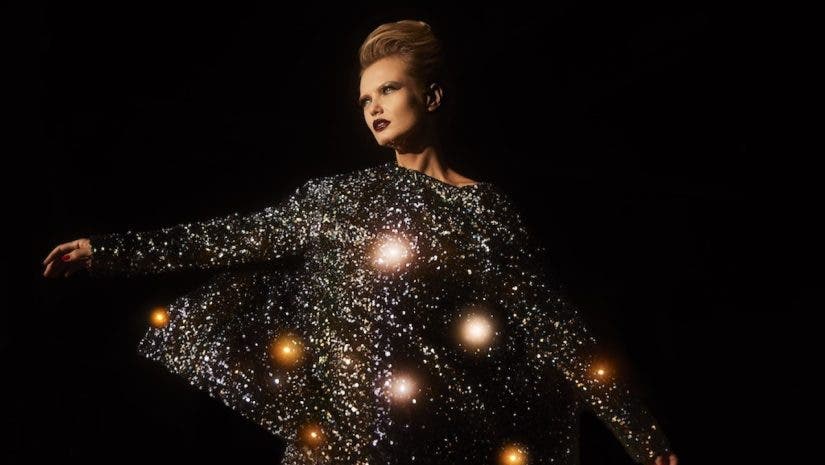
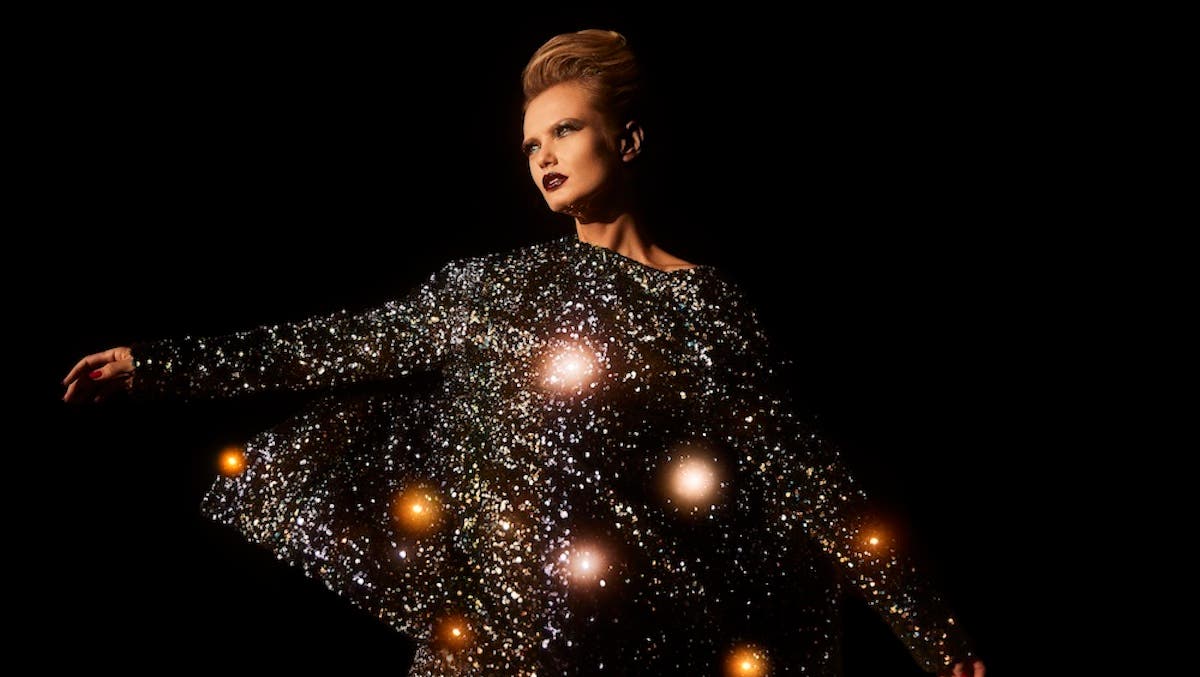
This Black Pro Mist Filter creates a glow or “bloom” around highlights (most noticeable on point light sources). This filter is available in a variety of different strengths, and one-stop creates a very strong, dreamy, and hazy look. This filter also lowers overall contrast in the image, which you may wish to add back using clarity and contrast in RAW processing. In this setup, you can see that the reflections on the sequins appear like beautiful glowing orbs. It is an unusual effect that can also be quite pleasing with backlit highlights.
Freewell Centerfield Split Diopter
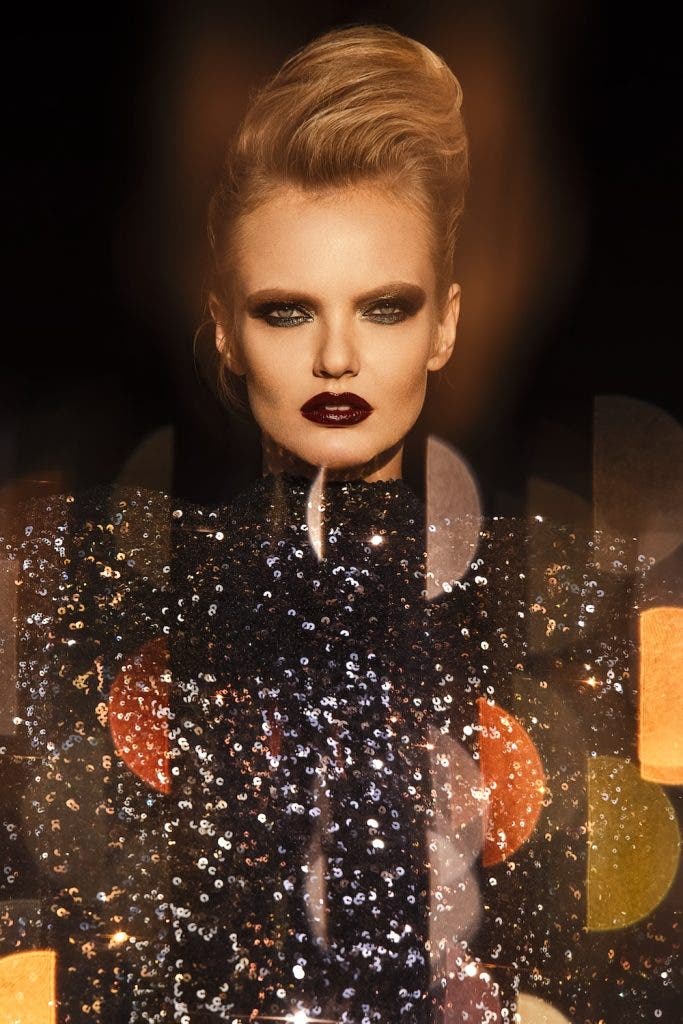
This filter creates a refracted blur effect on the edges of the frame while keeping the center area unobstructed. This filter works best on longer focal lengths (suggested 85mm+) and can create beautiful bokeh when used on specular highlights. In this setup, you can see the beautiful bokeh that surrounds the subject on the left/right when the sequins are hit by the sun. This filter can also rotate, allowing you to adjust the area that is “free” from the effect.
Tiffen 4 Point Star Filter
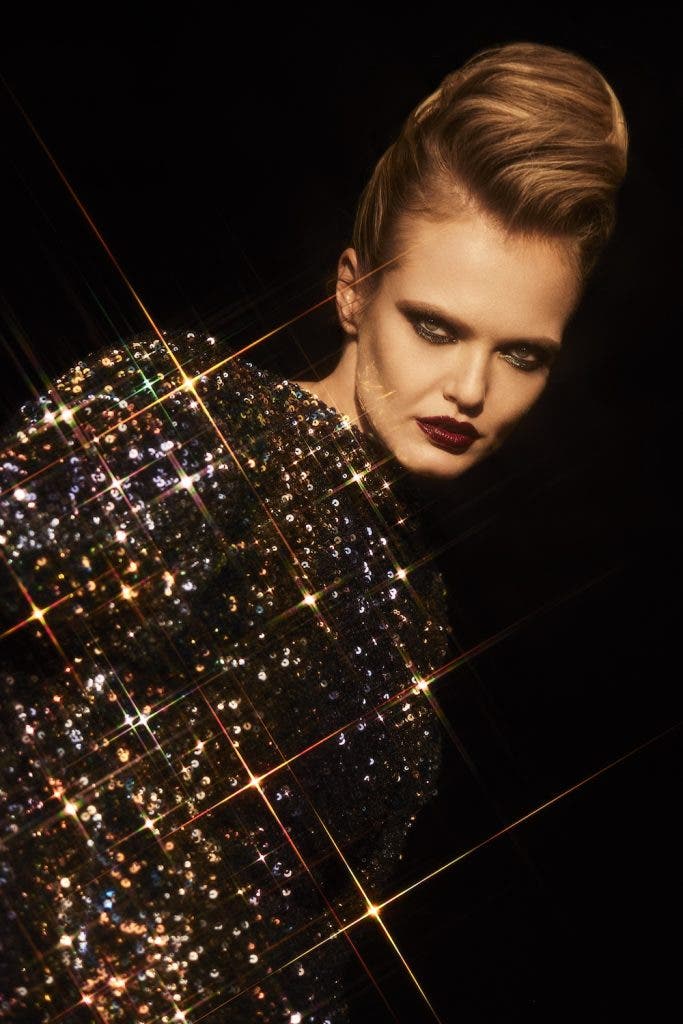
This star filter creates streaking light effects that look like starbursts that emanate from specular highlights. This will be most noticeable when using hard light and working with reflective surfaces (jewelry, sequins, rhinestones, etc). This particular filter creates dramatic results even with more subtle lighting. In this shoot, you can see the layers upon layers of stars reflecting off of her jacket.
Tiffen makes a wide range of star filters. In fact, they have the Hollywood Star, North Star, Grid Star, Hyper Star, Vector Star, and more! If you fall in love with the 4 Point Star Filter, it may be time to experiment with others. The 4 Point is very dramatic and defined, whereas something like the Northstar is a more subtle result (needs a more defined source of light to show up).
Check the Size
Now that you may have an idea of what filters interest you, it’s time to chose a thread size. Take a look at the most common thread size for your lenses. You don’t want to purchase something that is too small for your go-to lenses. You can, however, always buy a larger size and purchase a step-down ring so that it will fit lenses with a smaller thread size.
I hope you are feeling inspired, creative and ready to experiment with filters. If you come across some new favorite camera filters, be sure to share your results so that I, too, can discover some new creative effects!
