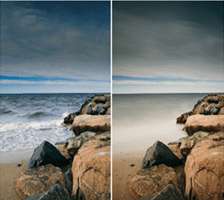
Nobody’s perfect.
Sometimes the color in your photographs, whether captured digitally or on film, are not quite what you want. Or maybe you’re trying to restore an old, faded print using digital copy and restoration techniques, and are frustrated by color shifts in old prints. In the movie industry, fixing images after they’re made is called “post-production,” but I prefer to think of it as enhancing an image to create the scene as it was or was previsualized in your mind’s eye.
Photoshop Variations
One of the simplest ways to correct color is to use Adobe Photoshop’s Variations (Image>Adjustments>Variations) function. Experienced darkroom workers will recognize this dialog box as a “ring-around” that shows how different color filters or exposure changes will affect the final image. Use a slider to increase the differences between colors and density. Simply move it back and forth to make large or small changes. If you have Adobe Photoshop, Variations is a good place to start and it’s been a part of the package since version 4.01.
The faded print at left is a photograph of one of my wife’s oldest friends who recently passed away. Using just Photoshop’s built-in Variations, I was able to clean up some of the color shifts caused buy age and improper storage.
Balance of power
If Variations is like training wheels and you want more power, there are many power tools availalbe. Photoshop plugins quickly accomplish tasks that would take some time and effort (and, perhaps, some experimentation) in Photoshop itself without them.
Keeping in mind that plug-ins may change web sites, parent companies and product names, here are a few examples of useful products:
- PhotoTune Skin Tune automatically corrects skin color via a simple selection tool.
- 20/20 Color MD gives you two variations; you choose the one that’s closest to the accurate color and that’s that.
- iCorrect EditLab Pro searches photos for “memory colors” such as sky, foliage, skin tone, or neutral. Select a reference color, click on the image to preview, and it will be corrected.
Which one of these color correction plug-ins do you need? Depending on the image, I use a different approach or plug-in to solve the color correction dilemma facing me at the time. You should try each one of these plug-ins to see which ones works best for your photographs. Just download demo versions from their respective websites and apply them to your own images.
Joe Farace is author of, “Plug-in Smart” and 22 other books. You can visit his websites at www.joefarace.com, www.joefaraceshootscars.com, and www.takeyourcameratoworkday.com.


