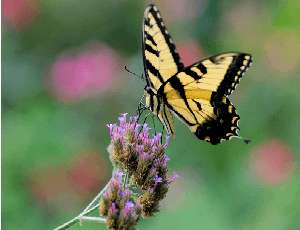
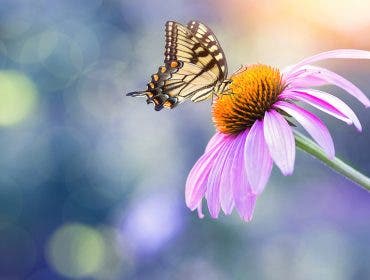
One of the greatest experiences I regularly have as a photographer is glimpsing the tiny miracles of nature that come to light through close-up photography.
Photos © Allen Rokach.
It never ceases to amaze me that I can shoot the miniscule structures inside a flower or record a small insect, then project or print the image to many times its actual size. It’s truly a fantastic voyage.
But to make those telling images is no easy feat. It takes the right equipment (all of which is available through Adorama); an understanding of how to work with natural and added light; an ability to achieve the right degree of sharpness; and, of course, lots of patience.

Can You Shoot Macro with a Compact Digital Camera?
Let’s begin with the equipment and take a look at what I carry with me for macro shoots. Your setup doesn’t have to be super fancy, but it does have to have macro capacity. That basically means that the image your camera takes must be at or close to life size. Most point-and-shoot or compact cameras have this capacity, so look for an icon – usually a flower – on your point-and-shoot camera’s menu. In this mode, your camera will use a wide aperture that limits depth of field and will help blur the background behind your subject for added definition. Also, check your manual to be sure you know exactly how close you can get to your subject using this mode. Otherwise, you’ll be disappointed. Some compact digital cameras, for instance, only focus to macro territory when the lens is at its widest setting.

DSLRs and Macro Lenses
You’ll have a better chance at getting those prime close-ups if you have a digitalSLRwith a macro lens. This lens is especially designed to create life-size images; that is, the image on the sensor is the same as the actual subject.
Macro lenses come in several focal lengths—50mm, 100mm and 200mm are the most common—all giving you the same image size. See the Adorama Learning Center Macro lens quick buying guide. Of those, I’d recommend the 100mm macro as the first choice because you don’t have to be as close to your subject as you would with a 50mm macro. With a 200mm macro, you would have to be further from your subject and you could lose sharpness because telephoto lenses exaggerate camera shake.
A word of caution if you have a zoom lens with a close-up feature: this will allow you to focus at a closer range, like 1:4 or 1:3, but is not truly a macro lens (even if the lens is advertised as “macro” because it does not produce a life-size image.

Lower-Cost Alternatives
If you’re just getting started and don’t want to pay for a macro lens, you can experiment with extension tubes. These are hollow tubes that are placed between the camera body and your lens. The longer the tube, the greater the magnification and the closer you’ll be able to focus. But more magnification also means more camera shake so be sure to mount your camera on a tripod. I recommend Kenko extension tubes, available at Adorama, because they link to the camera’s automatic settings.
A less desirable option, but still worth a try, is close-up lenses, which screw onto your normal lens and magnify the image somewhat. Close-up lenses look like filters and come in increasing levels of magnifications: +1, +2 and +3 diopters. You can also combine them for added magnification. The big down side: you can only focus in a very narrow range and may have to move your camera back and forth to find the best focus. Some point-and-shoot cameras take macro lens attachments which are similar to close-up lenses that screw onto the front of the lens and magnify the subject. Check if your compact camera has this capacity.
Alternatively, but least desirable, is a tele-converter, essentially a lens which you place between your camera body and another lens. The piggy-back effect permits you to focus closer, but you lose sharpness because of the added lens.

Steady support
Whatever camera and lenses you opt for, keep in mind that when you are shooting close-ups, the biggest challenge is holding the camera steady. That’s because the same magnification you like for your image also magnifies any shaking you may be doing, consciously or unconsciously. So plan on working with a tripod and a good ball-joint head so your camera will hold still and you can maneuver it into just the right position for your shot.
I use my tripod so often that I think it’s worth getting a really good one that can be easily moved up and down and that’s light to carry around. Check out the Flashpoint F-1228 Carbon Fiber tripod and the Gitzo GT1531 tripod, which I’ve used for years. As for the ball-joint head, this should have a smooth movement and a locking mechanism that opens and closes easily. I use the Arca Swiss Monobal p0. If you’re still saving up for that perfect tripod, you can make do for a while using bean bags – but trust me, it won’t be the same. A cheap tripod will probably become frustrating to use in a short time. And forget about a monopod: it’s useless when you want to work hands-free, as you do with close-ups. Of course, remember to get a good cable release so you don’t even have to touch your camera at the decisive moment when you are ready to release the shutter.
Let there be (good) light
So you’re set with your camera, macro lens, tripod and cable release. But there’s one more thing you have to think about before you get those dream close-ups: lighting. Small things, especially in nature, are often in the shadows or are only partly in sun – and nothing spoils a close-up more than splotchy or inadequate lighting.
To make that close-up glow, you may need to add light with a flash unit. I prefer one that you can take off your camera and position where you want it. Such a flash unit lets you reduce contrast, if that’s what you want, or create backlight or sidelight, if that will enhance your image. I like the Nikon Speedlight SB910, available at Adorama, which can be operated wirelessly with ease. If you are saving for a flash unit or forgot to take it with you, you can try using or improvising a reflector to shine light onto your subject. My wife has often been put to work holding a reflector to illuminate a wildflower I want to capture. Reflectors are inexpensive, light and come in a range colors in addition to white so you can tailor the light to your subject.
On the other hand, you may want to reduce the amount of light, especially if the sun is very bright and overhead. You can do this with any kind of diffuser, even a hanky or an umbrella. Just be careful to use something white or the color of your diffuser will distort the color of your subject (unless you like that effect).


