You love photographing people and have decided to make the leap from a part-time hobbiest to becoming a part-time or full-time professional studio photographer. Photography can already be an expensive hobby, and some of you might not be able to afford separate studio space. A solution is to build your own photo studio from the ground up. While a home studio is an affordable option, there’s still much to consider and basic required gear to have before opening up shop. Over the next few months, I will be sharing tips, advice, and a few recommendations based on my own experience of building a home studio. This month, I will go over space considerations as well as required equipment.
STUDIO SPACE
One of the biggest determining factors in building a home studio is space. Some questions that may arise are:
- Is my apartment/home big enough?
- Can I devote a particular part of my home to working space?
- Do I have the ideal type of environment for a home studio?
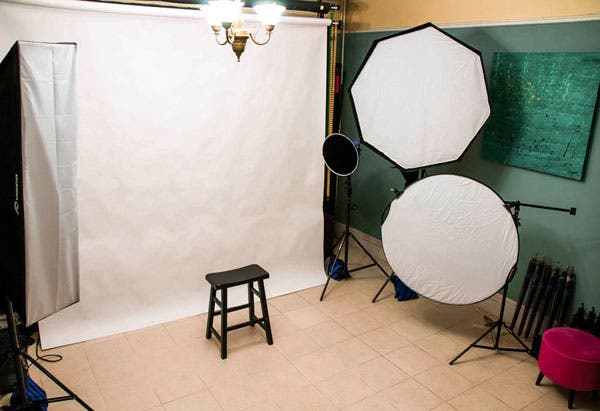
I personally work out of an 11×12 foot space and still create work that leaves my clients happy and working with me again.

This is not to say you can work in a closet, but as an artist, you must get creative with making your home studio space work.
The optimal amount of space is as much as possible; however, when you don’t have 2,000 square feet to devote to studio space, keep the following thoughts in mind:
- You’ll want a decent ceiling height. Ten feet is really a minimum for shooting standup full body shots, if you plan to use a hair light, and if you do not want to have to Photoshop the bottom of your roll of seamless from behind the subject’s head. Lower ceilings could work, however, sitting portraits and headshots might be more of a working option with a low ceiling height.
- Aim to have at least six feet between the wall and your subject to avoid a shadow on the background without having to use a backlight. Depending on what you are shooting and what focal length you will use, you also want to consider the space between you and your subject too. You will not be able to use a 100mm lens and get a full length shot of your standing subject when you are only three feet away. Don’t have this much room? Consider shooting from outside the door of your studio space, down the hallway, from the kitchen, sitting or standing on the furniture behind you to shoot – get creative.
- White walls are the way to go. If you have colored walls, that color may tint your images. (I have this trouble with my blue walls leaving a bluish hue on my images…) Can’t paint your apartment walls? Consider buying or making two sets of v-flats (white on one side/black on the other side) to create 4 walls of neutral light and dark space for your needs.
- Having the option of natural light in your studio space is a plus. However, you want to create a controlled studio lighting setup, and sunlight is hard light to control. For this reason, consider installing blackout curtains for use during those overly bright times of the day.
- If you are already limited on space and using only one room for your studio, keep in mind you will also need room to store equipment and props. Too much gear and not enough space? Consider creating shelves and/or hanging gear on the walls out of the way. A single coat rack makes for a nice modifier stand. My top piece of advice is to only buy what you need and nothing more. My next piece of advice: make sure every prop you buy has more than one use (i.e. my ottoman not only stores equipment but I use it for my subjects to sit/lay on.)
- Most likely, you will be shooting a person in multiple outfits. You will need space for your client to change and to prepare their hair and makeup. Sometimes you may have a hairstylist and/or makeup artist in that space, too. How large is your bathroom or kitchen area? Consider a portable coat rack for hanging clothes and a folding wall for your subject to change behind in the kitchen. A foldable standing mirror is a ideal for your subject’s use as it can be hung on the wall to save space, moved around the room when needed and even used as a prop (remember, double use!)
 |
 |
With space, there are ideas you can create to make it work if you put on your thinking cap and get creative.
CHOOSING A GOOD CAMERA THAT IS RIGHT FOR YOU
While it’s really important to have a good camera when shooting for more than hobby, you should buy only the best camera that you can afford. Keep in mind that the glass you put in front of that camera body is nearly if not more important in determining the quality of the image you will make. Imagine the images you’ll create slapping a crappy low-end lens onto a high-end camera! This is not to say you should buy the bottom of the barrel camera body and an expensive high-end lens as then you would be losing many performance necessities.
First, it’s wrongly-perceived that a higher megapixel count means a better camera option for you. It is really important to consider what you are shooting and how you plan to output the images. If a majority of your image-making is for the purpose of posting on the web, regardless of what you are shooting, you are absolutely fine with a 12MP camera, so long as it has other features that are important to you. Buying a 36MP camera for only posting on the web can be overkill and if used for nothing more and would be a waste of money that could be used on buying a better glass option.
Next, format size is usually a big question and most of the time is decided by how much you can afford as crop sensor cameras can run anywhere from $400 to $1,000, whereas full-frame cameras can start new at $1,800 (when on sale) and can go up to $5,000 or more depending on the model. Which has better quality? I’ve shot on both full frame and crop sensor cameras and saw nearly no huge difference in quality when used with good lens choices.


Another consideration is whether you are interested in shooting video or think you would be in the near future. You can save money choosing a camera that does not offer a video option and putting that savings toward better or additional glass too.
Shooting rate and buffer size is another important quality to consider when choosing a camera that is right for you. Will you be shooting a lot of indoor action in your studio or location such as dancers or sports? You will definitely want a camera that has a higher shooting rate before the buffer kicks in.
While with a home studio you would mostly be shooting at a low ISO speed, for shooting on location indoors or outdoors in low-lighting conditions, ISO is another factor to consider. If you think you will be shooting in low-light conditions, you will want a camera option that has a higher ISO performance to minimize the noise quality. The Canon 5D Mark III has a native ISO of 25600 extended to a whopping ISO 102400!
You’ll want a camera body that has a fast focusing speed and a high number of autofocus points. I tend to shoot just about everything with off-center composition, so more autofocus points is important to me. I found the Nikon D7100 and Nikon D750 cameras are pretty darn quick and both have 51 autofocus points. While the Canon 5D Mark III has a 61-autofocus points, the Canon 7D Mark II has 65 autofocus points.
Do you think you’ll use the Live View option? While Live View has its benefits, such as being able to shoot from the hip or shooting from overhead and still being able to see what you are shooting, Live View does have some disadvantages. Your battery tends to not last as long when using Live View. In addition, there tends to be a little bit of a lag time between pressing the shutter and actually capturing the image in Live View mode, which I specifically noticed with the Nikon D7100. It’s important to consider whether you prefer to have a camera with Live View or would forego the option to save money and put it toward better or additional glass or save it for other gear that you will want or need for your home studio.
Have an existing DSLR and just looking to upgrade? Unless you have money to blow, it’s usually wise (and less expensive) to consider staying with the same brand when upgrading so that you’re not only having to go through the hassle and expense of selling your old camera body and buying the new body, but also selling all of your old lenses to purchase lenses to accommodate your new camera body.

As for brands, there is so much controversy of which brand is the best brand of camera. That’s a tough question that really cannot be answered as features that are developed that put a manufacturer on top one year is exceeded by new technology developed by a different manufacturer the next which keeps manufacturers constantly cycling on top. Sometimes awesome new helpful features tend to come at the expense of lacking other features. For your purchase now, consider the features you want and need in a camera and what you will mainly shoot with the camera.
For the most part, Nikons and Canons have been on top in the industry for many reasons in addition to the actual functions the cameras provide. They are versatile. They are rugged and built to last. Nikons and Canons tend to have longer battery life than many other brands of cameras. Some brands have tethering issues to programs such as Adobe Lightroom, whereas Nikons and Canons do not have those issues. Not to mention there are many more lens options for Nikon and Canon than any other brand as not only do they have their own extensive lens lines, but third party companies like Sigma, Tokina and Tamron manufacture a multitude of lenses compatible with Nikon and Canon cameras.
Some of the cameras I found to be of terrific quality and that I would consider replacing my very old Nikon D300 with are the:
- Nikon D7100 at $696.95,
- Canon 7D Mark II at $1,399
- Canon 70D at $899
For crop-sensor format cameras, or for full-frame format cameras, the:
- Nikon D750 at $1,896.95,
- Nikon D810 at $2,796.95, or the
- Canon 5D Mark III at $2,499.
Which lens is right for you?
What glass you put in front of your camera will determine the quality of the image the camera will help to produce. There is no camera out there that will help produce a magnificent image with a bad quality lens attached. While you most likely have a budget in place for a new system, before you buy that high-end camera body with half the features that you will never use, factor in the cost investment of a at least one exceptional lens.
A good lens for you really depends on what you are shooting. It does not necessarily mean the widest aperture available. Why? Well, most of the widest aperture lenses are extremely costly and may not produce the results that you might be looking for. Almost all wide aperture lenses – while having beautiful bokeh – yield very soft images. This is great for newborn and child photography, but when your client might be a group or family or even if you are shooting for a lookbook or an ad, that client will want tack sharp images that are produced by an aperture of between F/5.6 to F/8. So why go crazy buying an F/1.2 if you’re not doing newborn and child photography?
You also might consider where you will be using the lens the most. If it’s in your home studio, consider the size of your space. Remember, you will not be able to use a 100mm lens in a small space for a full length portrait.
PRIME LENSES (AUTO)
Autofocus prime lenses are great for shooting moving subjects. These lenses are practical good for shooting fashion in the studio as you may have your subject continuously moving. Typically great focal lengths for shooting people in general are 50mm and 85mm. On a crop sensor camera they are right around the equivalent of 90mm and 135mm respectively. These come in several aperture ranges with the F/1.4 and F/1.8 being the most popular.
The Nikon 50mm F/1.4 at $334 is a great compact lens that packs a lot of punch for its size. You can read more about this lens in my review here.

The Canon 50mm F/1.4 at $329 is also a compact lens that does a good job in capturing portraits and headshots as seen here.

The Nikon 85mm F/1.4 at $1,596.95 is also an exceptional piece of glass that produces a beautiful bokeh and sharp features both in and outside the studio.

The Canon 85mm F/1.8 at $349 is a great alternative to the F/1.4 option and is a little less expensive to boot.

PRIME LENSES (MANUAL)
Manual Prime lenses can be expensive and really work best only if your subject is stationary. These lenses can be optimal for portraits and headshots. I found the Zeiss line to be exceptional with the more budget option of Rokinon right behind it. You can find my reviews on the Adorama Learning Center for the Zeiss 50mm F/1.4, Zeiss 85mm F/1.4, Zeiss 100mm F/2.0, Rokinon 50mm F/1.4 and the Rokinon 135mm F/2.0 lenses.


ZOOM LENSES
Zoom lenses can be great as they have much variety in focal length and allow for a versatile creative use of shooting while zooming in or out among other uses. I’ve had the pleasure of using several Nikon zoom lenses in my studio work, most recently the Nikon 24-70mm F/2.8, retailing at Adorama at $1,796.95.
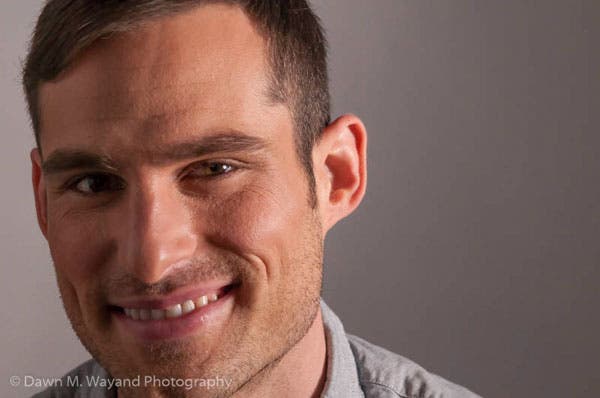
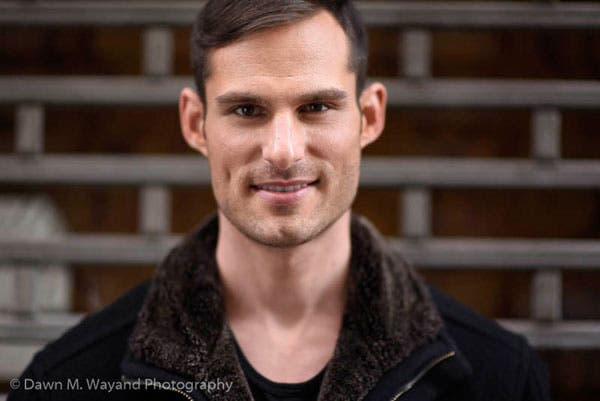
It gave me terrific look book images indoors…

On location outdoors this lens also made an enormous impact, case in point: the following untouched image of my model Katie at sunset.

While no longer manufactured, but still available used, I have used a Nikon 28-105mm in my space as well as client’s small spaces and have produced some very striking images.

Be sure to look for lenses that have vibration reduction should your camera system itself not have an equivalent function.
HARNESSING YOUR CAMERA: CAMERA STRAPS AND CAMERA HOLSTERS
Camera straps are one of those things you need that can also be a nuisance to deal with wearing. Some photographers take them off, only later to drop their camera and break it or drown it in a pool of water! Neck straps are generally a safe way to protect your camera from tumbles and falls, but they also have their issues such as causing neck and back pain, getting in the way of a shot when shooting down as well as the “obvious” factor when you are a street photographer trying to conceal that you are shooting.
There are some great alternatives to neck straps out there such as sling straps, double-camera vests and holster belts.
CAMERA SLING STRAPS

BlackRapid makes a great sling strap called the BlackRapid Metro Sling Camera Strap, which is available at Adorama for $39.95. This is my go-to when I’m shooting outdoors, as I can let the camera hang to my side and quickly and easily bring it up to my eye by sliding it across my body up from waist to eye. It’s also nice as the lens hangs behind you, making it harder to damage the lens if you run into something.
CAMERA VESTS

In addition to the sling strap, BlackRapid also makes the BlackRapid Double Slim (DR-2), Double Strap for two cameras. If you shoot weddings or other events, for $134.95 this is a perfect solution for having your backup camera also attached to you saving you money from the damage of having both cameras bumping into each other using two neckstraps. My favorite studio strap is not a strap at all – it’s a belt.
CAMERA HOLSTERS

At $15.95, Spiderholster Pro Kit is an easy way to have your camera securely attached to your waist by a locking hook mechanism, which takes the strain off of your neck and back while keeping your camera right at your side, within your hand’s reach.
KEEPING IT CLEAN
It’s extremely important to clean your camera and lens after every use to avoid heavy buildup from occurring as well as to keep dust from getting into your lens or camera, especially for those that are not weather-sealed. It’s like washing and waxing your car. A bare necessities that you need to do this are camera wipes, lens cleaner, a lens cloth, a blower and maybe Q-tips. Some of the basic kits that Adorama carries that get the job done are the Adorama Cleaning Kit for $14.95, the Zeiss Complete Optics Cleaning Kit for $28 (good for more than Zeiss lenses), and the Vanguard 6-in-1 Cleaning Kit at $18.14.
Visible Dust makes decent sensor cleaning kits but while cleaning your camera exterior and lenses is like washing and waxing any car, cleaning your sensor can be extremely difficult to do and to do safely and like not making my own repairs on a high-end car, I would leave that to a technician.
Building your studio from the ground up starts with analyzing your space needs before anything else and if you’ve decided to give it a go, acquiring equipment and gear that is mandatory for actually producing an image such as cameras, lens cleaning kits and camera harnesses. This is probably one of the most important and the most time-consuming part of building up a home studio from scratch because of the infinite number of choices. Once you’ve gotten past this point, it is pretty much a walk in the park in choosing your light sources, modifiers and the other odds and ends you’ll need to set up a professional system. I’ll be covering all of this and more each month over the next few months. Stay tuned and happy shooting!


