Wherever I travel, photography is a major interest even if it’s not the primary reason. My top priority is to protect my images with backups so I won’t lose anything.
I usually don’t have a lot of time to process images but as much as possible I want to have a look at what I got while I may still have a chance to re-shoot it. And I’d like to be able to keyword some images while I remember what and where they were.
Three things to consider when traveling:
- Storage
- Backup
- Workflow
Storage can be as simple as having enough card capacity, and expanding that capacity as needed with a storage device. The simplest ones will copy your files to a hard drive when you insert a camera card. This overview of portable image storage devices can get you started in deciding which one would be best for you. With the more sophisticated devices such as the Epson P-6000 or an iPad you can also view images, but if you shoot RAW (which I strongly recommend) make sure you can view your camera’s format. (You can always shoot RAW + JPEG and at least you can see the JPEGs.)
The iPad is still new and software will undoubtedly continue to appear that will make it a viable storage device, but for now I don’t think it can display RAW files. And all of these devices have limited capacity compared to the portable hard drives used with a laptop, which have up to 1 TB or even 2 TB of capacity (A 3 TB portable hard drive was introduced in May). I use an Iomega 340 GB drive and am about to upgrade to a 1TB version.
Storage devices also provide backup. While traveling you should have your images stored in at least two places. If you have enough cards to leave the images on them until you get home, and if you copy them to a backup device, you should be in good shape. But for a longer trip you may run up against card and storage limits.
Going beyond backup
With a laptop and external hard drives I have expandable storage capacity. And a laptop provides so much more than storage and backup; when I travel it has become increasingly important. For e-mail and the web, I can do a lot with my iPhone but for me there’s no substitute for a laptop, and it’s mandatory for the photography side of things. I want to use Lightroom, as I do at home, to organize my files and (if I have time) I like to be able to use Photoshop for some images to go beyond what I can do in Lightroom.
My choice is the 13” MacBook Pro. At 3 pounds it’s not much bigger than a netbook, and it fits in my carry-on camera bag even though it’s an older one that doesn’t have a special laptop compartment. It gives me a lot more screen size than a netbook, it has a decent screen for first-round editing and it can easily run Photoshop and Lightroom. (If you don’t have enough hard drive space on your laptop, you can set Lightroom to use an external drive.) I also have it loaded with Microsoft Office in case I want to do any work and Dreamweaver if I want to add something to my web site.
I also carry two travel drives for backup. I have all the images that will fit stored on the laptop (they may not all fit on a long trip) and I can keep all of them from the trip duplicated on both travel drives, which are always packed in separate bags. It’s cheap insurance; you can get a 1 TB travel drive for around $100. These drives are rugged, small, and lightweight, and they get their power from the USB port so there is no power cord to hassle with.
Getting the laptop ready for a trip
Before starting a trip I clear off all the old images from previous trips (on both the laptop and the travel drives) and empty the trash. This gives me more hard drive capacity and means I am only dealing with images from the new trip, which makes transfer of the new images to my home computer very easy, along with all the metadata I have entered using Lightroom (such as copyright, keywords, ratings and develop settings).
The cleanup step is optional, just for making room. But if you leave older images on and do any further work on them, you will need a more elaborate process for getting those changes back onto your home computer. That is beyond the scope of this article.
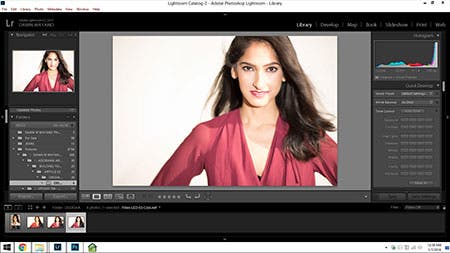
In order to delete the images both from the laptop’s hard drive and from its Lightroom Catalog, I need to work from within Lightroom. I choose the folders I wish to delete, one by one, in the Folders palette in the Library module, on the left side of the screen. I need to be in Grid view, so the main window is showing thumbnails and not a single image, as shown here:
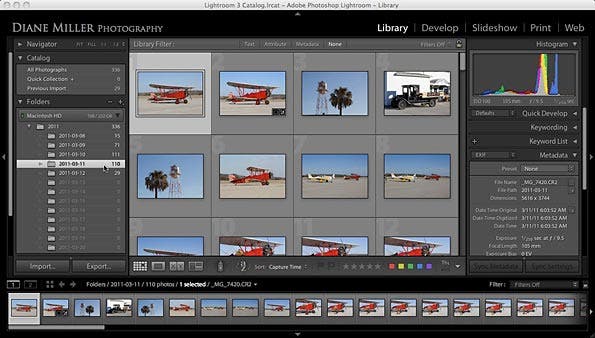
I click Edit > Select All, or Ctrl-A / Cmd-A and hit the Delete key. I get a confirmation message and click Delete from Disk. (Note: That is not the default.)

Then I need to remove the empty folder. I right-click it and choose Remove. I do this for each folder.
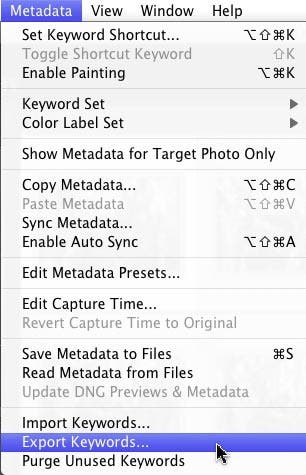
If I have added to my Keywords file on my home computer since using the laptop, I want to transfer the updated file to the laptop. (And back home, if I have added new keywords on the trip, I can reverse the procedure and copy the expanded list back to my desktop computer.) From the menu bar choose Metadata > Export Keywords and choose an easy-to-find location such as your desktop. Copy this file to the laptop (again, the desktop is my easy-to-find choice). On the laptop choose Metadata > Import Keywords, and navigate to the file’s location. After they are updated you should throw away the file you exported.
I also make sure software updates are current on the laptop and check that everything is working. And I make sure the card reader and power cord are packed.
A very important setting
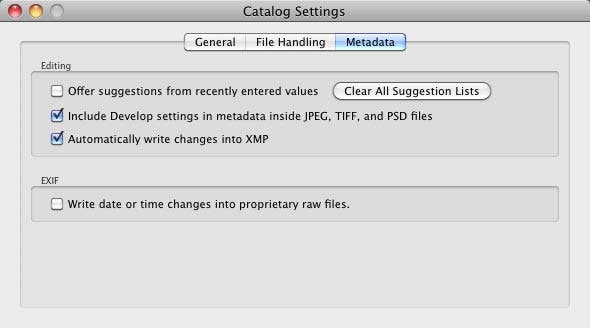
There is a very important Lightroom setting that makes it easy to bring my travel images back to my home computer along with any work I did on them. I think it is also important for daily use on my home computer, and I set it on both. Go to the File menu (PC) or the Apple menu (Macs), Catalog Settings > Metadata tab, and check “Automatically write changes into XMP.“ I also check the item above it, just to cover bases. This ensures that all the things I do in Lightroom on the trip (keywording, rating, develop settings, etc.) are recorded in the .xmp (sidecar) file that accompanies each RAW file. In this straightforward travel workflow, I don’t need to do anything with the Lightroom Catalog.
For general Lightroom use I also want the Preferences set to back up the Lightroom Catalog every time it is used. You will be given the option when you quit (for Lightroom 3) or when you start (for Lightroom 2). If the main Catalog gets trashed, Lightroom will restore the last good copy for you. (You will want to delete older Catalog backups every so often; they stack up. I like to keep the last few, just in case.)
Catalog confusion
You see a lot of information about taking Lightroom on the road that gets into the need to export the Catalog from the home computer to the laptop and then import it back after the trip.
Exporting the Catalog will give you access to the previews of all your older images and will allow you to further edit them. Since the image files are not on the laptop, you will be editing on the basis of the preview. (If you have saved standard-sized previews you won’t be able to go to a 100% view but you can still edit.) Since the sidecar files are also at home, these edits will be stored in the Catalog, and you will need to import the changes when you are back home. But importing the Catalog back after the trip is only necessary if you have made changes to older images while on the trip. I have never needed to do this. I prefer the simpler workflow of just working with the images I make on the trip and that’s what I’m showing you here.
Daily workflow
On the trip, here’s a typical evening, after a day of shooting. (Be sure the laptop has plenty of battery life or is plugged in during card reading and file copy operations.)
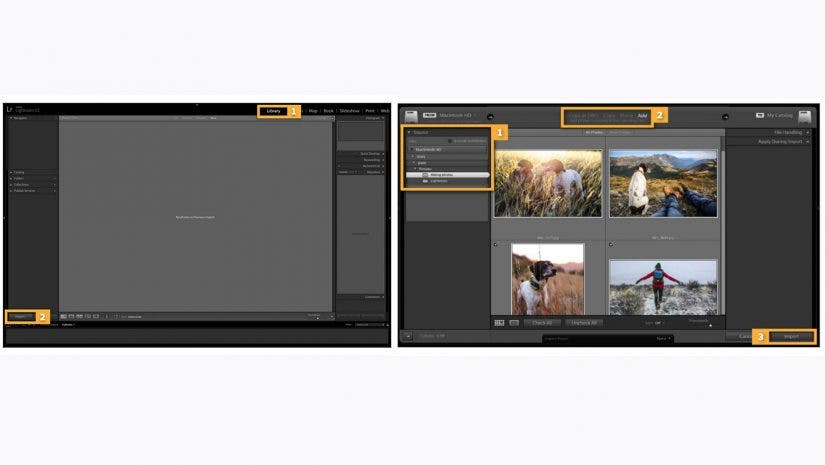
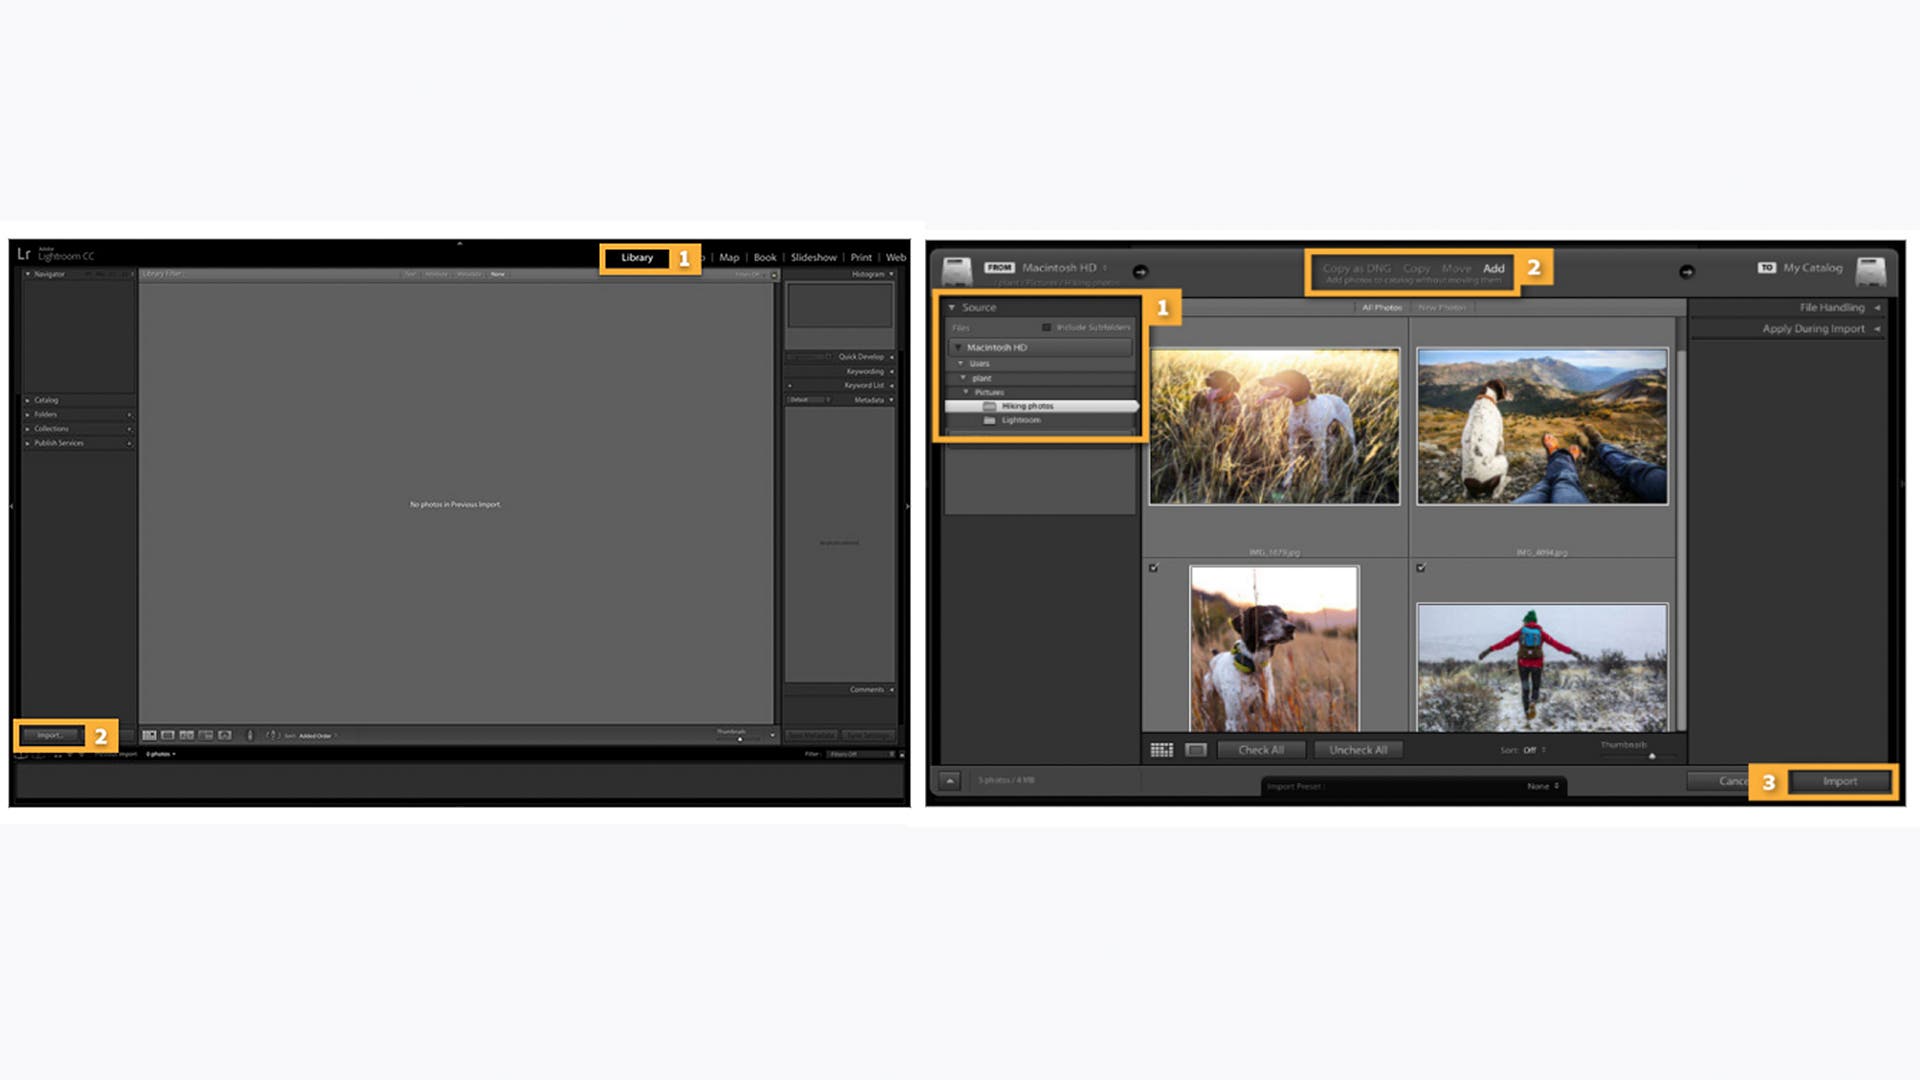
Download the card(s) from the day’s shoot. After starting Lightroom, when I put a card in the card reader the Import dialog opens. (If it doesn’t, you can set it to do so in Preferences, under the File menu for PCs and the Apple menu for Macs.) I like to check and make sure the Import settings are correct (once set they should be sticky) and I click Import, in the lower right of the screen. This copies the files to folders named by date (my choice), in a parent folder, created by Lightroom, in my Pictures folder. When the copy is done Lightroom ejects the card and I can insert subsequent ones and repeat the procedure.
Pitfall: if you have images on the card from previous days that you have deleted in Lightroom, it will see that they are “new” images and will try to copy them, too. Scroll to the bottom of the Destination panel on the right side of the screen and uncheck any previous dates for which you don’t want deleted files re-imported. Typically I will only check the current day.
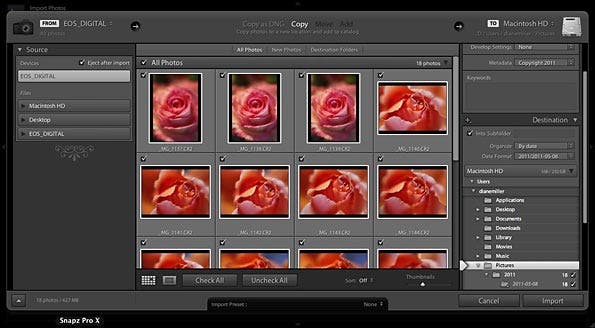
I check the Apply During Import panel and make sure my copyright information is automatically included on download.
After import I take a quick look in the Library module to make sure the files are OK; if Lightroom can read them and make previews, they’re good. (The files come in from the camera with thumbnails—the JPEGs you see on the back screen of the camera—but these are small and low resolution. Lightroom makes larger previews after importing images.)
I add keywords to any images that depend on my memory for ID or location. I can do the others at home if it’s not convenient to do them now, but this is a task best done as soon as possible. You can get way behind with it.
If I have time I delete any obvious duds. I may have more time for that each day than I will when I’m home and dealing with many days of shooting.
I may also work up some of my favorite images in Lightroom’s Develop module and even go into Photoshop to play with some if I want to go beyond Lightroom’s capabilities.
When I’m through with the images in a folder, I plug in a travel drive and simply drag and drop the day’s folder(s) to copy them there. The .xmp files are contained in the same folders and will also be copied.
Then I plug in the other travel drive and do the same thing.
Back home
When I’m back home all the work I did in Lightroom (develop adjustments, keywords, ratings, copyright, etc.) can easily be copied from one of the travel drives onto my home computer along with the picture files. (I may need to fine-tune color when I see the images on my calibrated monitor. Most laptops don’t give an accurate representation of the colors or tonalities in an image.)
But it is important that I do this transfer from within Lightroom. I start Lightroom on my home computer and plug in the travel drive. The Import dialog will come up and I simply check the folders from the trip and confirm the correct destination. Lightroom does all the work for me; I love it when that happens!
I like to quit Lightroom at this point and let it do a Catalog backup. Check Test Integrity to check the newly updated Catalog for errors.
There is more information about Lightroom in my tutorials “Getting Started in Adobe Photoshop Lightroom 3, Part 2, Using Lightroom” and “Getting Started in Adobe Photoshop Lightroom 3, Part 3, The Develop Module and Output.”
