Here’s a classic example of how you can take better pictures and grow as a photographer by forgetting FIP and using the computer between your ears!.
For the uninitiated, FIP is an acronym that stands for Fix In Photoshop, and it’s a term advertising photographers and art directors are using more all the time.
Without belittling them or Photoshop, I feel they decide to just FIP it all to often. After 35 years of being a pro in the trenches, working with both print and chrome retouchers, I have nothing against fixing or modifying an image after it’s been shot, so using today’s magical image editing software to alter an image after the fact is no big deal for me. But there is a joy I find in shooting a photograph clean.
Getting two swings at the ball is better than only getting one!
Furthermore, fixing a problem within a photograph can happen before or after it’s taken and it’s the wise photographer who examines the possibility of correcting something as early in the process as possible. While I don’t discount the greatness of Photoshop, I believe if you fix something before you shoot it, Photoshop becomes the second line of defense instead of the only chance to correct the problem.
Doubling the chances of getting it right is something all pros should be happy to explore.
Is Photoshop a deadly crutch?
But, I’m sad to say, as pros start relying more heavily on Photoshop as a crutch, they run the risk of losing their chops (a musician’s term for virtuosity when using their instrument). I have nothing against crutches but you can’t win a big race while using a pair! A crutch causes muscles to atrophy into uselessness and that can include the muscle between your ears!
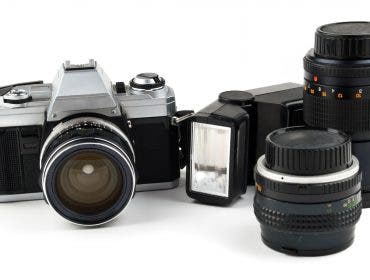
Here is the final, cropped camera-and-lens still life that I will be talking about in this column.
Anatomy of a Still Life
The picture at left is an assemblage of classic film cameras and lenses shot in the pre-digital days, with an 8X10 view camera. It’s a perfect example of the gyrations a studio photographer goes through to conquer the limitations of the medium. Interestingly, the primary hurdle that had to be overcome was not the red glow coming through some of the subjects and emanating from behind others. The principal problem facing me in creating this photograph was depth of field. You remember depth of field…. it’s the scale that they no longer engrave on 35mm and DSLR lenses!
Oddly, in the days of large-format still life photography, the battle was often one of getting enough depth of field. I say oddly because the view camera, with its swings and tilts, has the ability to increase depth of field by applying the Scheimpflug Rule (it’s used to find the optimum plane of focus) but sadly, this often only works on receding lines and doesn’t really affect the depth of field if you’re shooting a subject straight on.
The type of depth needed for the photo at left can only be achieved by using a smaller f-stop but, because larger-format cameras use longer lenses and depth of field is a function of the lens’ focal length and not its field of view, photographers often must resort to careful arrangement of their subjects. Such was certainly the case with this picture.
Lower the water AND raise the bridge!
Even though I used an aperture of f/64 to get the depth of field needed for this picture, some of the subjects had to be raised while others had to be recessed into the tabletop I was working on to keep everything in focus. This meant that the depth-of-field concerns were tackled by starting with the supporting foundation of the picture.
Because I was shooting straight down on the subject, and didn’t want to be constantly banging my head into the ceiling, I assembled a low table from four cinder blocks set on their ends and topped with a 3 by 4 foot (approximately) piece of 3/4-inch plywood covered with a like-sized piece of light gray seamless paper. A hole was drilled through the upper left hand corner of the plywood and a matching hole was cut in its paper covering. The long telephoto lens was dropped into the hole and a flash unit with a red gel over it was placed under the rear of it.
Once I measured how much of the telephoto above the table’s surface and decided the focal length of the lens I would use to take the picture, I set up my view camera to frame the subject. I started my assemblage by first placing the telephoto lens within the frame and focusing on its front element, to figure out how far the camera’s film plane would be from the subject. Armed with this info I consulted a depth-of-field chart and decided on which f-stop to use. Check out my freehand sketch to see a side view of how my set looked.
A side view sketch of the set.
The rest of the cameras were stuck to small clear plastic storage boxes of various heights with gobs of FunTak (a non-marring, removable, reusable adhesive) and moved around on the tabletop until I got all of them into a pleasing composition that happened to coincide with the depth of field I had to work with–pretty tricky!
Why use clear plastic boxes? Couldn’t I have used various sized wooden blocks in their stead? Well, the red glow behind the cameras was created by wrapping a bare flash tube in a red gel and snaking it in from the side of the tabletop (you can see the wire that powers it at the 1 o’clock position in the full frame photograph) and my feeling was that opaque supports, even though hidden by the camera on top of each of them, would have created a set of shadows below the cameras that would be confusing to the viewer.
In fact, the gelled flash tube ended up resting in a hole that I drilled through one of the plastic support boxes. Finally, a few red-gelled lights with snoots were placed around the subjects with their beams aimed into the lenses of those cameras with waist level-finders, so the red light went into and through the lens, bounced off the reflex mirror, and lit up the viewfinder screens of these cameras (or vice versa).
Building this kind of photograph is also a bit weird because you don’t light the subjects until after they are arranged and all the red-gelled lights are in place. To do this, I surrounded the set with four 4×8-foot sheets of translucent acrylic, and positioned the lights outside the tent, and low so they wiped across the subjects’ surfaces. Furthermore, no frontal lights (which, in this case, would have to be placed above the subject) were used because such lighting would both dilute the red glow and lessen the t on the cameras’ leather coverings.
As a last bit of fine-tuning, a few sheets of black paper were taped over the translucent acrylic sheet nearest the silver Leica (at about the 2 o’clock position) so the lighting wouldn’t burn out the detail in this highly reflective camera.
This is a scan of the full frame 8×10 transparency from which the final photo was cropped. Note how the cropping cuts into some of the subjects but tightens the composition. As an aside, note how the big lens’ edges touching the side of the composition increases the sense of immediacy and tension in the final crop.
Moral: By all means be aware of the many ways in which Photoshop can save the day, but don’t rely on it too often lest you forget the basic photographic skills you mastered in pre-digital days!
Some of today’s Photoshop aficionados will probably comment that this photograph could’ve been done by shooting all the elements individually and then making a composite of them but, to my mind, that would have opened up a huge can of worms with regard to scaling each subject to the others correctly, and in reality would have entailed much more work than doing it in a single shot.
Regardless, what is important is that this photograph relies on knowledge of the basics to get the job done and it really doesn’t matter whether film or digital was used to capture the image. What does matter is the computer between your ears and an appreciation of the fact that sometimes things can go better when you forget FIPs.


