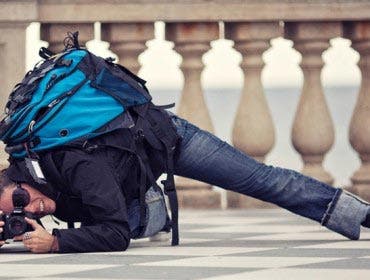
Jumping into video without a net? Want to go viral on YouTube? Here’s how to avoid the fear, the swish, button mashing, and other rookie regrets when planning and shooting a video.

Jumping into producing your own video content to share on YouTube, Vimeo and elsewhere—and doing it right—can seem like an overwhelming endeavor. No matter if you are making the jump from stills to video via your HDSLR or just borrowing your uncle’s camcorder, the technical concerns, artistic choices, and the content itself can feel like too much to digest. But taking a simple, step-by-step approach can help you get over the hesitations and get into producing top notch content. Ready? Let’s do this!
Before the shoot
Before you shoot, think about what you are looking to say, how you want to say it and what you need to learn to get it done. Are you hoping to create a channel devoted to action sports? Adventure? Arts and crafts? Are you going to host your own videos or work with another performer? Do you want up-tempo, fast-edit clips, or a simple “talking head” style show? Are you shooting everything in your living room (or garage, dorm, pool) or in various locations? Taking some time to decide exactly what you want helps save headaches down the road by eliminating what you don’t want (or need) to include.
Next, make a quick list of the technical concerns that you are most afraid to conquer. Check these off as you explore solutions for each area (audio, camera moves, importing clips, etc). And be ready to fail! Your early efforts will most likely generate out-of-focus clips, distorted audio and unwatchable edits. Take notes on what you tried (settings, camera angles, audio levels, etc) and write down what worked and what didn’t work. Be honest about the results. Hashing out all your mistakes before your channel is up and running will help build confidence, eliminate technical hang-ups and create a workflow—from prep to shooting to editing and uploading—that you can rely on again and again as you focus on generating new content.
Speaking of prep, my advice is that you can never do too much. Create a shot list or storyboards in advance, making decisions (and mistakes!) on paper first. Get permissions from performers, locations and other contributors (crew, musicians, etc) before you shoot, or at least get an on-camera verbal “ok” during production. Going back and tracking people down later for their blessing is a nightmare. Check and recheck your gear, especially when it comes to audio.

Cables, Mics, Headphones and Batteries: Be Prepared!
Make sure you have the right cables, adaptors and settings in place. And get over your phobia of shooting while wearing headphones! Better to look a little geeky than to find out hours (or weeks) later that your audio was no good!Buy extra batteries for everything from the camera to your wireless mics. Label them so can keep track of which ones are out of juice. Nothing causes more agony than being one shot away from a great day of production and seeing the battery life indicator turn red, and then…Yes, extra camcorder or camera batteries can be hard to track down, expensive to purchase, and a pain to remember (that’s what those extra pockets on your camera bag are for, people!). But, trust me, the extra expense and planning will save you time and time again—especially if you are shooting on a glacier, in the Grand Canyon, or at the beach.

Know the limits of your particular device, its strengths and weaknesses, and where they match your current skills. For example, DSLR cameras create lush video, but can generate too much “swish” (or blurry) footage when panned too quickly. They are also somewhat front-heavy (depending on your lens choice) and can brutal when shooting “run and gun” style (on the go) documentary footage. Camcorders have gotten more affordable, and the default lenses are getting better, but they often lack two key features that drive me batty. Namely, many pro-sumer and consumer level camcorders do NOT feature an audio input or headphone jack – which to me is asking for trouble (and compromised content) in the end.
Once you’re ready to roll, remember to “shoot to edit,” In other words, always record longer than you think you should. This can be counter-intuitive at first, but trust me, too much footage is always better than not enough. This is true both for the total number of takes and the duration of each one. For example, if you want to add a simple crossfade between two shots, longer clips work better. This is because transitions in most editing software aren’t just plopped on top of two clips. In actuality, they are commands for the software to blend frames from each clip to create the overall effect. The duration of your dissolve will be affected by how long each of the two clips are to begin with. Editing is like working with wood or fabric or food – you can only work with what you’ve got: you can’t build a three-foot shelf with a two-foot plank. So let each shot roll just longer than you think you should – you can always trim the extra frames away later.
Button Mashing?
Beware of button mashing! Huh!? This is my term for hitting record when you mean to hit stop and vice versa, leaving you with no of the action and lots of clips of the camera pointed at the ground – or worse – the inside of your camera bag. Laugh if you want, but this happens to the best of us (ie: this guy), especially when you are quickly shooting a ton of short clips. That red “record” light is there to help you, people! Keep your eye on it, and make sure you don’t end up button mashing!

Invest in a simple dry erase board and use it to “slate” each of your shots. This is a poor man’s version of those fancy markers that film crews use, and serves as a record of each clip, noting the day, date, title and take for your epic endeavors. But doesn’t the camera date/time stamp each clip automatically? Yeah, yours might. But trust me, when you’re shifting through hours of clips, three weeks (or three years) after you shot them, a quick glance at these easy-to-include slates will keep you from going totally bonkers.
Finally, once you are in production, shoot the simple stuff first and save those monster trick shots for last. In other words, always make it your goal to “get the shot” (capture the content) first, before moving on to the fancy stuff. A simple medium shot of your host speaking straight into the camera is easy to pop off. An epic swirling crane shot of your host speaking while you pull focus and bounce the shot off a giant mirror is juuuuust a touch more difficult to execute. Keep it simple, and remember: sometimes less really is more.
Related Products
- Shure SM48S-LC Cardioid Dynamic Handheld Wired Microphone
- Sony ECM-680S MS Stereo Shotgun Microphone
- Lapel Microphones
- Camcorder Batteries
Learn more at the Adorama Learning Center
- Soup up your digital still camera’s HD video sound—Don’t use the built-in mic!
- The Best HD Video Lighting Kits Right Now!
- Movie?Slate: Adorama Photography TV
Here’s one more quick tip…from me!


